
Let’s be clear here… if you are running a $500k trophy truck and racing the Baja 1000, Mint 400, or King of the Hammers and the like… your lights are a critical component to your race and your sponsor’s investment, and thus need to be as reliable as possible.
But, if you are a weekend warrior or even an experienced enthusiast that likes to explore remote places, frankly, we feel that $2000+ would be better spent fueling the adventure, rather than the latest high end lighting setup. We have tried several different eBay and Amazon LED’s and have been asked several times on how well they perform, so figured it would be a good topic to cover here.
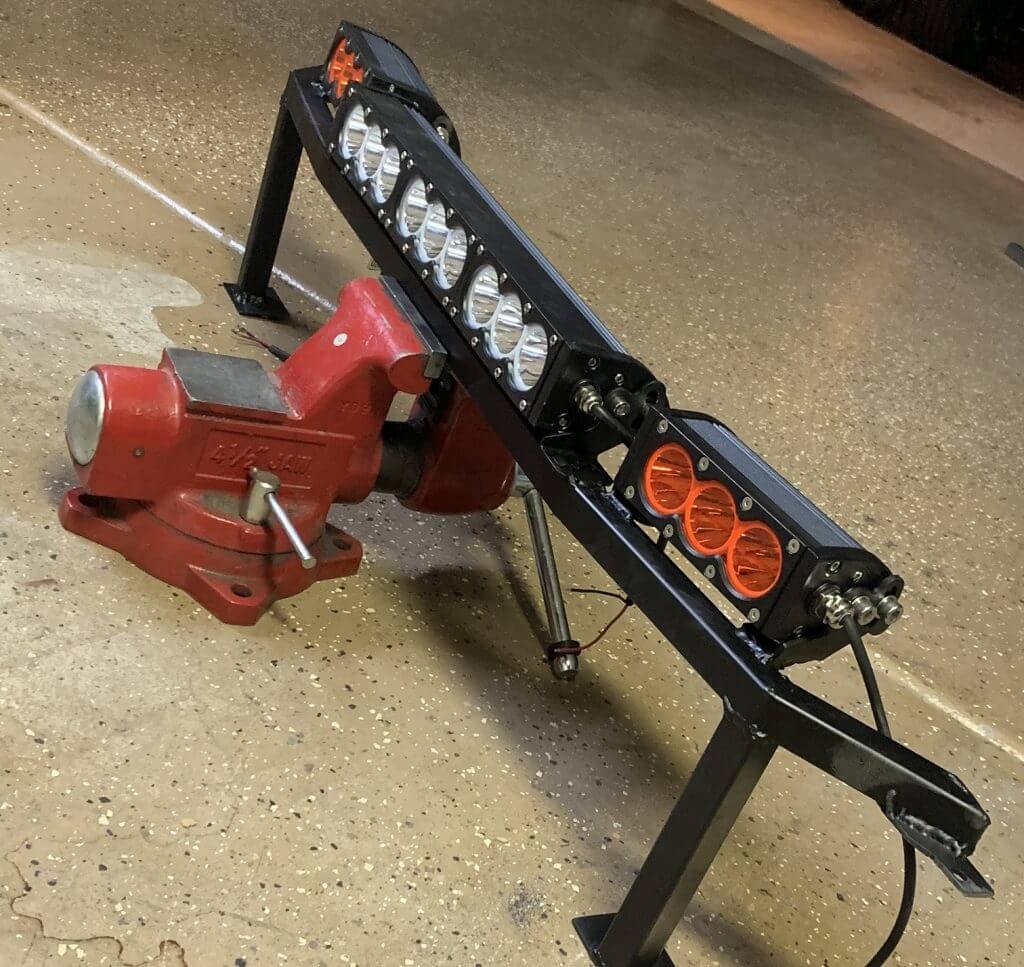
Reference the F150 behind-the-grill LED Bar Build article for more info.
First off, this is a different mentality than most people have: these are lights that each cost less than $70, so if one does fail our on a trail, you can still enjoy the trip, make it home safely (maybe with a bit of caution) and then order up another one, be good to go for the next trip, and still not even come close to spending as much money as the name brands charge. To be clear, Rigid and Baja Designs have phenomenal products, with great light output, and excellent quality; we just feel that for us, we get more “fun/dollar” with the budget lights and money leftover for more adventures.
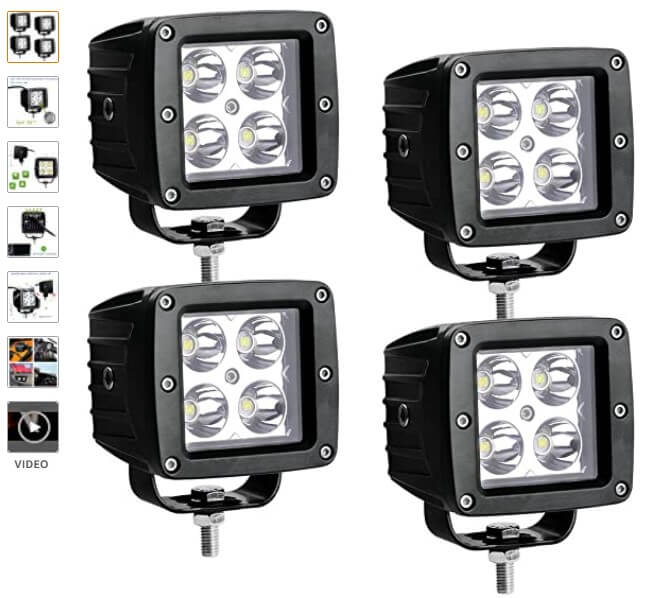
Primary front (white) – $72/ea.
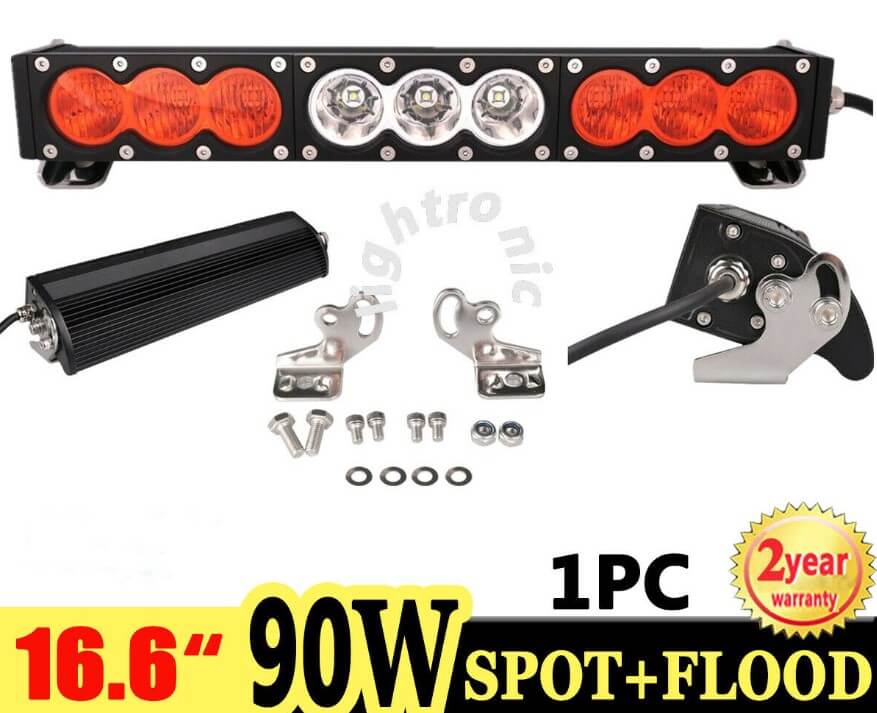
These were purchased with amber side lenses, and then the amber lenses were swapped out for clear ones just to have all 90W be white. Our general opinion on these is that they are really bright, and have awesome light output probably coming close to similar wattage of the name brand lights.
Corner and Rear Chase (yellow) – $36/ea.
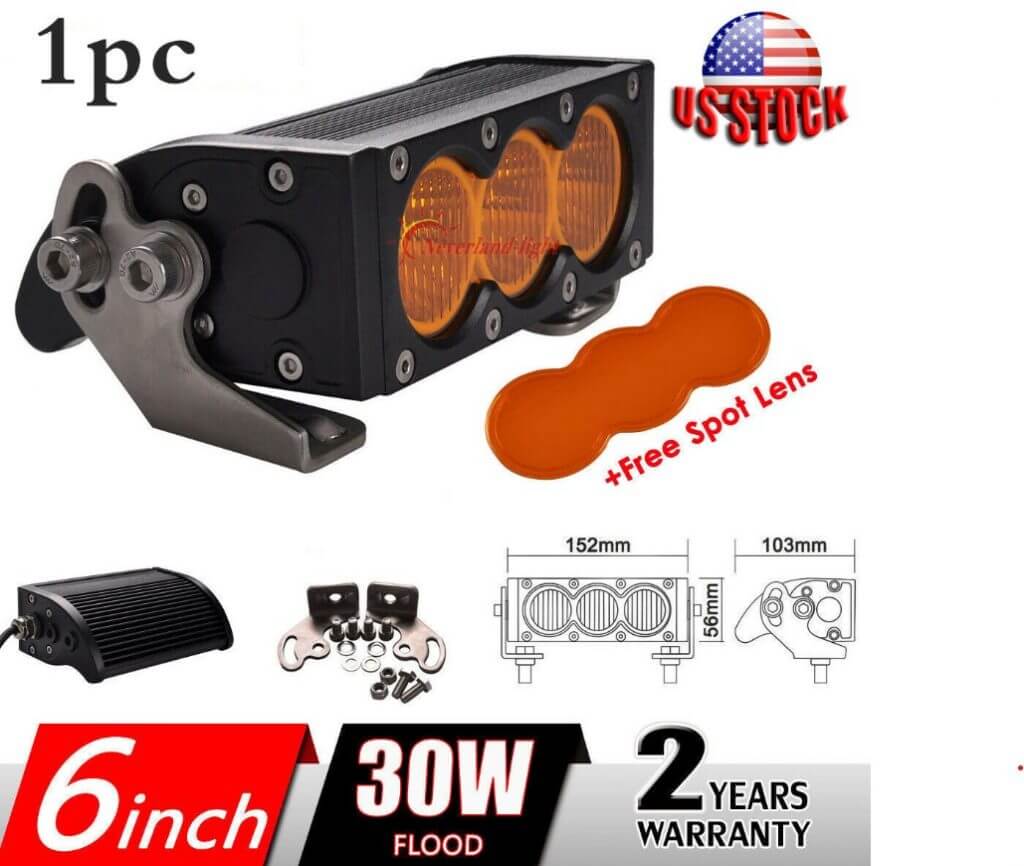
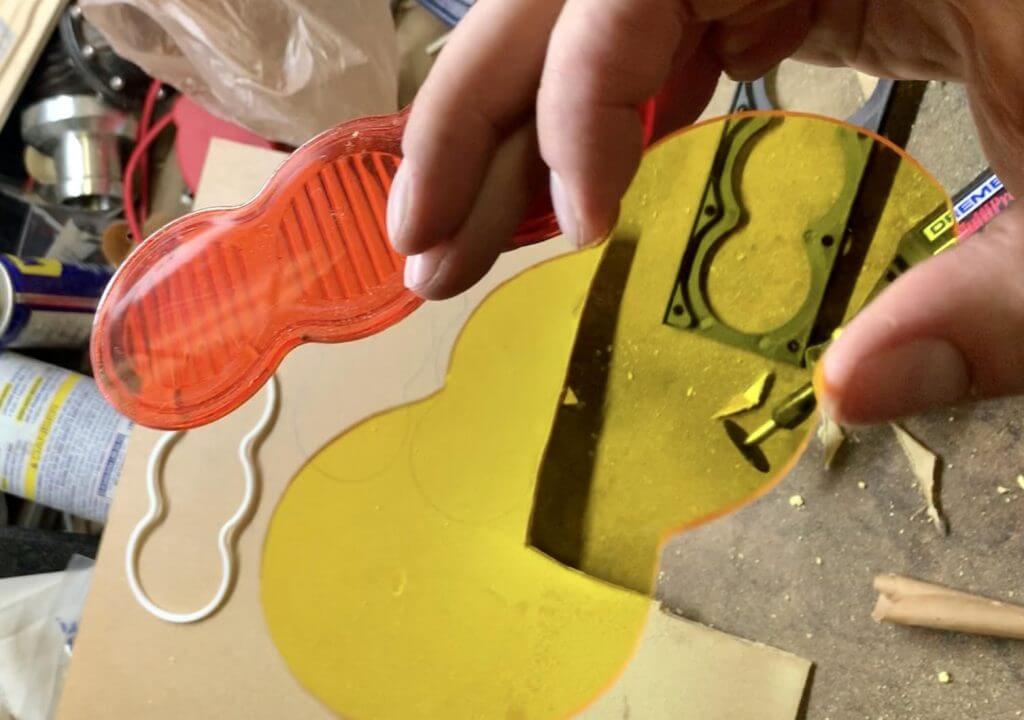
These are the same style lights as the primary 90W front, just a single 30W section. As before these are awesome, and we run them with “spot beam” lenses, as we found the “flood” lens to just scatter light inefficiently. Another thing to note, the standard orange amber lenses actually block a lot of light, and dim down the output significantly; they are also not very good in the desert dust that we find ourselves in most of the time, as it just doesn’t penetrate the dust cloud as well. To improve things, we bought some yellow lens material, and cut out our own replacement lenses with a Dremel. The DIY yellow lens makes these lights very effective and bright, they just pierce right through the dust.
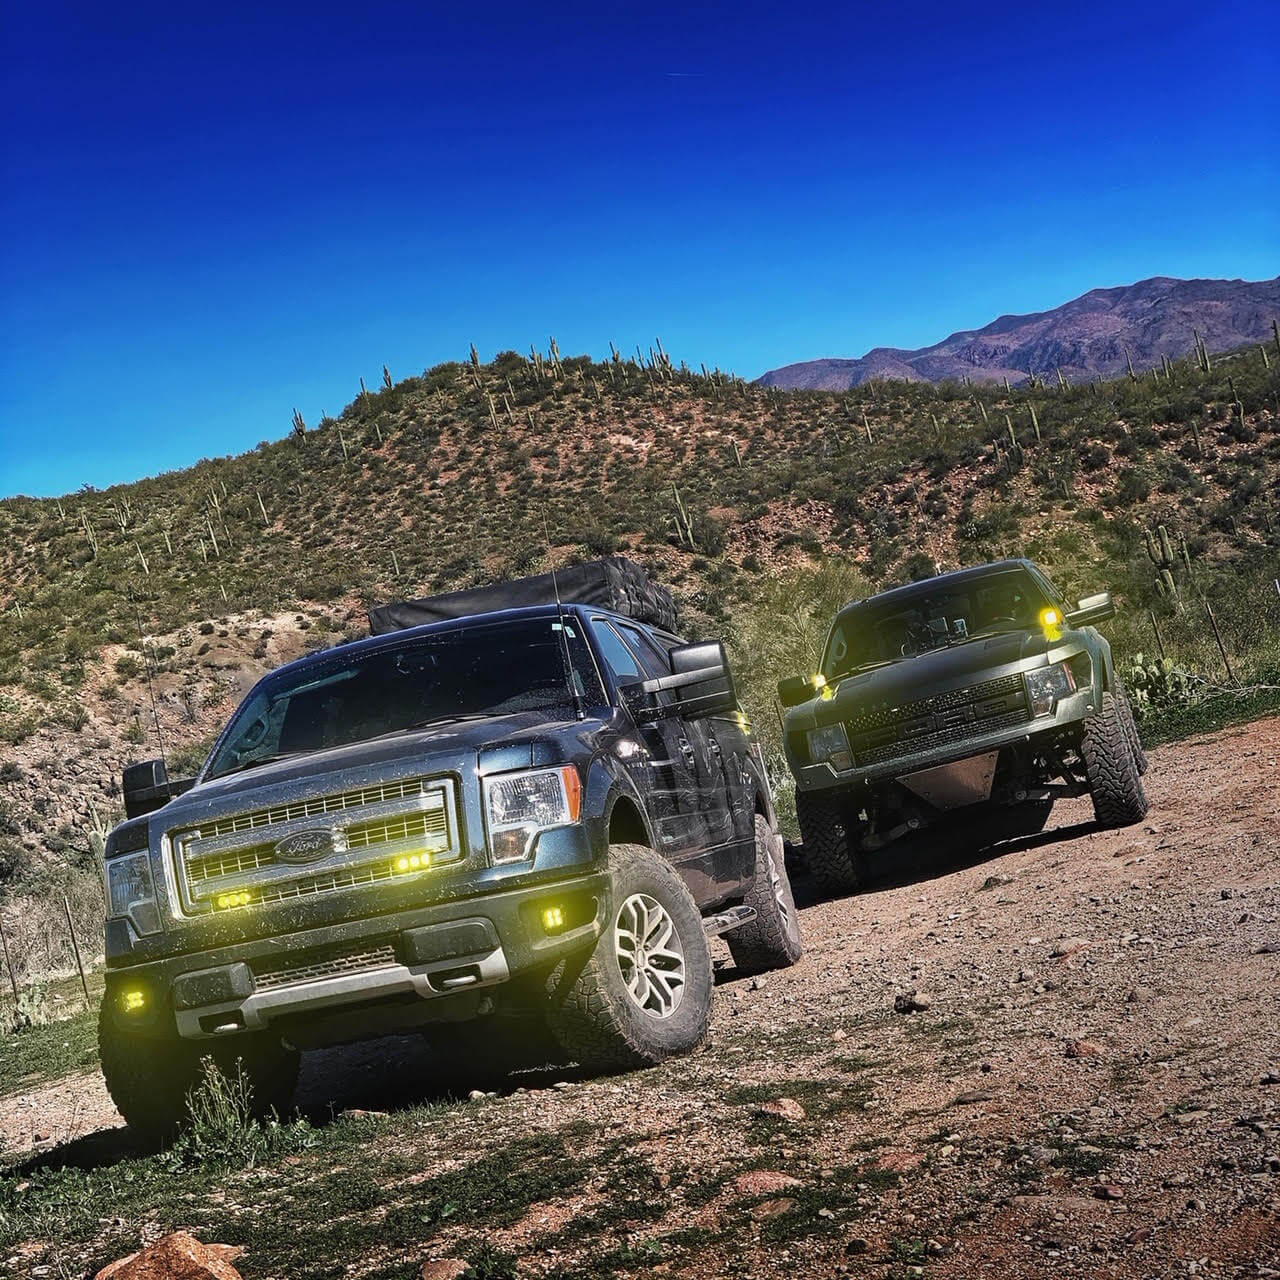
We have them mounted on the front at an 8° angle out to the sides to cover some cornering, as well as a pair on the back, also aimed slight angled out. The rears make excellent chase lights so that any vehicles traveling in the dust cloud behind us have better awareness of our position.
Fog Lights (yellow) – $30/four pods
When we installed the raptor bumper, we had to say goodbye to our factory fog lights; we got the 20W quad LED 3″ pods from Amazon to fill in the space. And to be honest, these I would say are disappointing in performance. We were hoping for another great find like the ones mentioned above, but, it just wasn’t there. Our guess is that the reflector design is lacking, and light is being scatter inefficiently even though they are supposed to be “spot beams”. In our case, we just aimed them really low so they light light up the ground just in front of the truck and behave more like a traditional fog light, rather than a lower mounted spot beam. The reduced brightness also lets us run them as DRL’s (Daytime Running Lights). Once again, these got the same yellow lens treatment.
DIY Yellow Lens – $13

This is the material we’re using, it is a transparent acrylic (plexiglass) and is quite robust. It has not been problematic with any of the glass cleaners we use to wash the lights with. Once thing to note though is to use a nice microfiber rag when cleaning, plan paper towels will leave micro scratches over time. We have cut this stuff with a Dremel just fine; we’ve also use a razor blade to score out straight lines and then snap it along the score mark to make a nice clean break/cut. The light throughput on this material is excellent.
Leave a Reply