
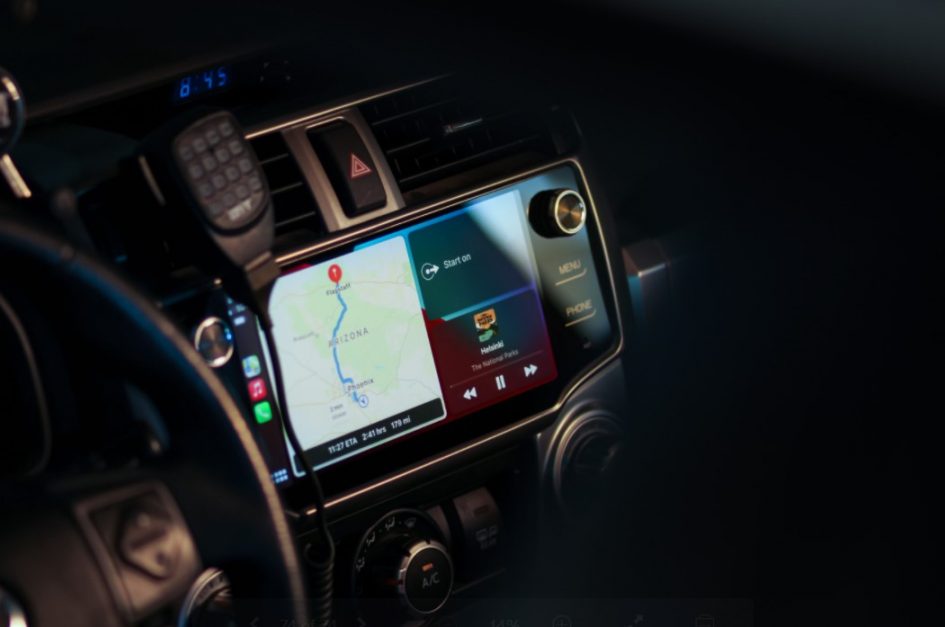
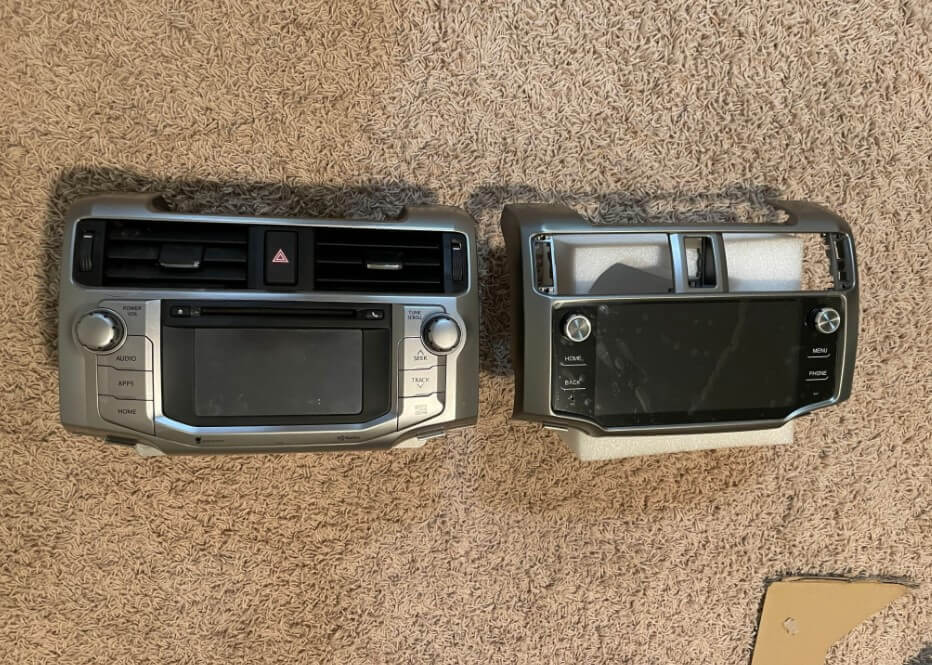
We love our 2016 4Runner, and feel it is a perfect car for daily life and off-roading. However, we could not stand the OEM head unit and entertainment system. It is outdated and functionality with modern phones is clunky, all of which is easily solved by the Apple CarPlay interface in most other modern cars. Since we use trail maps like GiaGPS (which has a great Apple CarPlay integration), we wanted to make an upgrade. There are many aftermarket 4Runner Apple CarPlay head unit options out there, in price ranges of $300-$1500.
After much research we settled on a Chinese Android unit that is around $500 (price seems to fluctuate). It is most commonly referred to as the T10 unit, which had T8 and T9 predecessors. This made us feel more confident knowing that there has been plenty of time to resolve any major design issues. As will most Chinese products, there are many names, CarTrimHome and Rhino Radios seem to be the most common. We got ours from Rhino Radios. The reason for our decision was the functionality, price, and honestly we felt that that it looked the way Toyota should have designed the interior.
One major drawback, is that the unit does not come with any instructions, so we hope that this step-by-step picture guide will be helpful to anyone wanting to DIY this project. Legal disclaimer: Please use your best judgement, we are not responsible if you damage yourself, the car, or the radio.
With that out of the way, I think this is a pretty straight forward install that anyone with minimal to no experience can do themselves if you just follow the steps below.
OEM Head Unit Removal
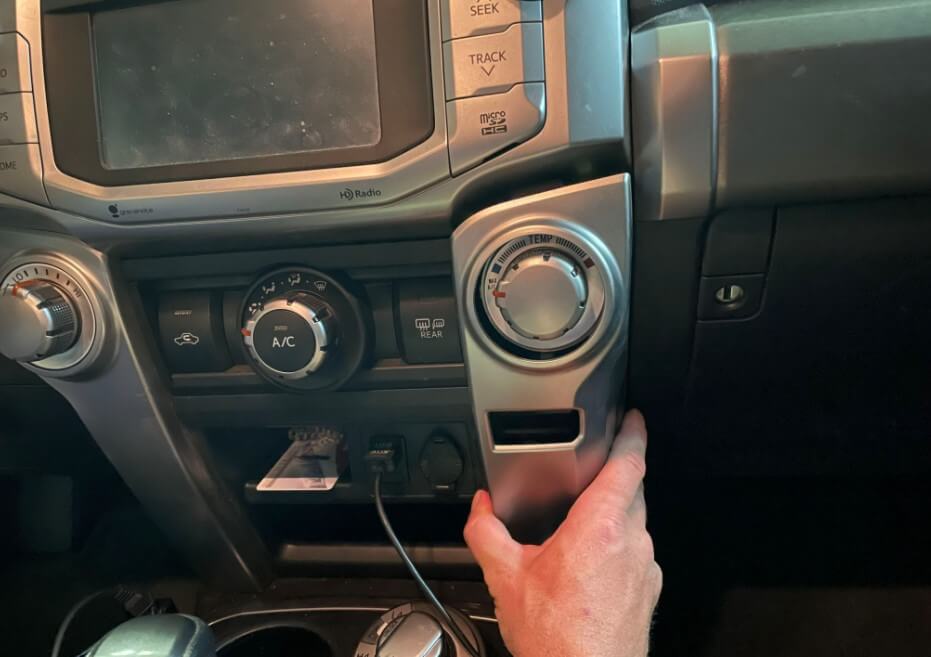
- To remove the OEM 4runner head unit, you need to pull apart the dash/center console a bit. Remove the right climate control trim piece. I was able to just grab it by the sides and pull it out as it is held in with clips. Use the included orange plastic trim remover tools if you need.
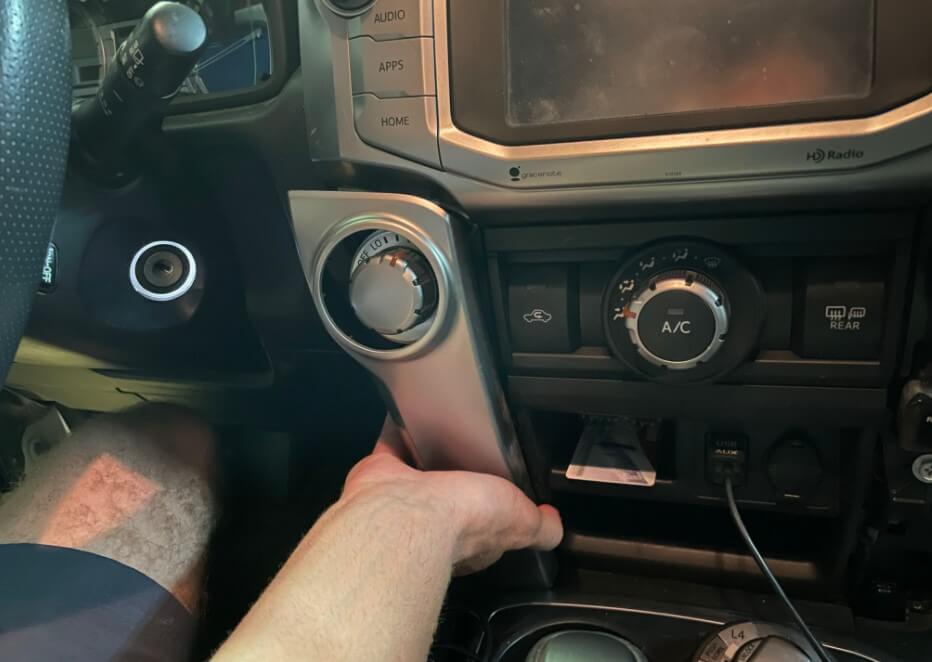
2. Remove left climate control trim piece the same way
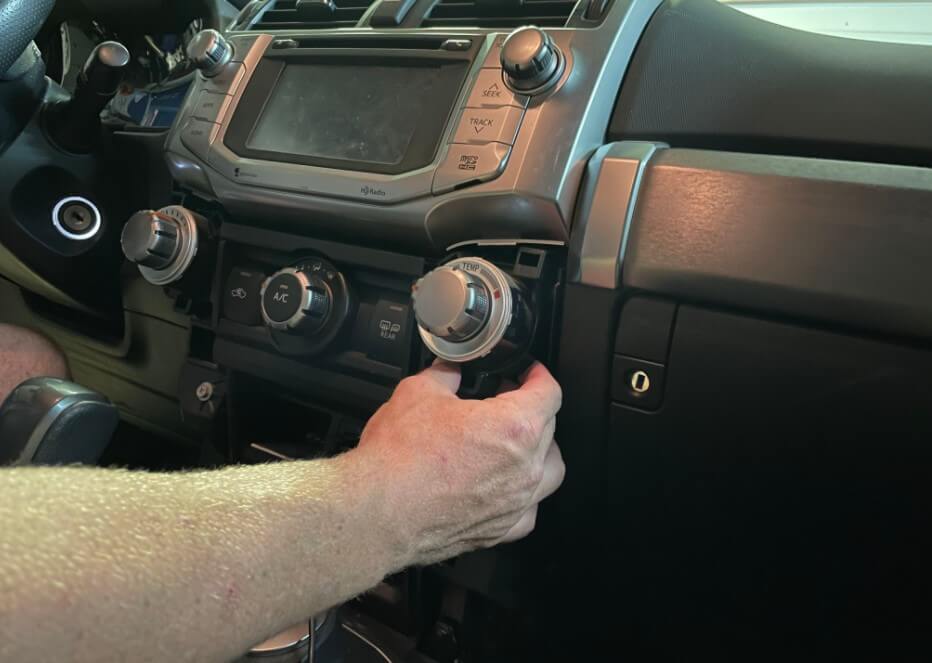
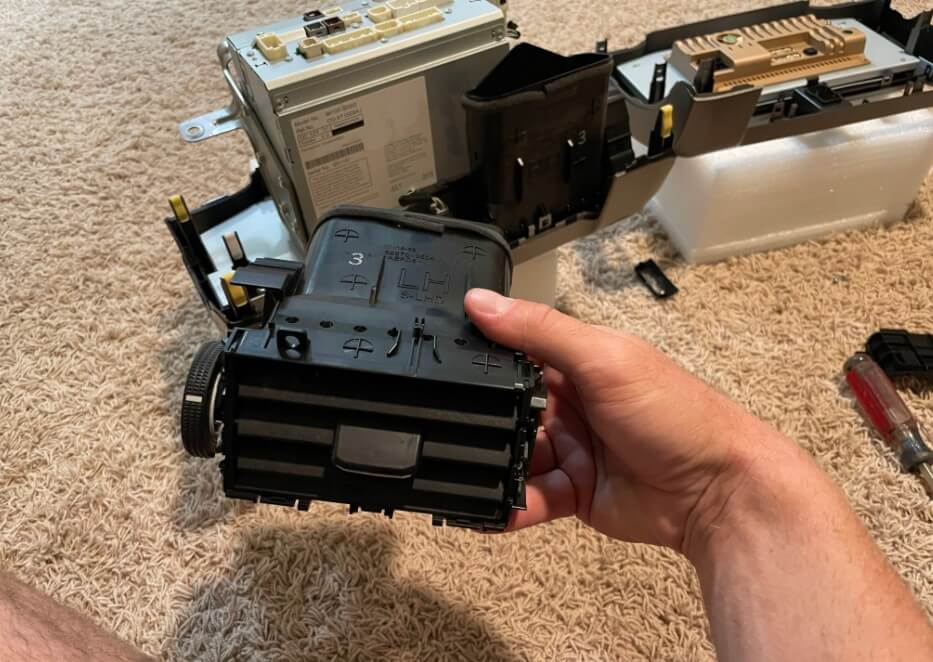
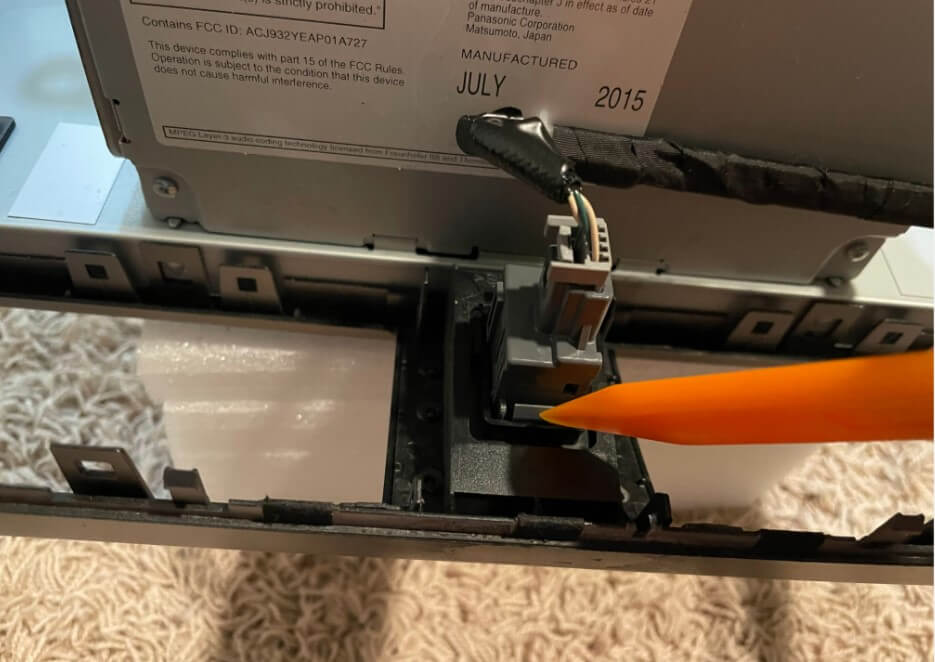
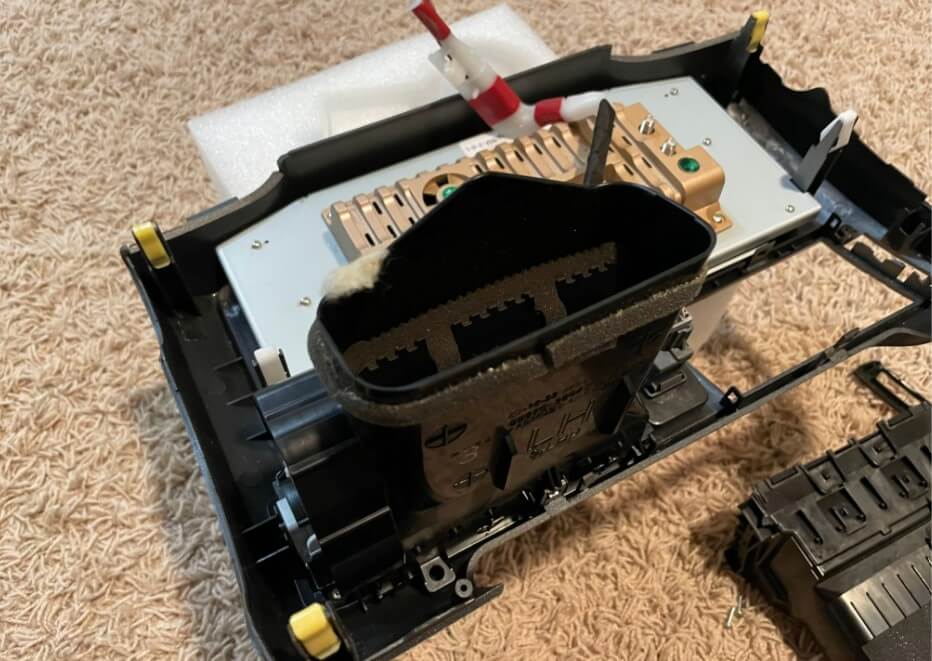
3. Remove climate control module. You can just pull it out and leave it plugged in. I was able to get a good grab on it by holding it on both sides as shown in the pic.
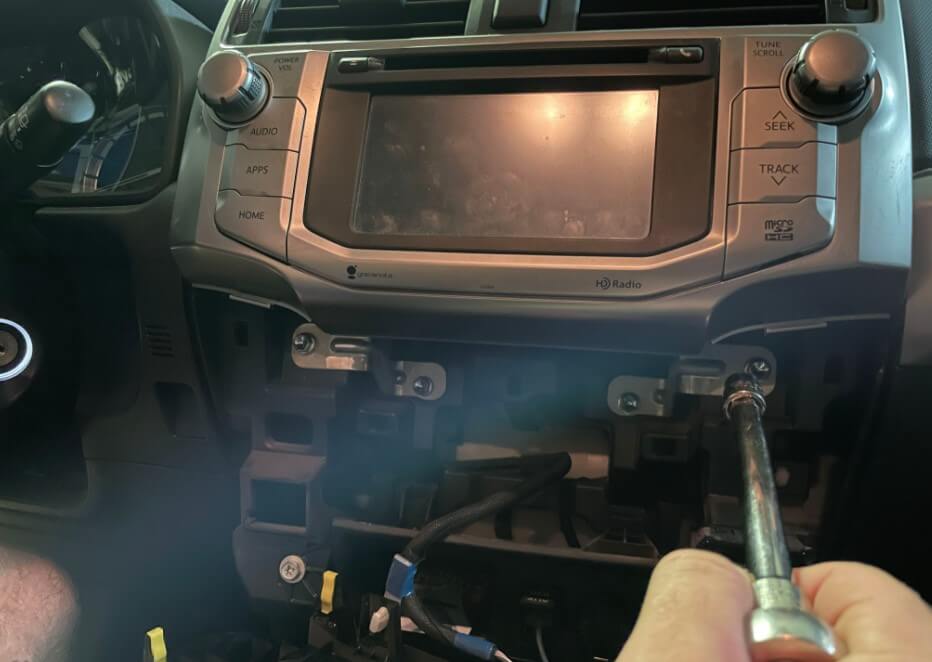
4. Unbolt the 4X head unit bracket bolts using a 10mm socket. Save these in a bag somewhere as the new unit will not use them.
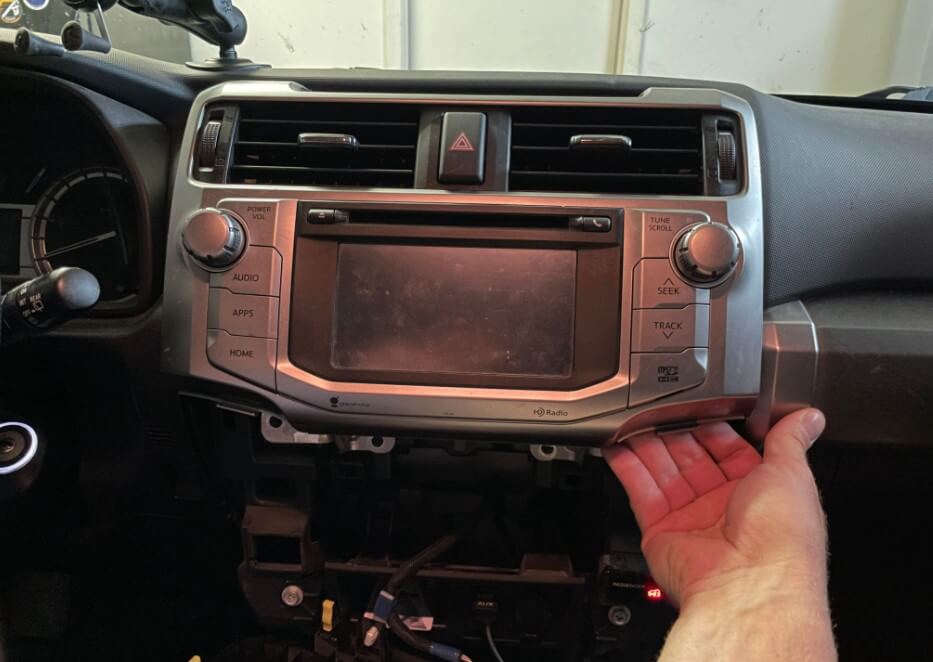
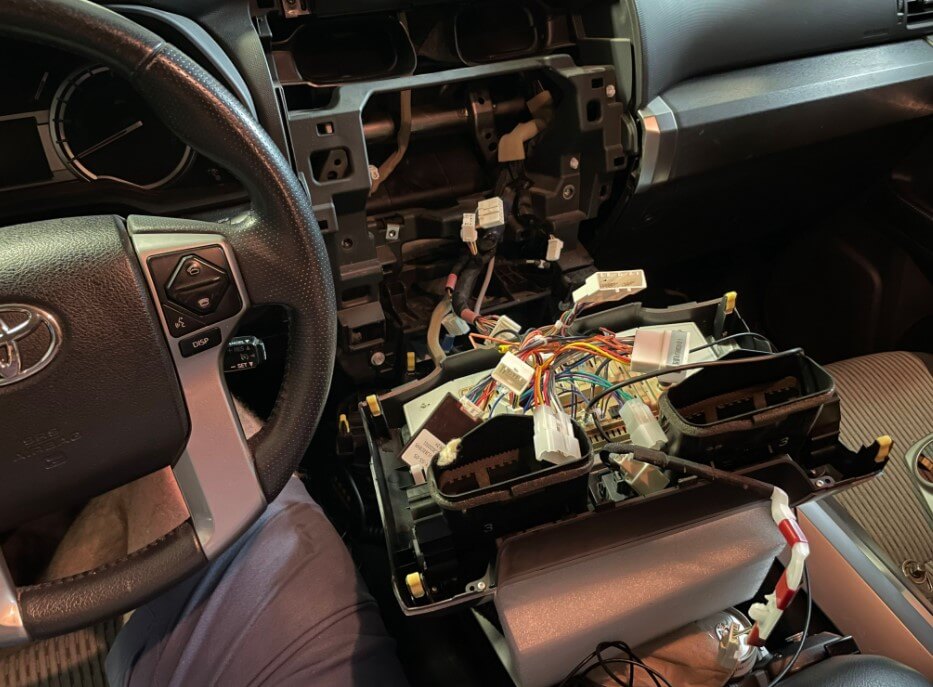
5. Remove the factory head unit by pulling on the bottom from both sides, this will pop it out of the clips.
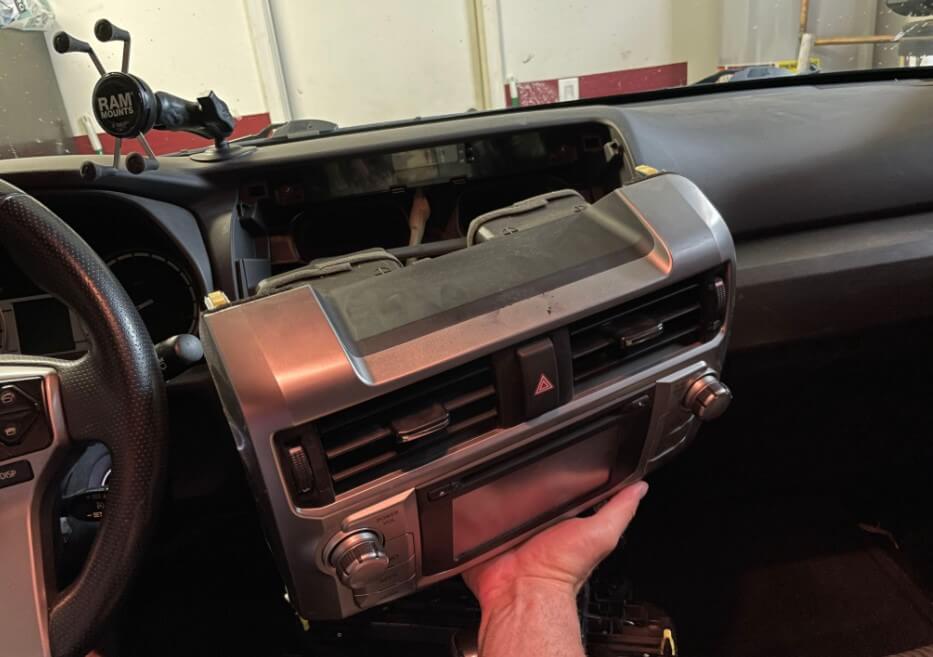
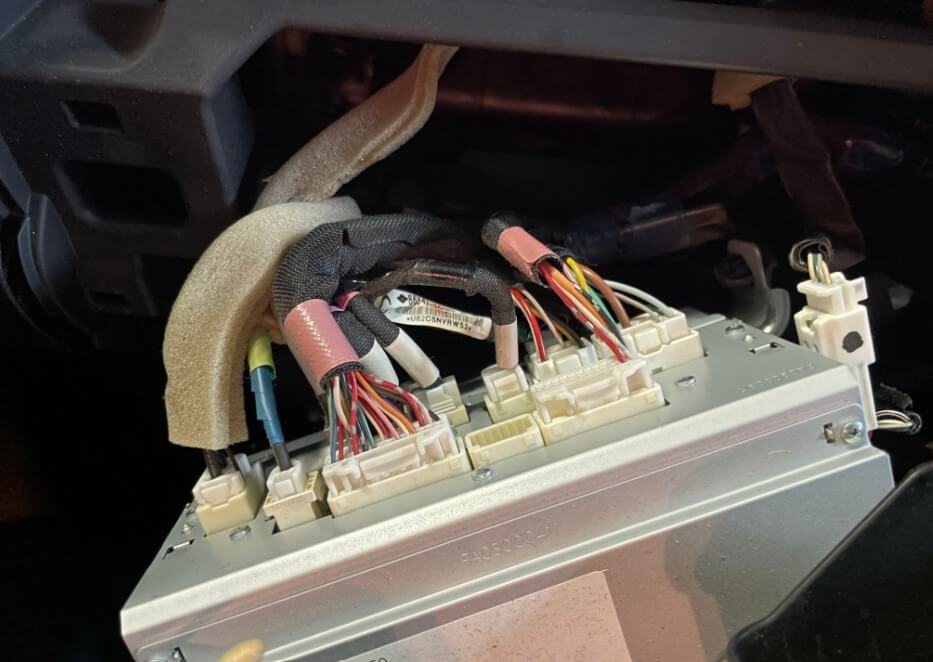
6. Be prepared for the unit to be a bit heavy, and hold it with one hand, while you use the other hand to unclip the harnesses in the back. It may help to put a towel on the shifter to avoid scratching anything if you need to set it down.
Bezel disassembly and component transfer
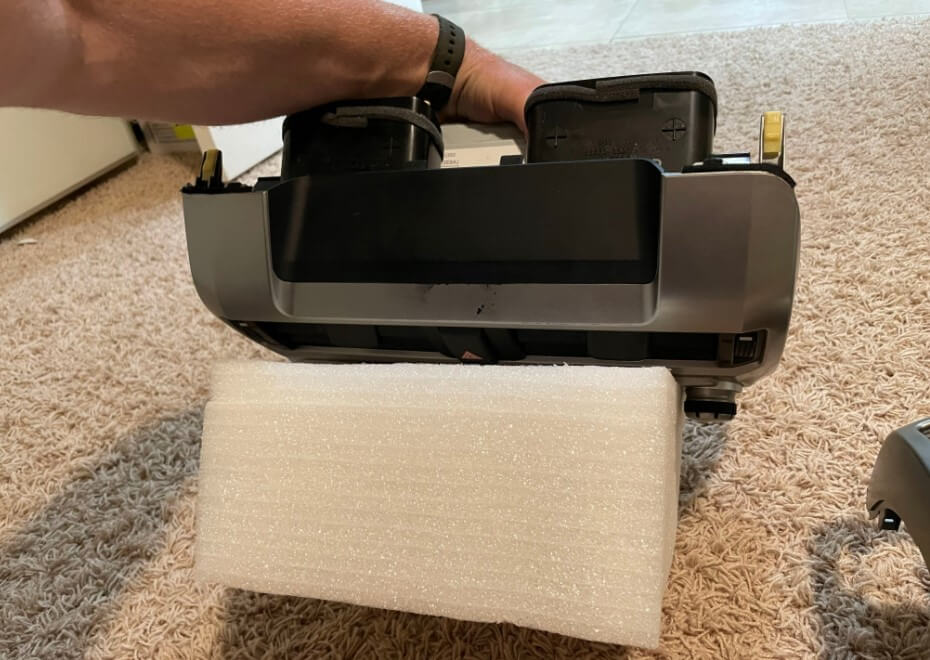
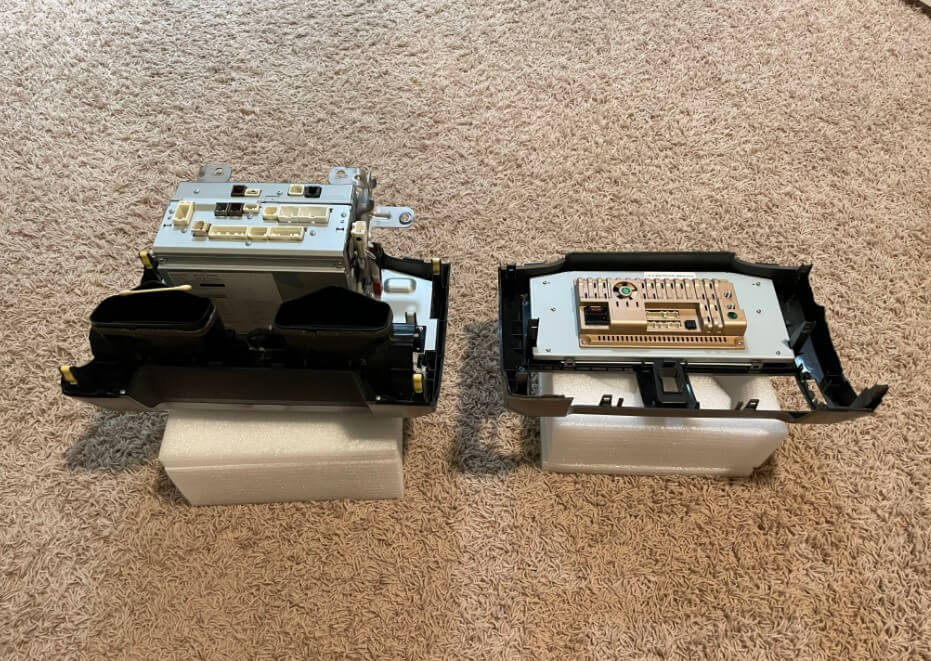
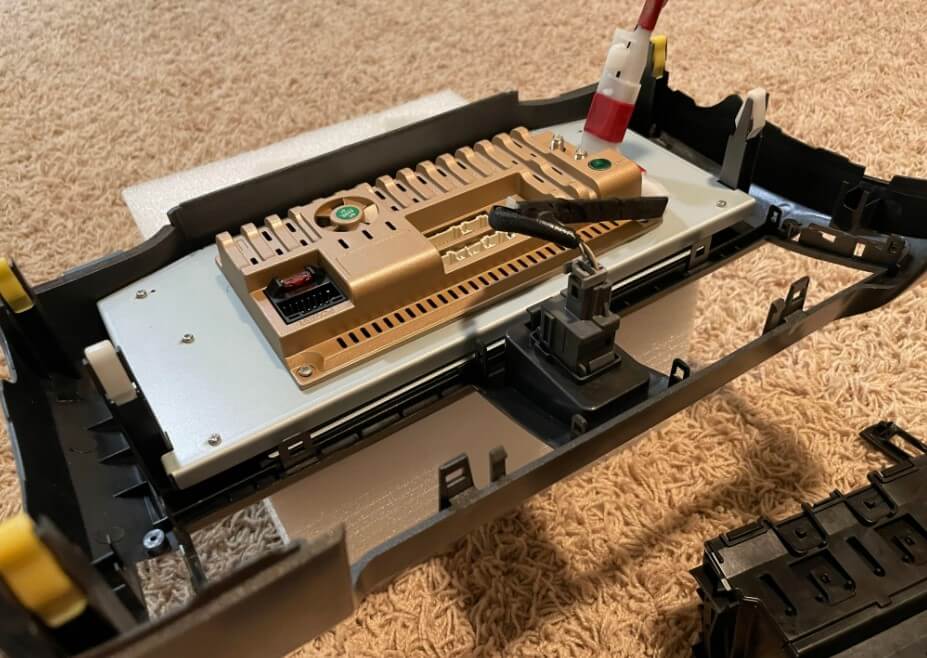
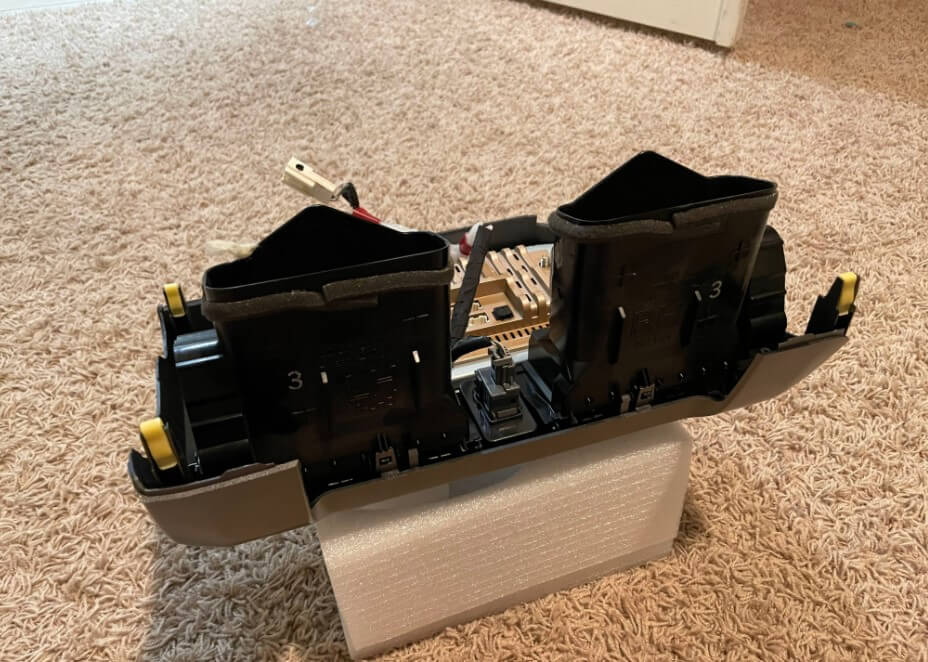
7. You can now take the head unit inside the house (or where ever you prefer to work) to transfer all the bits to the new plastic shroud.
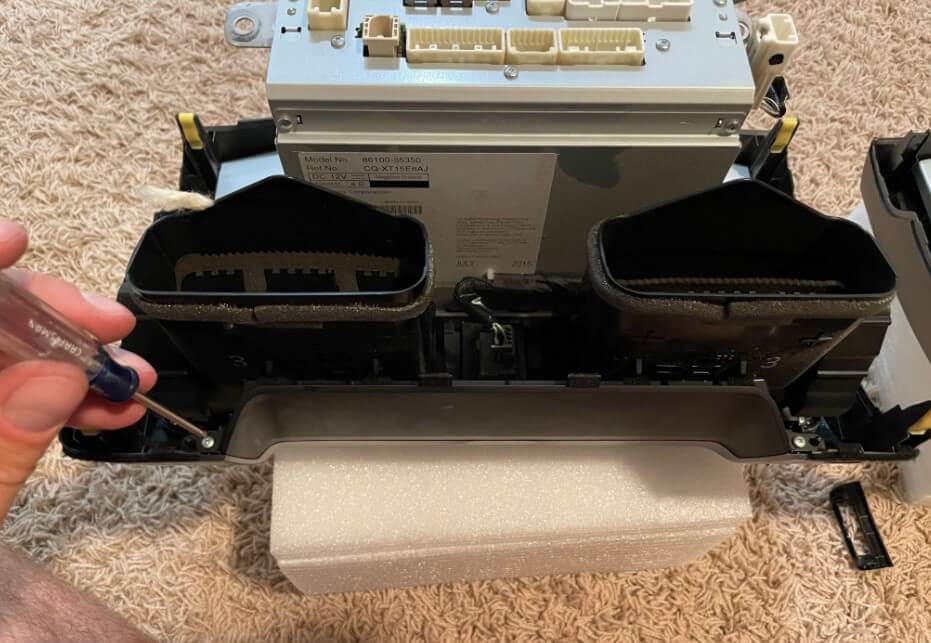
8. I recommend using the foam blocks that came with the new unit to rest the screens on to avoid any damage. The blocks fit perfectly between the knobs so that you don’t apply pressure to them and crack the new screen.
9. remove the right vent dial trim by unscrewing the two small phillips screws
10. Remove the other side cover in the same manner.

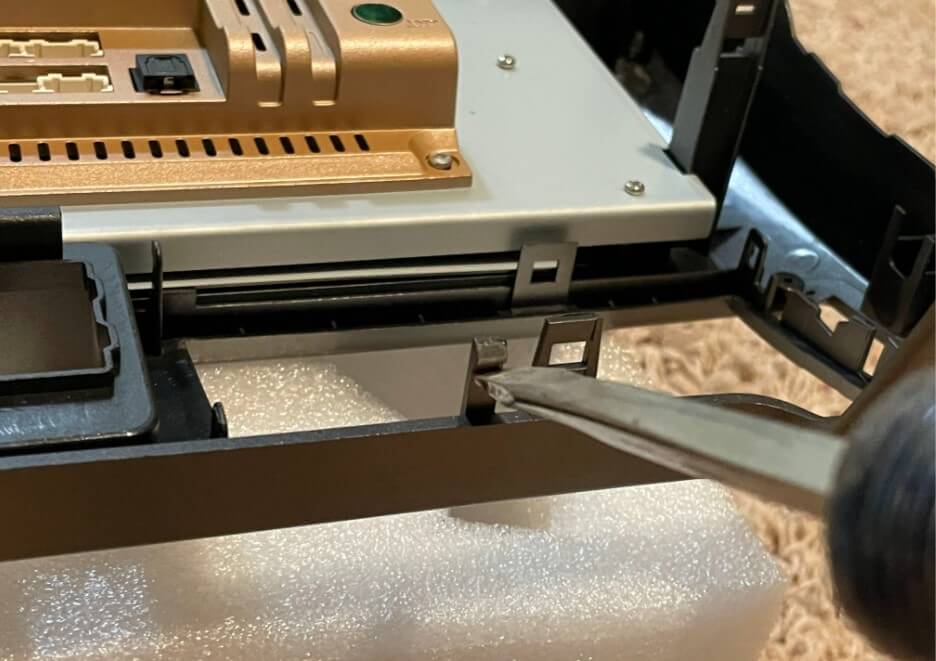
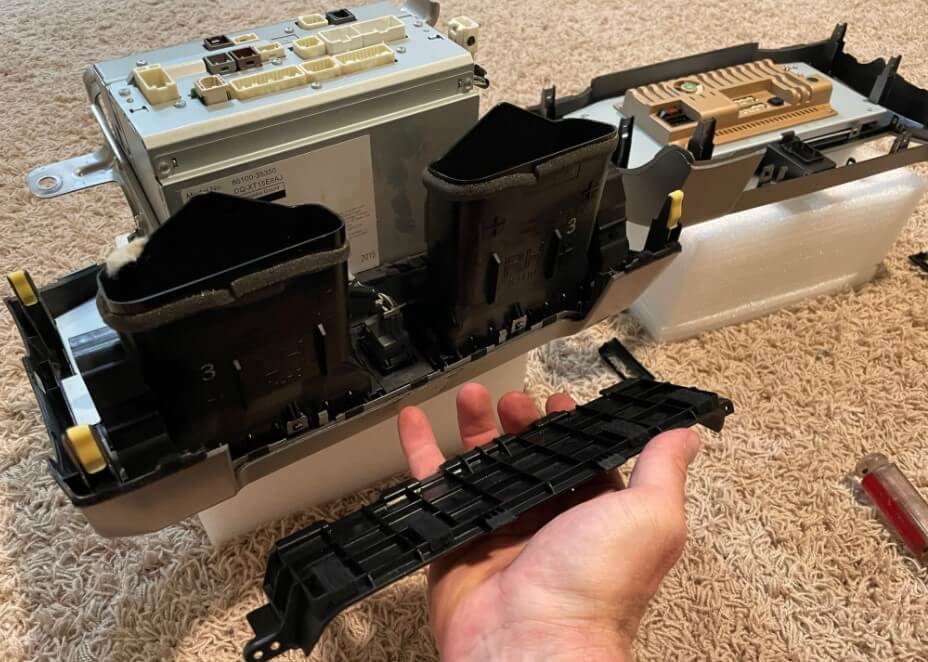
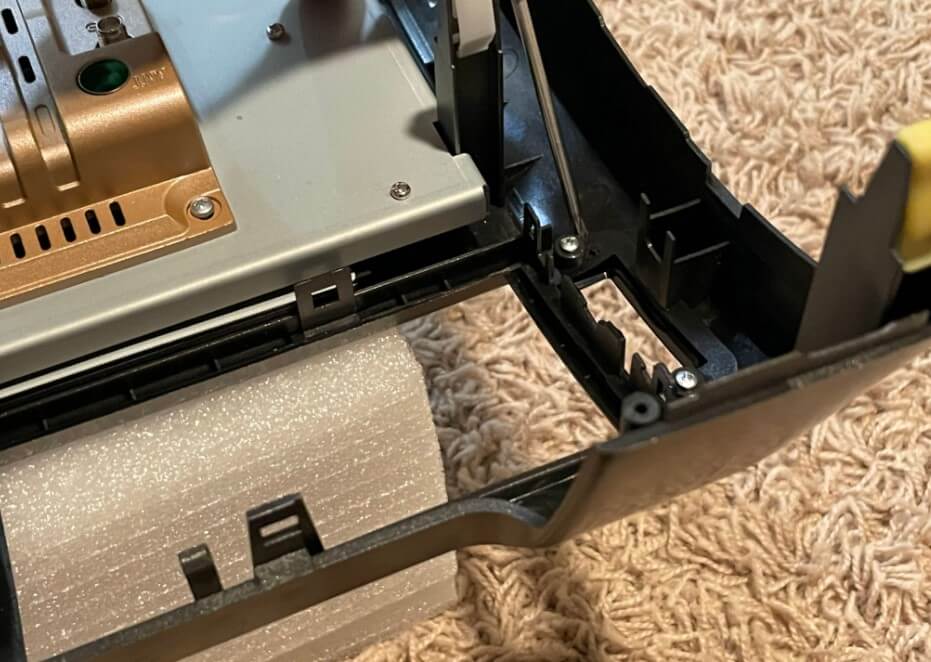
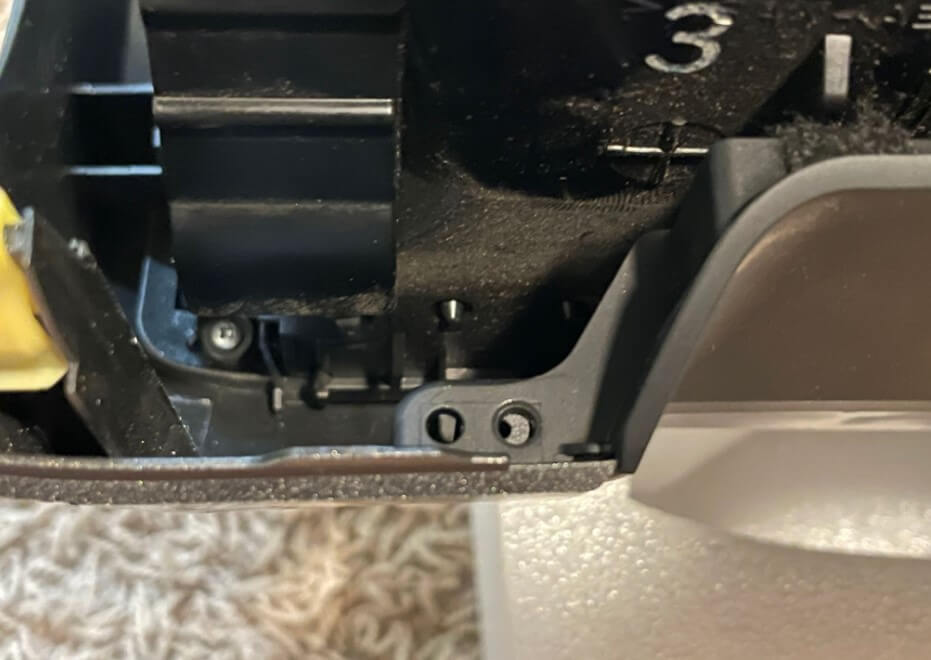
11. Remove the top trim piece with the two phillips screws.
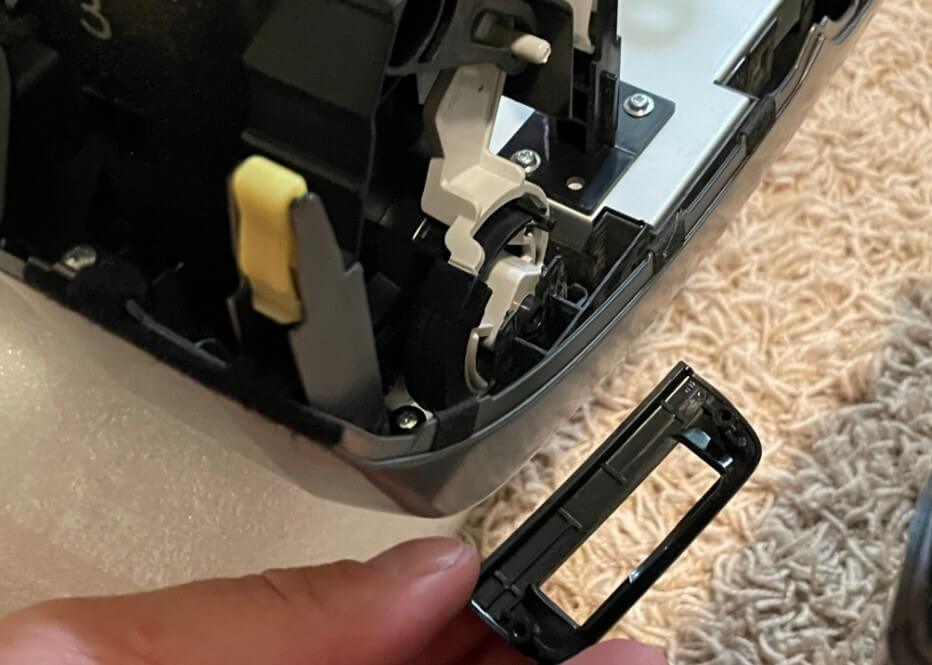
There are two clips that hold it in, so here is a view at what they look like (this one took me a few tries to figure out how to do carefully without braking the clips.)
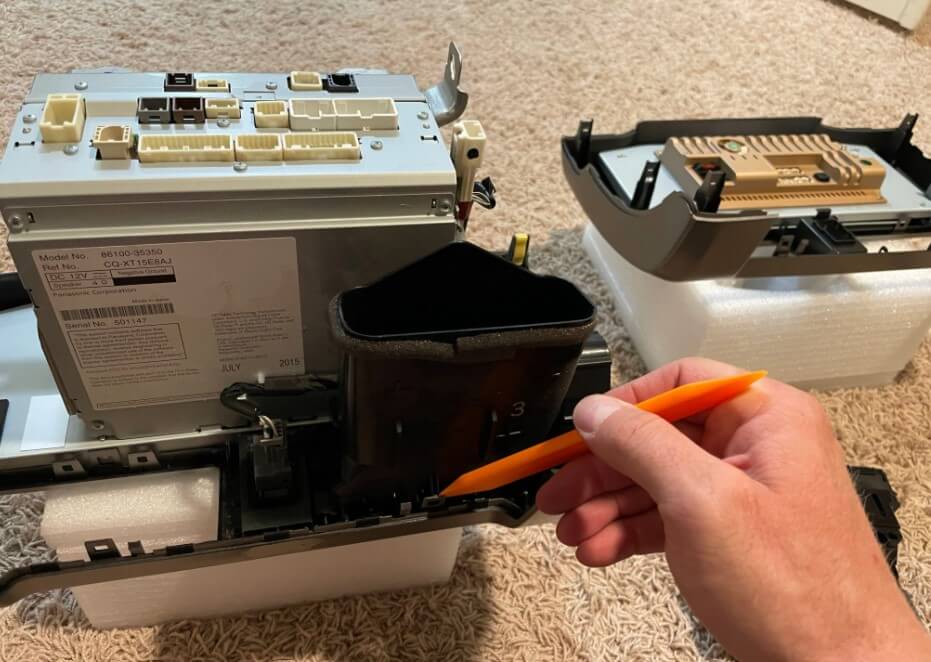
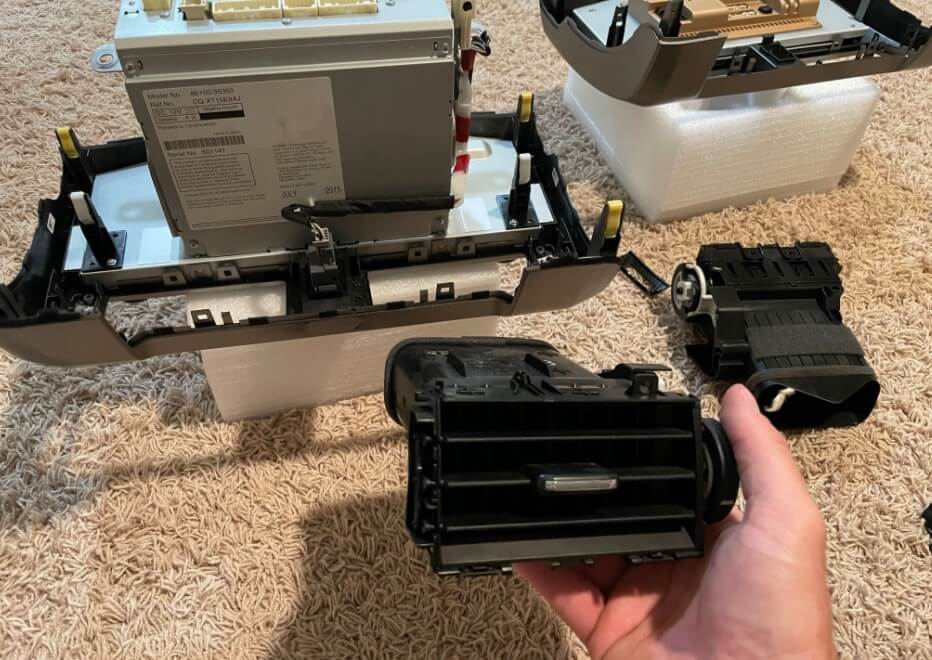
12. Remove the left vent by undoing the clips all around and pulling it up.
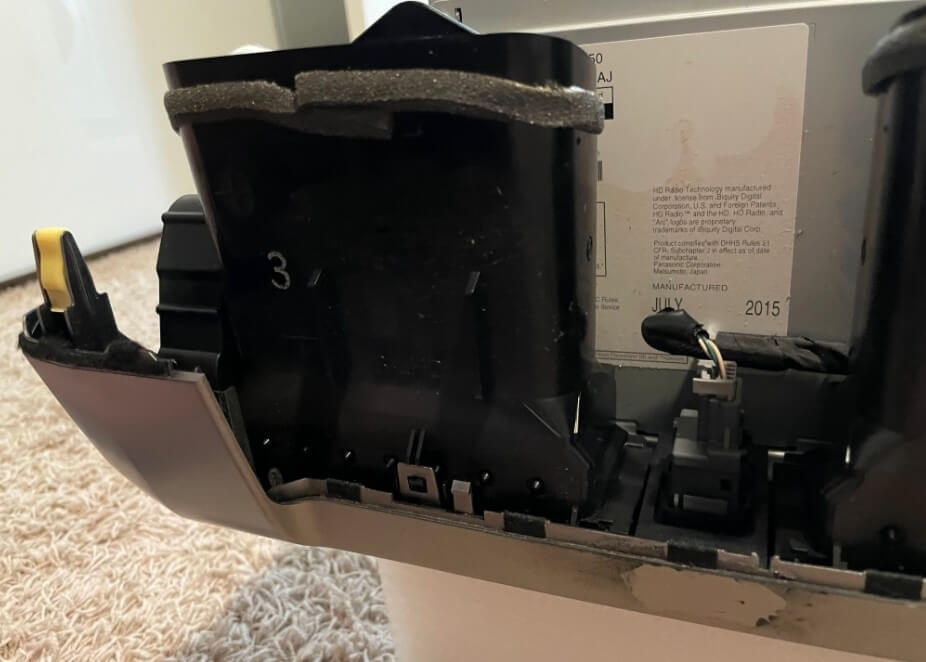
13. Remove the right vent in the same manner. The trim removal tool was useful here.
14. Unplug the flasher switch harness
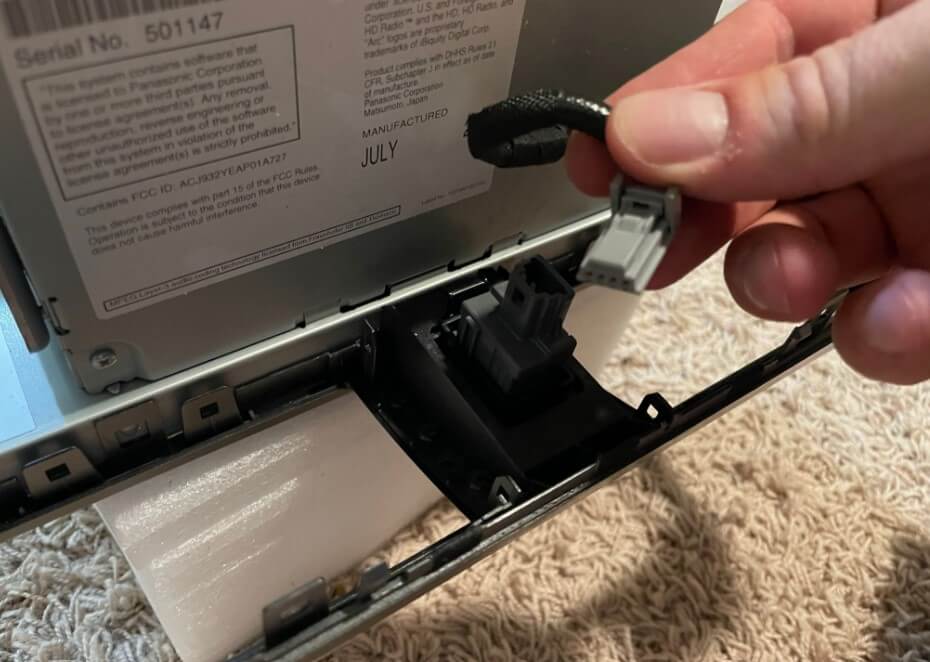
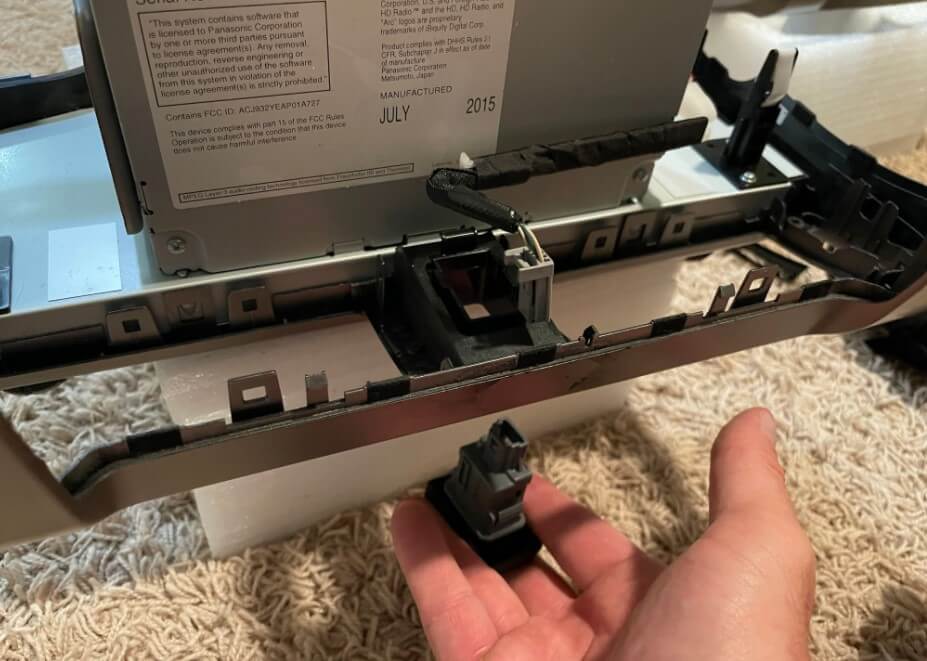
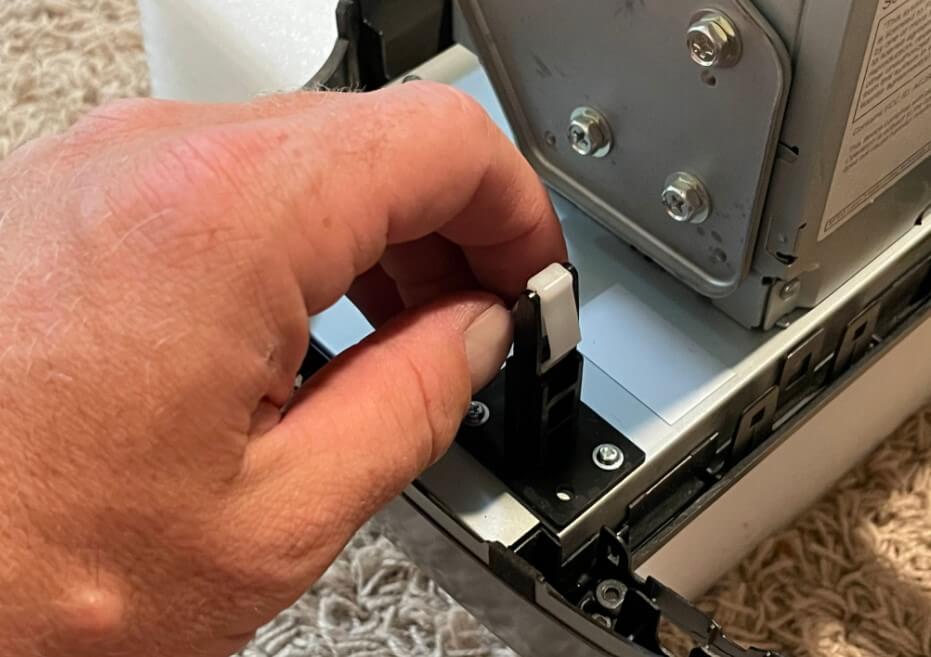
15. Remove flasher switch by pressing in the the tabs, and pushing the switch down through the front of the panel.
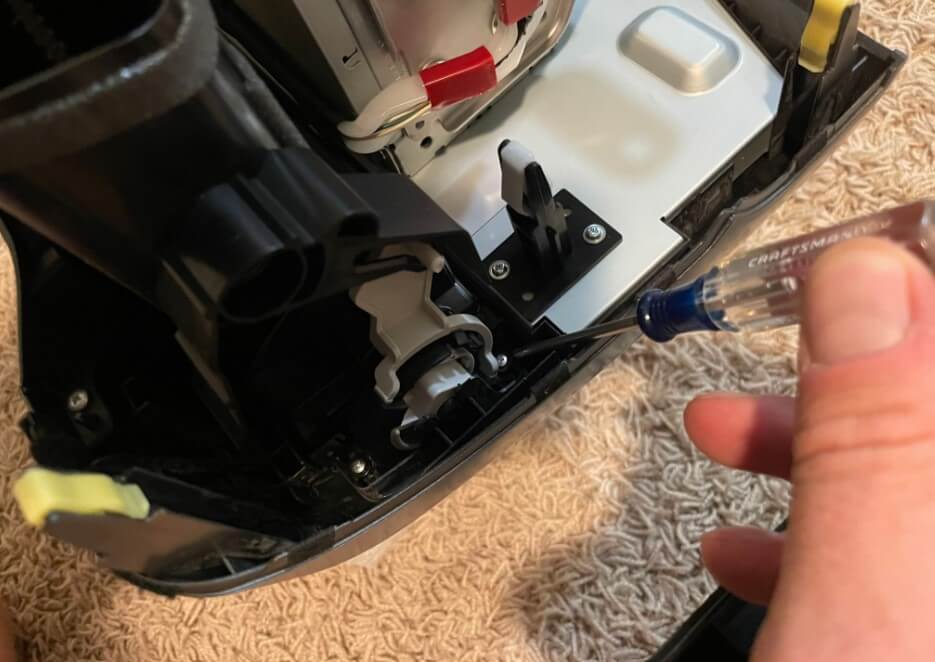
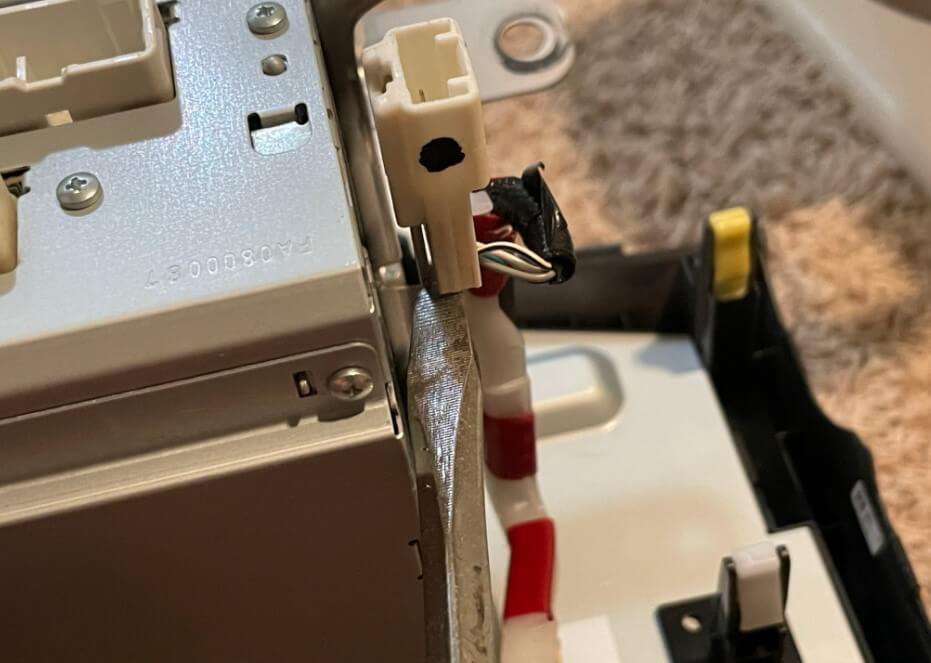
16. Unclip the flasher harness from the bracket. The white plug slides up, and then the other clip is removed by using a flathead screwdriver to press in the clips enough while pulling on the assembly.
17. Finally, remove the white and yellow plastic clips and transfer them to the new unit as you go so you don’t forget which color went where.
Assemble new plastic shroud
18. Install the flasher switch to the new unit and plug in the harness.
19. Install left and right vent dial covers. I found it easier to do this first before putting in the vents.
20. Pop in the left vent
21. Pop in the right vent.
22. Install the top plastic trim piece with the two screws. There is where some of the Chinese quality shows itself a little bit. The holes were slightly misaligned on the new plastic trim, so I had to push it in place a bit and was able to get the screws in.
Harness adapters
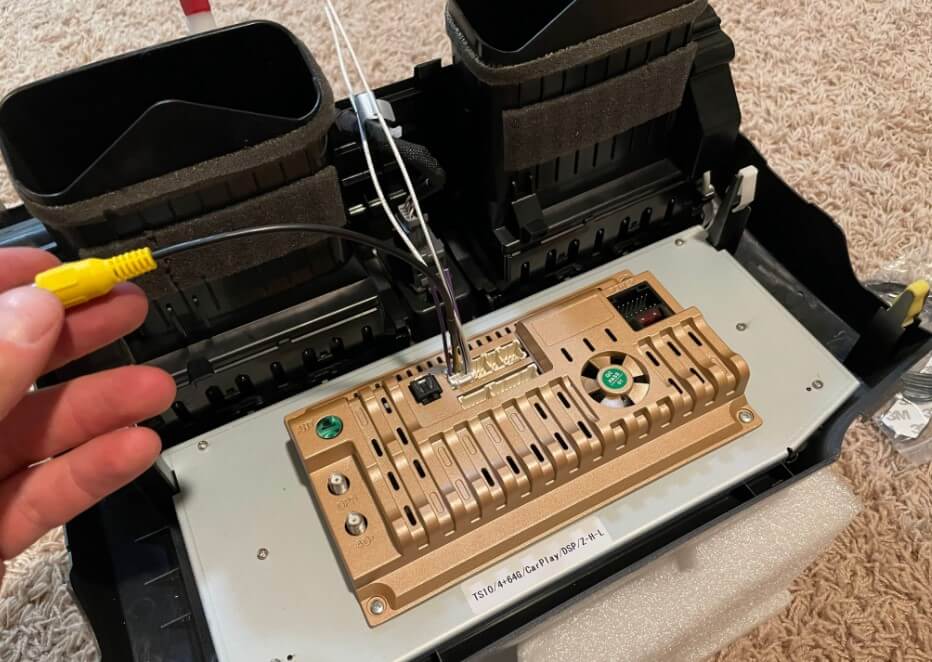
23. This is the reverse camera harness
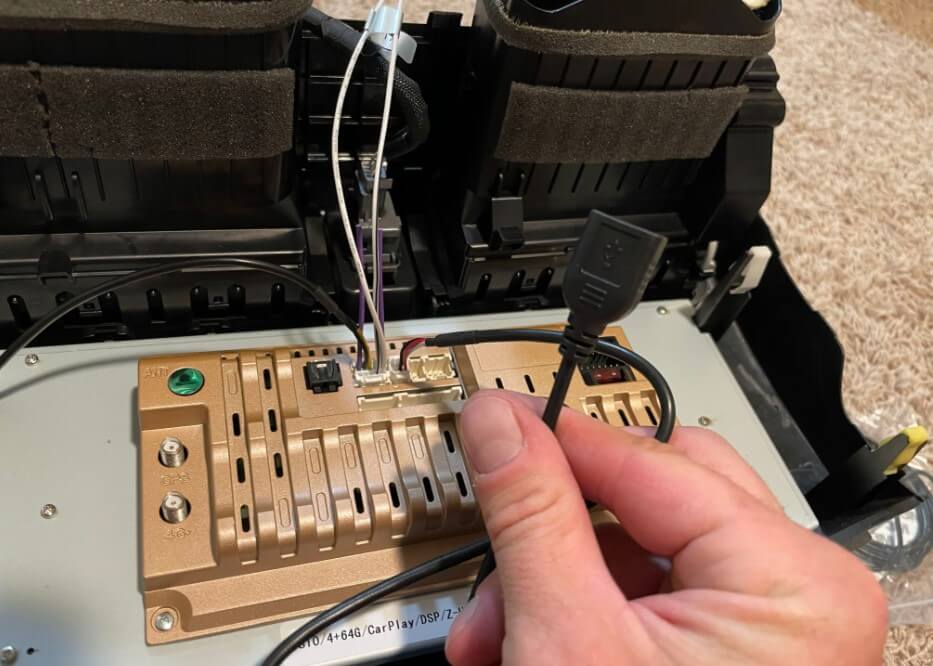
24. This is the USB harness. The kit comes with two of them, one of them has a 4pin plug, and the other has a 6pin plug. It doesn’t matter because there are still only 4 wires for the USB. I only plugged in the 6 pin because there is only one factory USB plug in the dash, but you can plug in both if you want an extra USB plug for something else, it will just be a loose wire type.
25. Plug in the GPS antenna.
NOTE: We do not plan on paying for an extra 4G service provider, so we did not plug in the 4G antenna or the SIM card harness. You can plug these in and not use them, I just didn’t want extra stuff rattling around while on off-road trails.
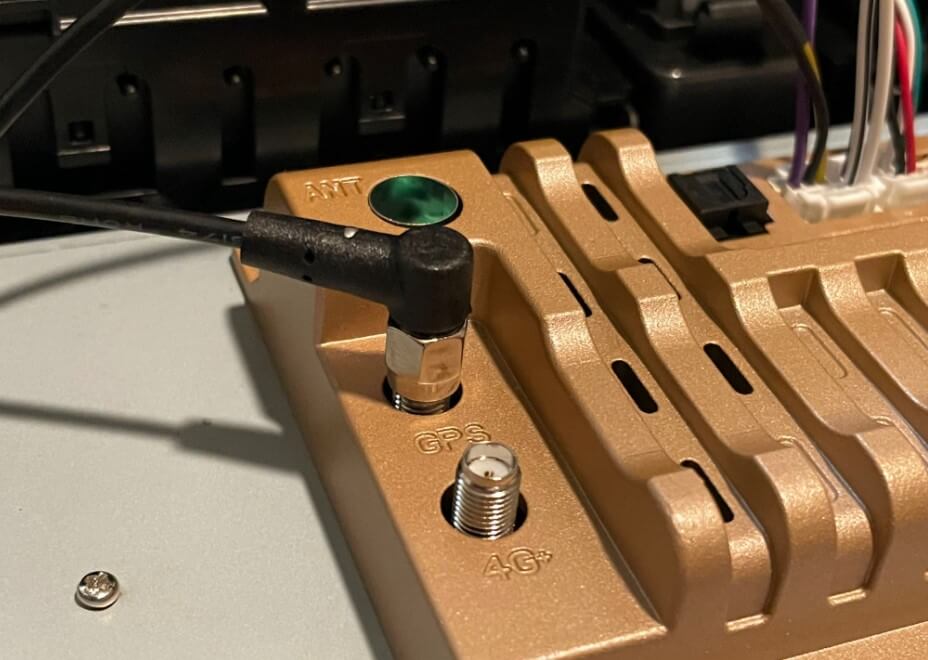
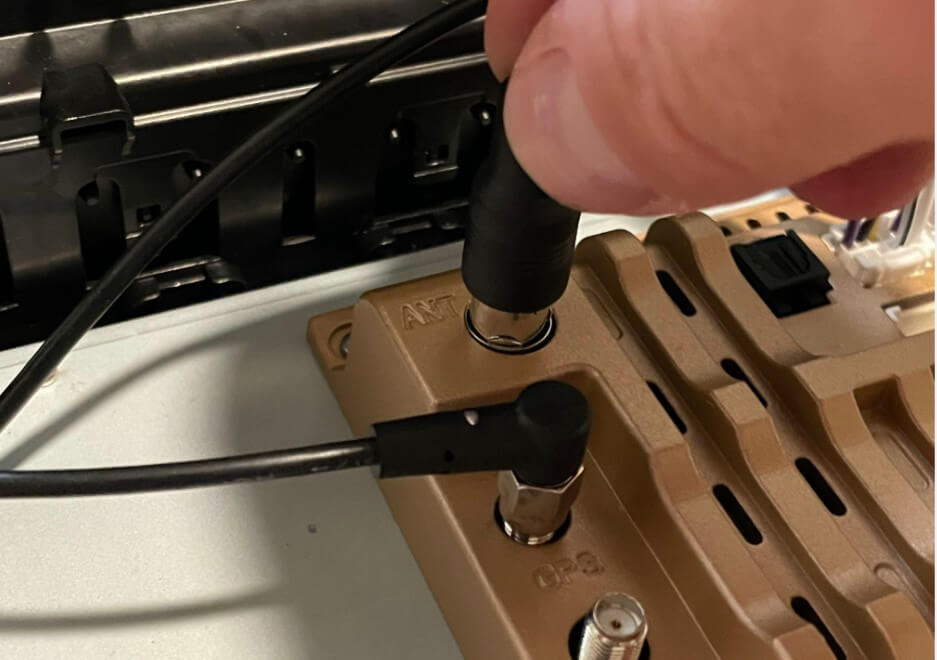
26. Plug in the radio antenna harness. The unit will use the existing car radio antenna.
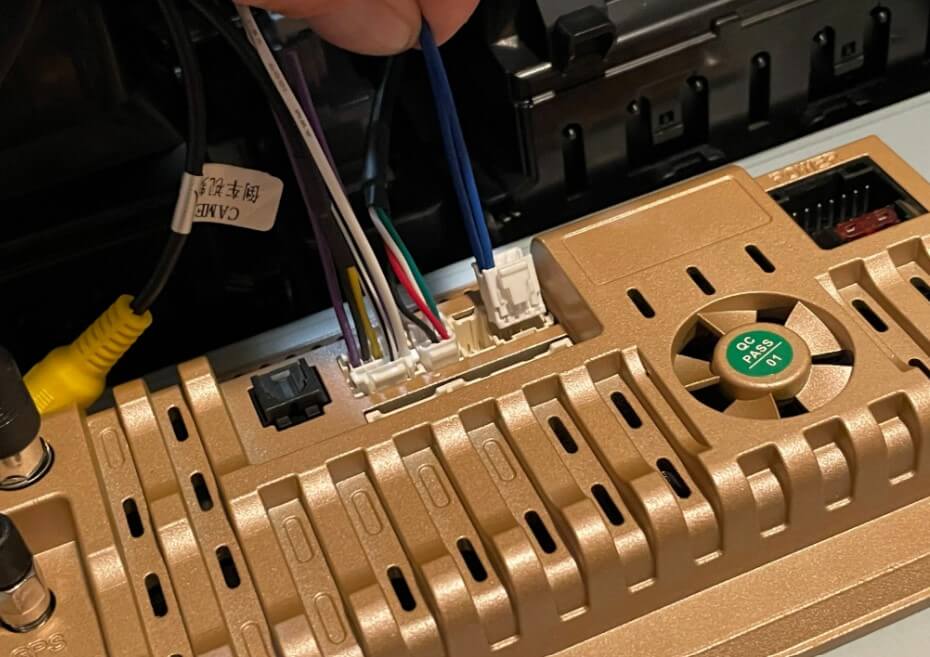
27. Plug in the CAN BUS interface connector.
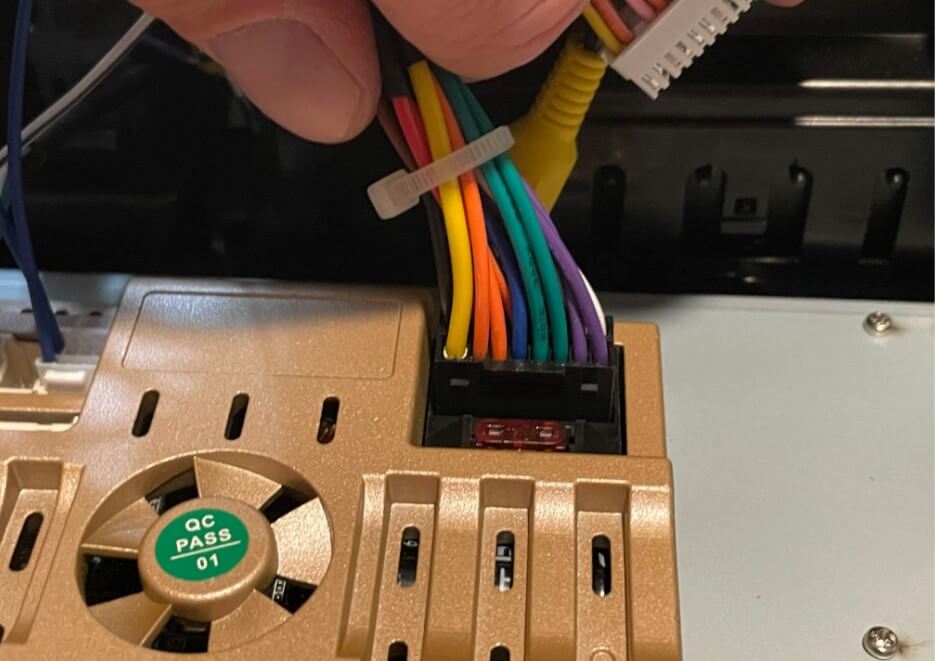
28. Plug in the main power harness
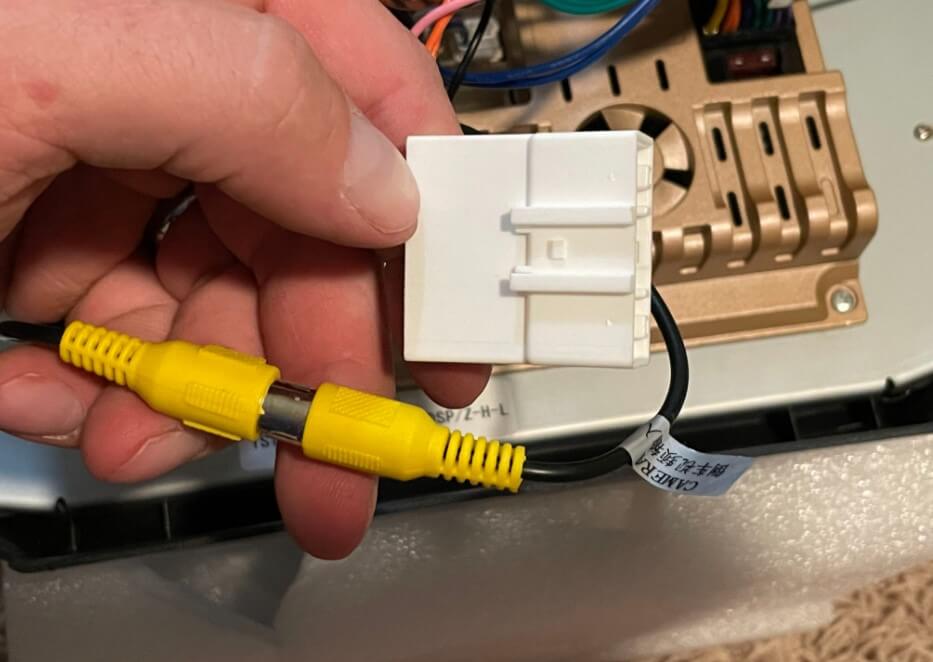
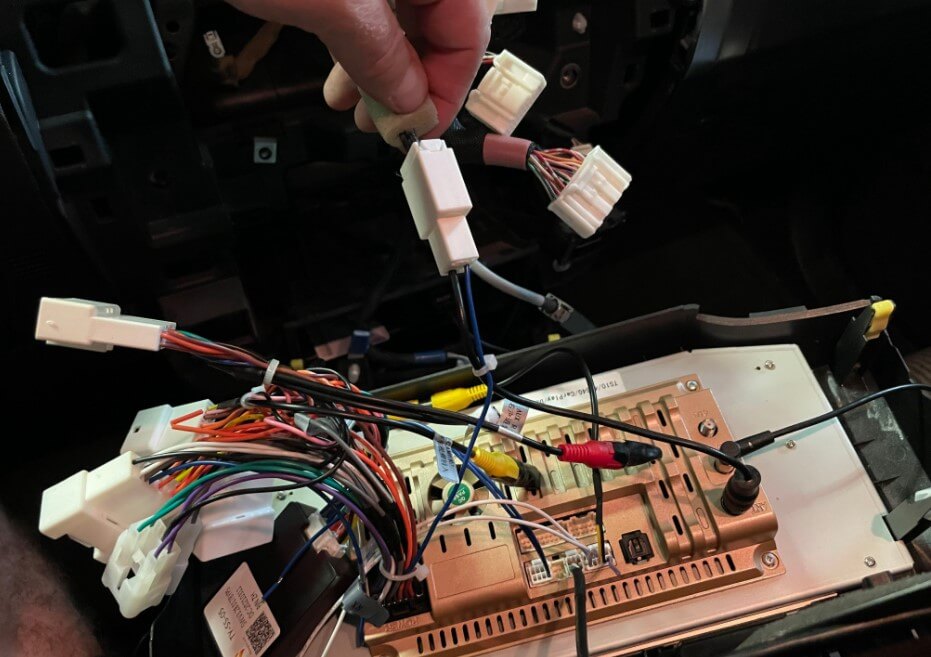
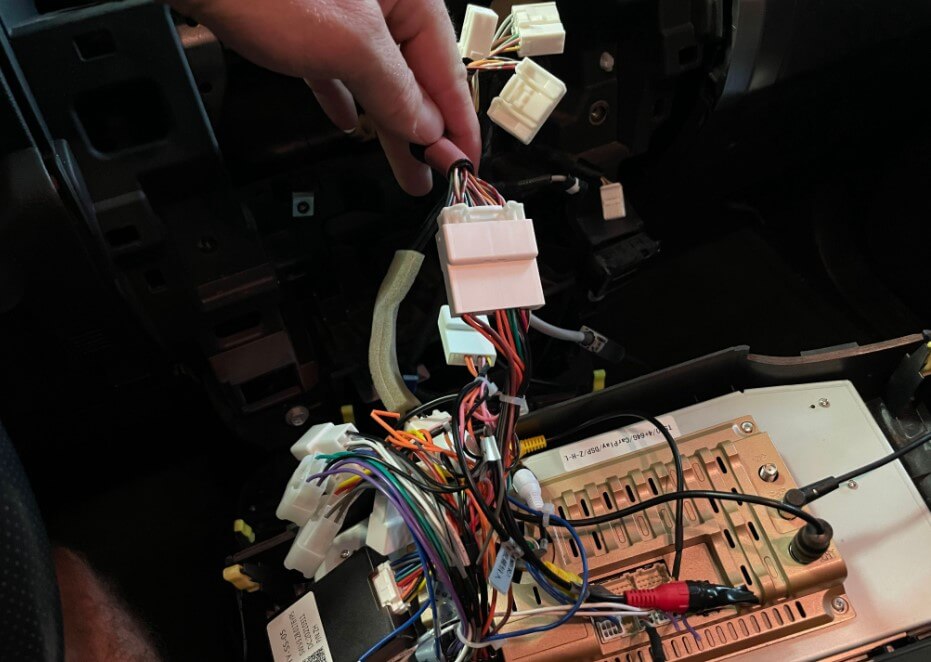
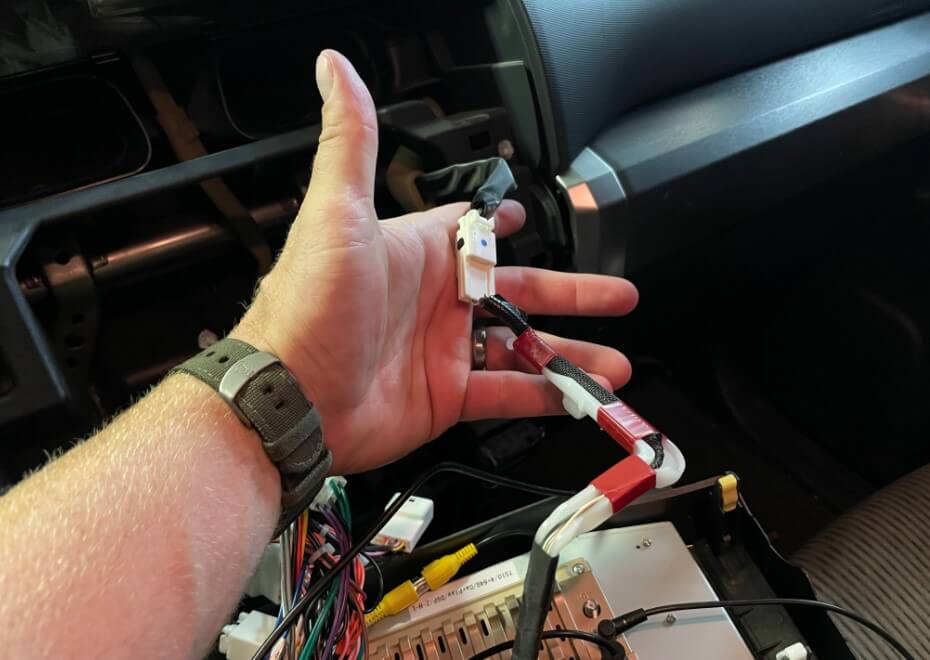
29. Now that you have a whole mess of wires, plug in the correct reverse camera yellow connector. The big harness has two of them, and each one goes into a different plug. This is is just so they can use the same harness in multiple cars. In our case we used the yellow connector that went to the “longer” white connector shown on the right
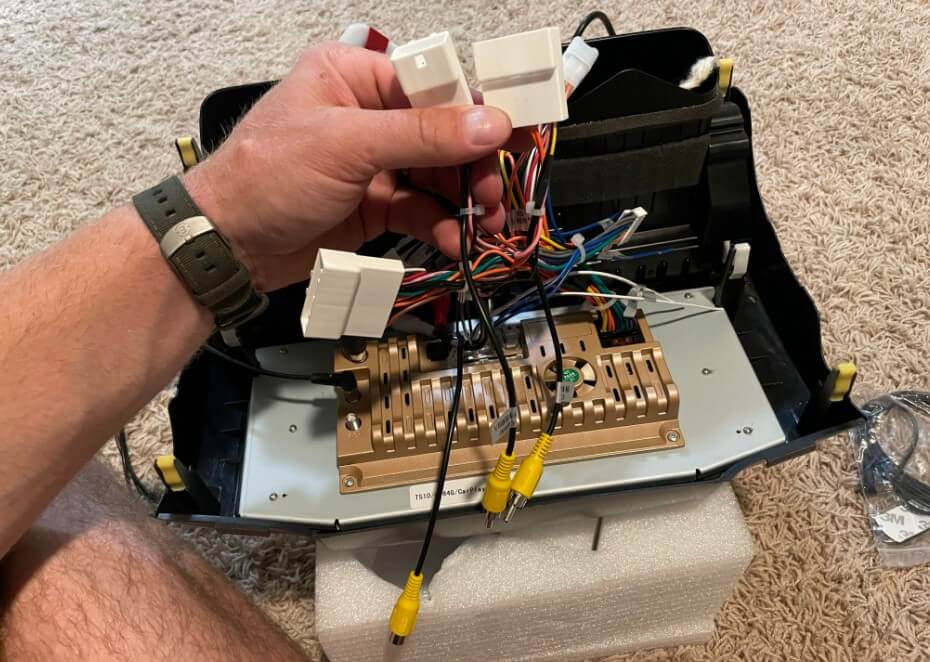
Plug that male connector into the female yellow connector that goes to the unit itself. Don’t worry, you’ll be able to verify that this is the correct one when we go to install everything in the car.
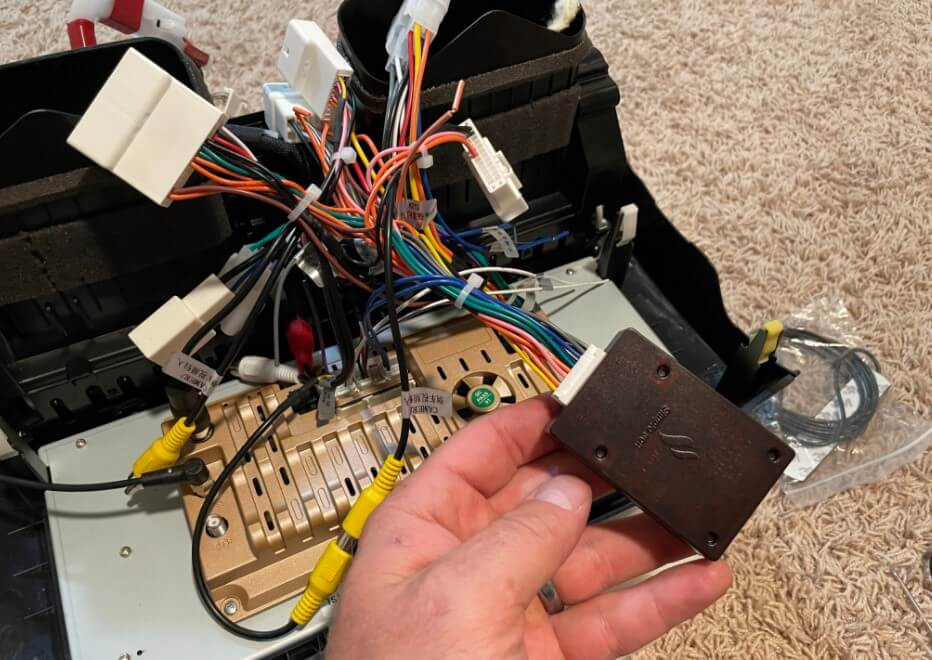
30. Plug in the brown/red plastic CAN BUS module. This is the processor that facilitates the interface and functionality of the OEM steering wheel controls and other car sensors like the doors etc.
31. Finally, tape off the unused RCA connectors so that you don’t short anything out back there on accident. (some kits come with nice plastic plugs (ours did not), use those if you have them, if not the electrical tape will work just fine)

Installing the new T10 unit in the car
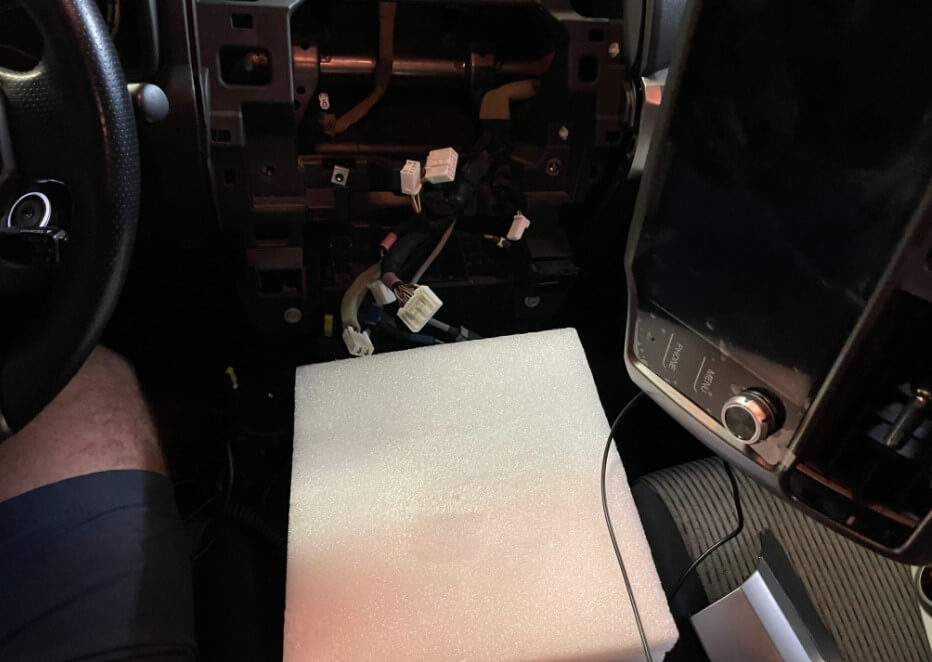
32. Take one of the foam blocks and put it over your shifter to really protect the screen here, as you will need to set the unit down for some time.
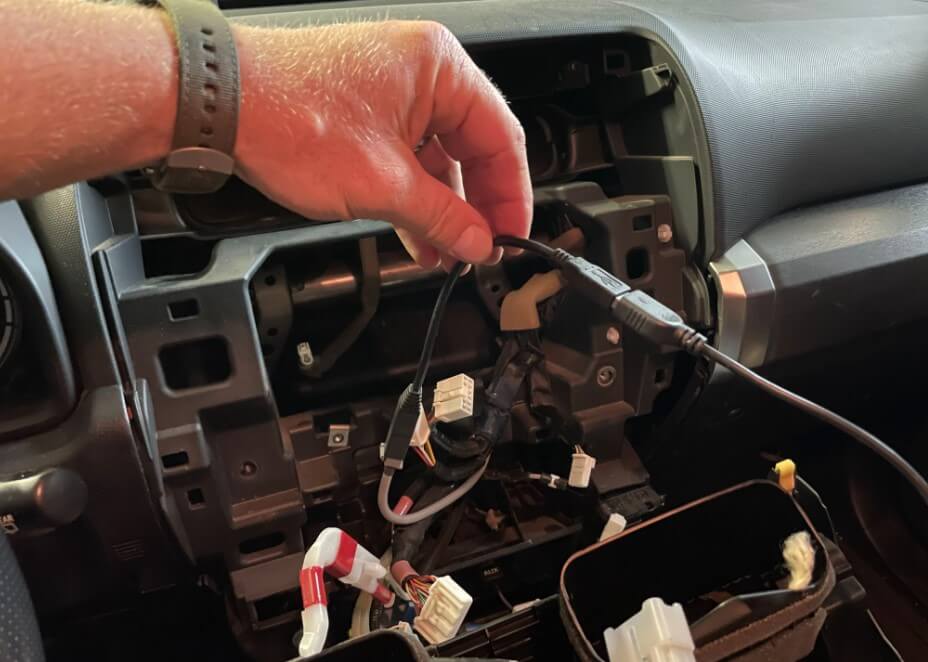
33. Plug in the provided USB adapter to the gray connector in the car.
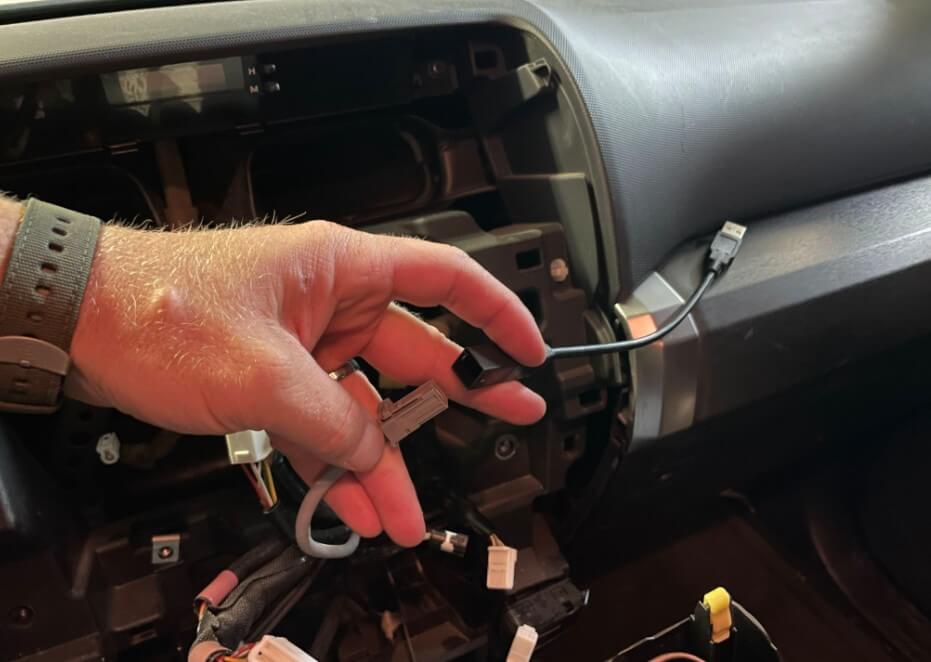
34. Plug in the head unit USB cable into the other side of the adapter. This allows the use of the Factory USB plug.
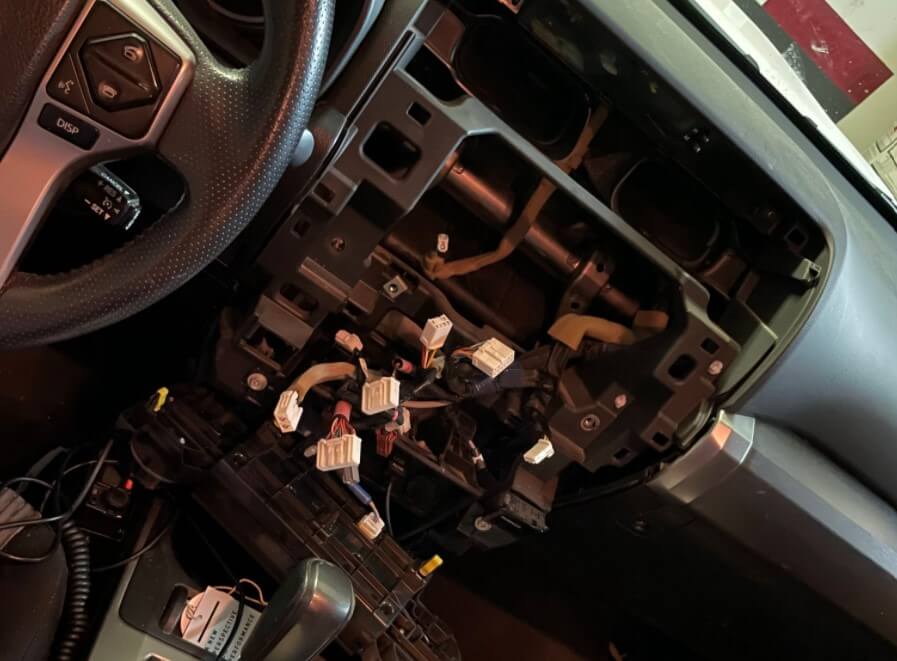
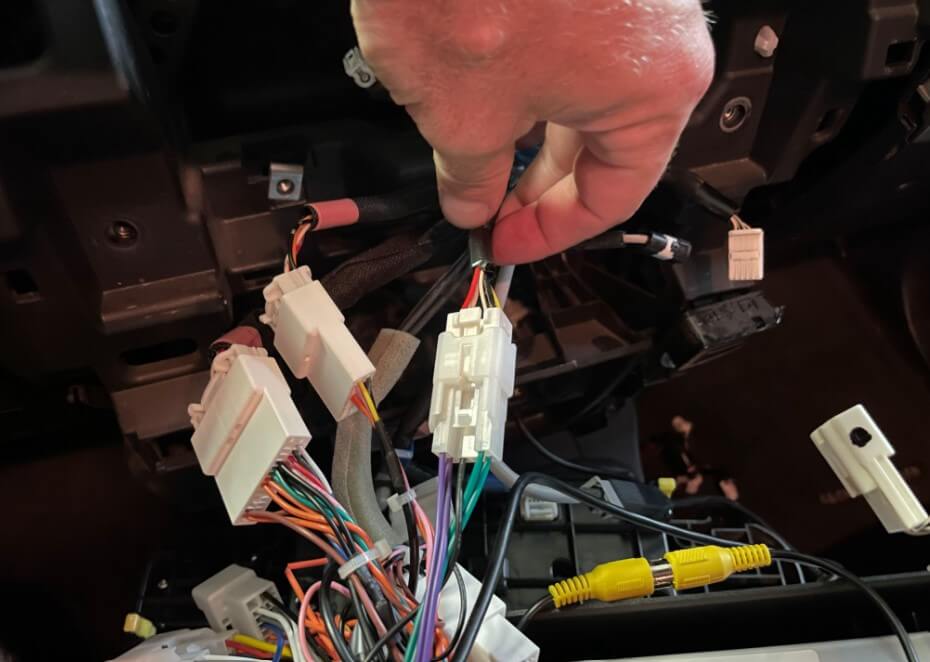
35. Start plugging in the rest of the connectors, I started working my way left to right on the car-side connectors. They all have unique plugs, so you can’t really mess it up. There will be a few on the car-side that are not used (they were antenna type in our case). This one was the radio connector
36. Not sure what this one is, but plug it into the plug that fits.
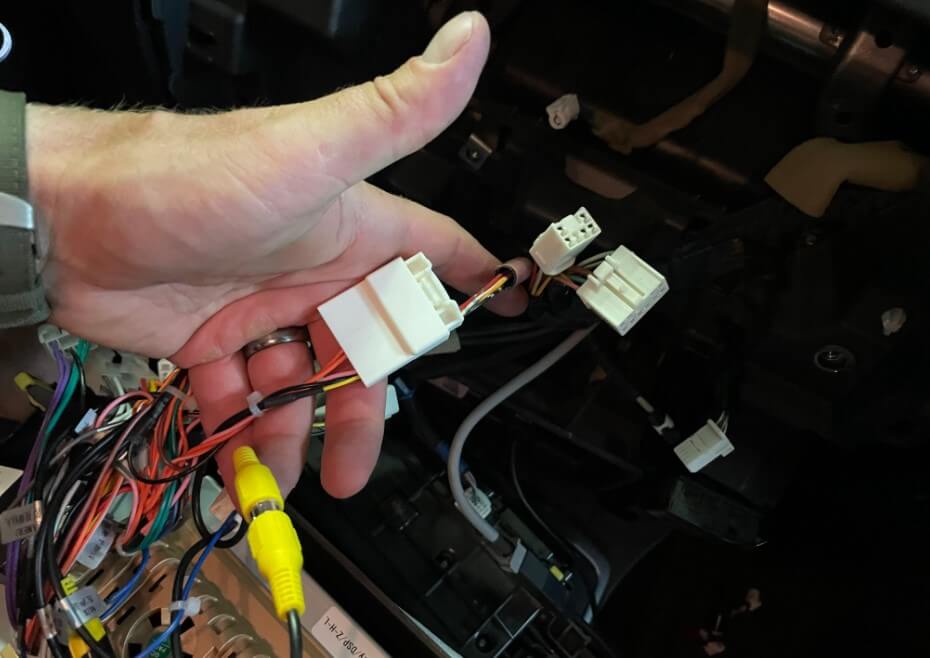
37. Reverse camera harness. This is where you need to verify that the yellow connector you plugged in earlier goes to the plug that then connects to the car. If your car uses the other white plug, then go ahead and swap to the proper yellow connector.
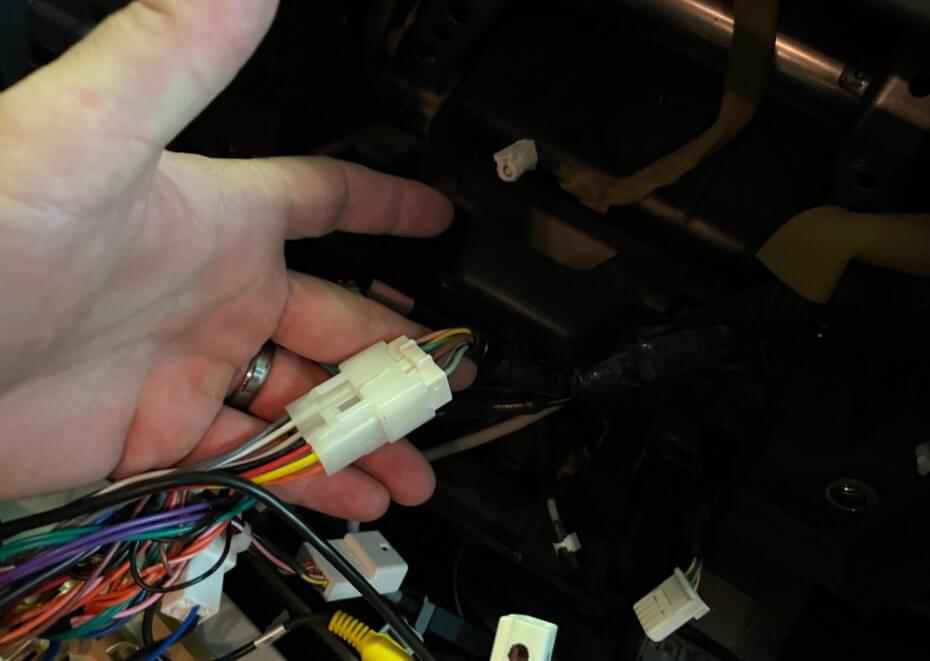
38. Plug in this harness.
39. Plug in this harness as well.
40. Finally plug in the hazard flasher harness.
Power it on!
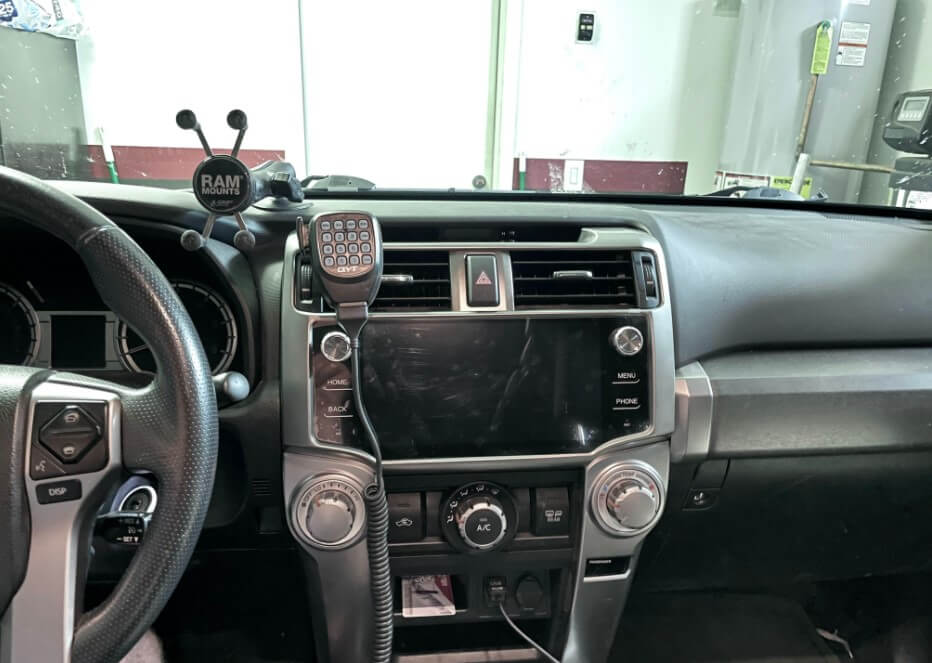
41. Now it is a good time to lightly secure the new unit into the dash clips and turn the car on to make sure everything works before you put all the trim on.
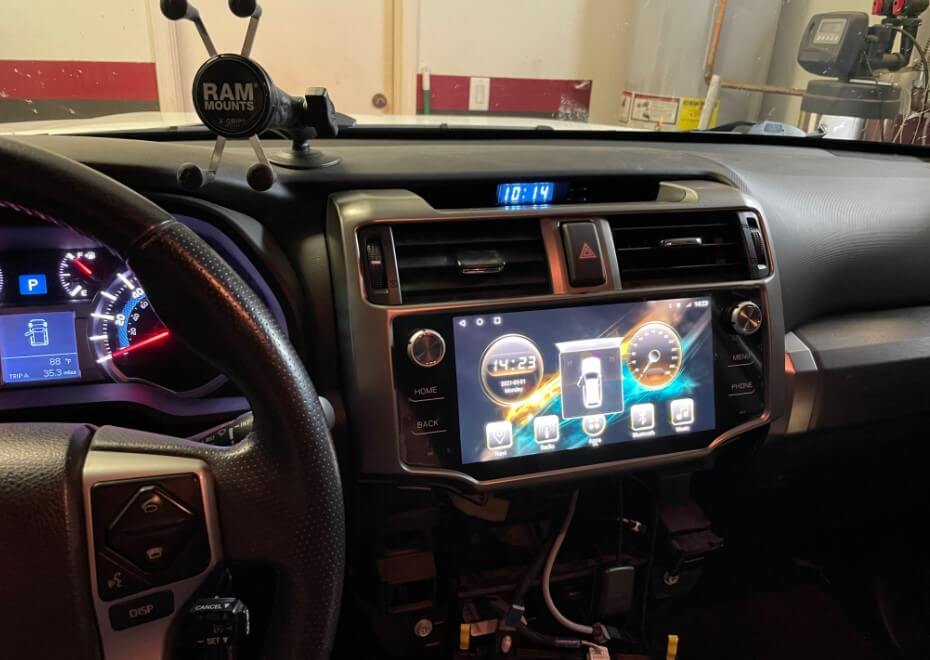
42. Getting Apple CarPlay to work is not initially intuitive. On ours it seems that you have to use Bluetooth for (the USB port works for charging the phone, but the CarPlay interface is through Bluetooth). This is actually kind of nice for off-roading when we often get in and out of the car with our phones for either photos or trail spotting.
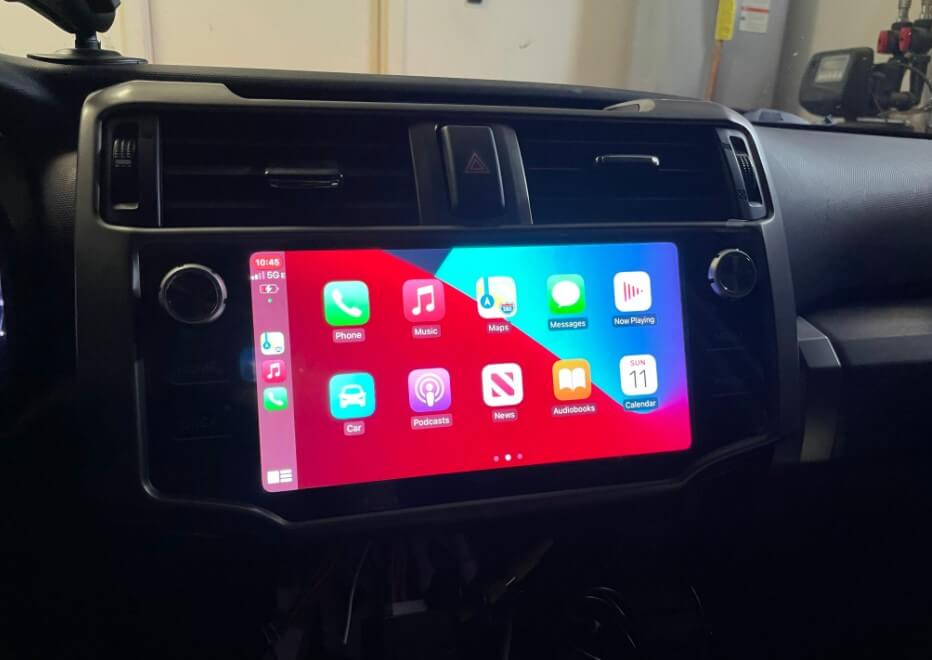
So go ahead and go to the Bluetooth icon, then press the pair button (looks like tow plugs) and go into your phone settings and wait for the unit to appear in Bluetooth devices. The factory code on the unit was 0000 for us. Looks like you can change it in one of the settings menus if you’d like.
Once bluetooth is linked (you only have to pair it once, from now it it will do it automatically), press the “Apps” button, and scroll to the right and find the app called “TLink”. Press that, and it should start connecting (may take 15-20 seconds). I went ahead and changed settings to automatically connect, but it seems that you may still have to launch the Tlink app when you start the car to turn on Apple CarPlay. Once it connects, the CarPlay app works just as well as any other car play we have used. You can exit out of the app and go to the Home screen without having to reconnect the CarPlay in the future. (I assume that Android Auto would be a similar process, but we’re iPhone people I’m not sure)
43. Now test your reverse camera, but putting the car in reverse (make sure to have parking brake on just in case you get distracted). Chances are, if you are in the United States you will have the same problem as us and the video will look all jumbled and scrambled. Don’t worry, its an easy fix.
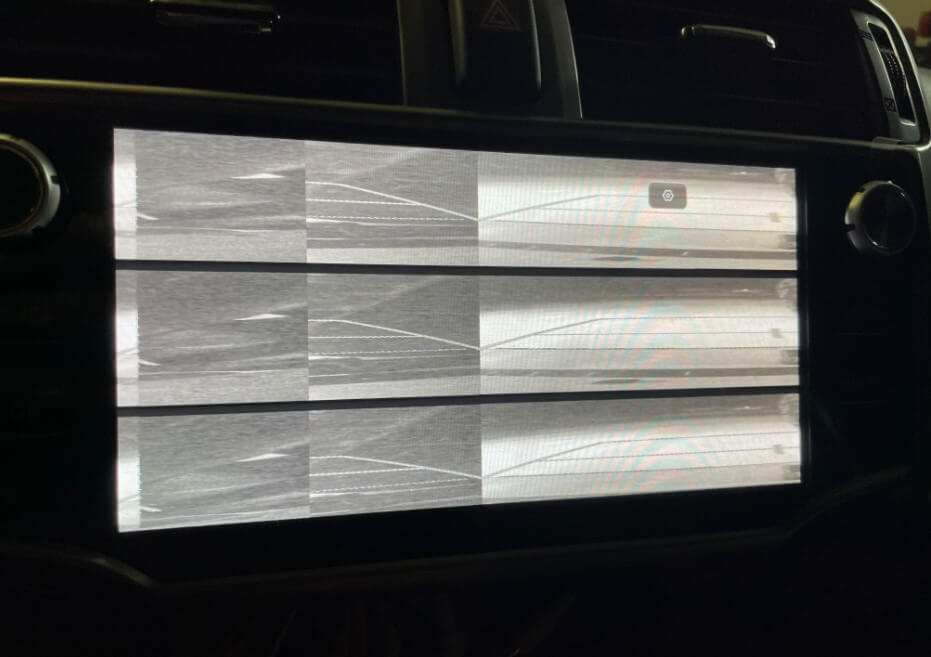
44. While still in revers, press the settings gear icon
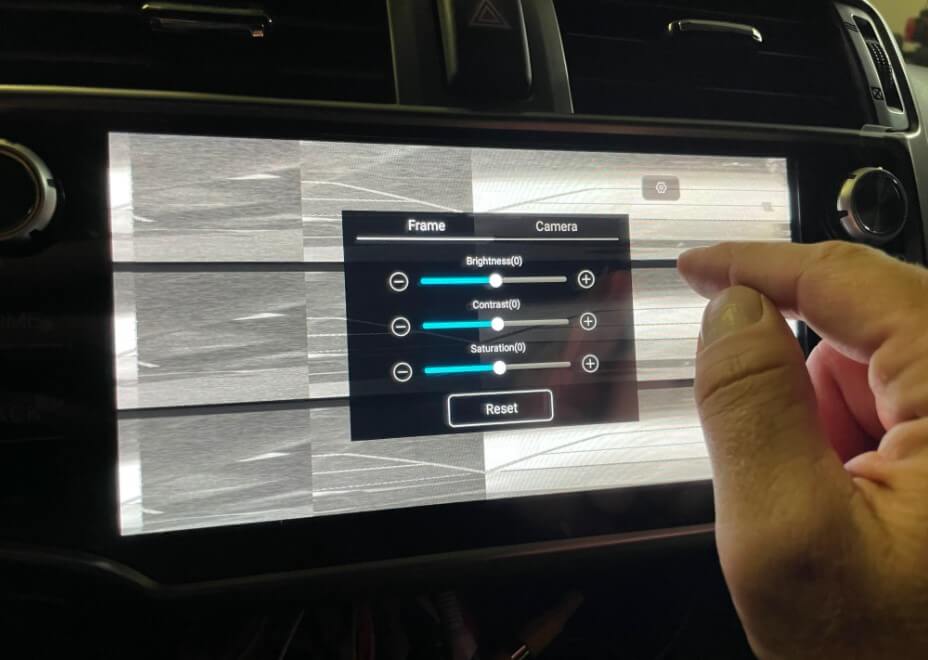
45. Go into the “Camera” tab
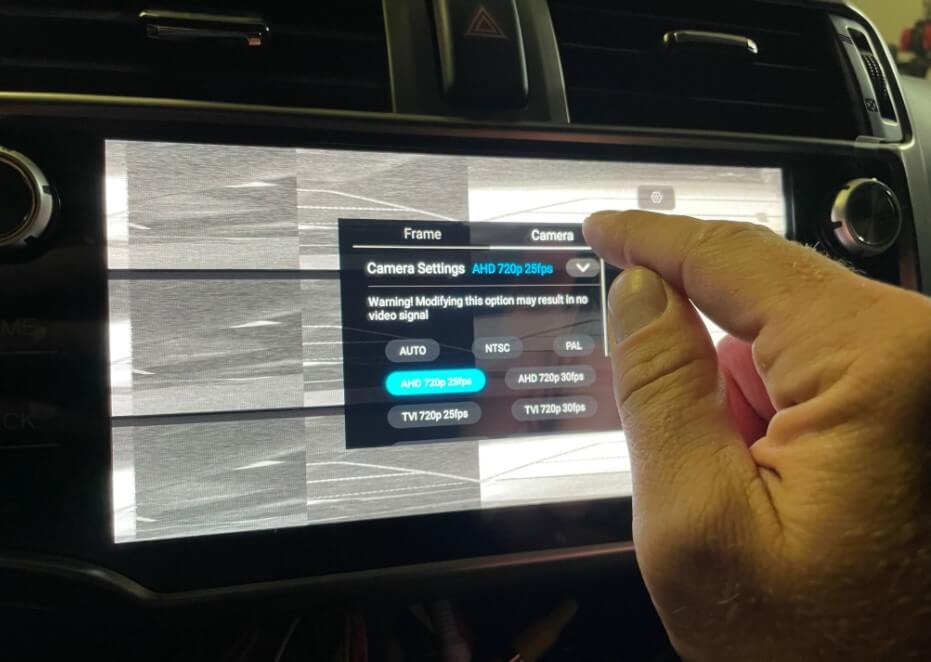
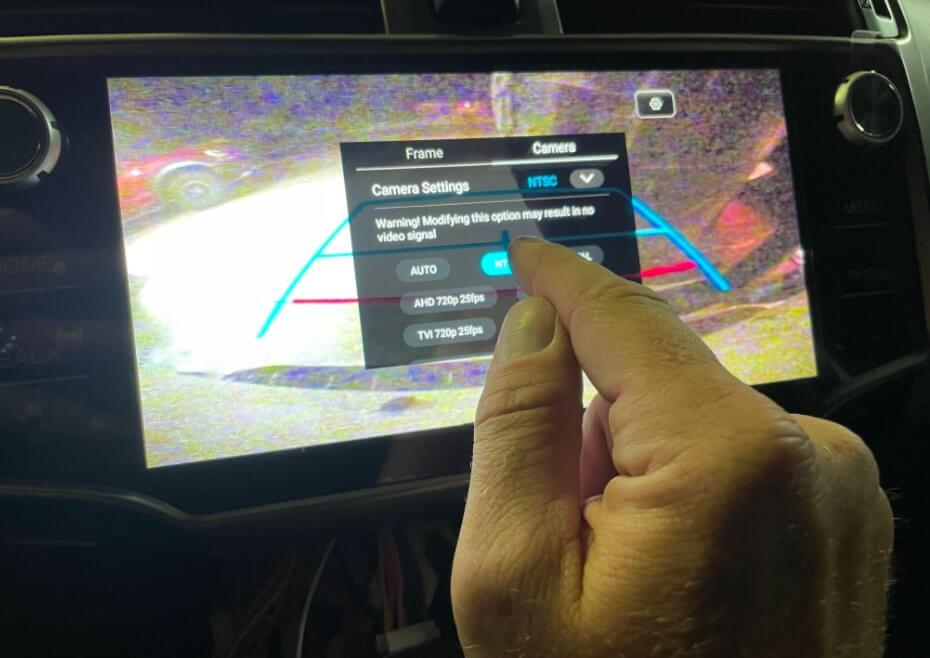
46. Press the “NTSC” button. This is the standard video format to the US, (Europe uses PAL). This did the trick for us, and now the camera works just as well as the OEM.
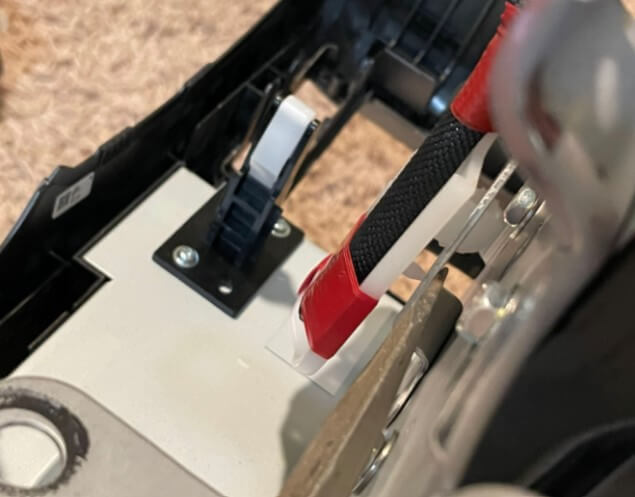
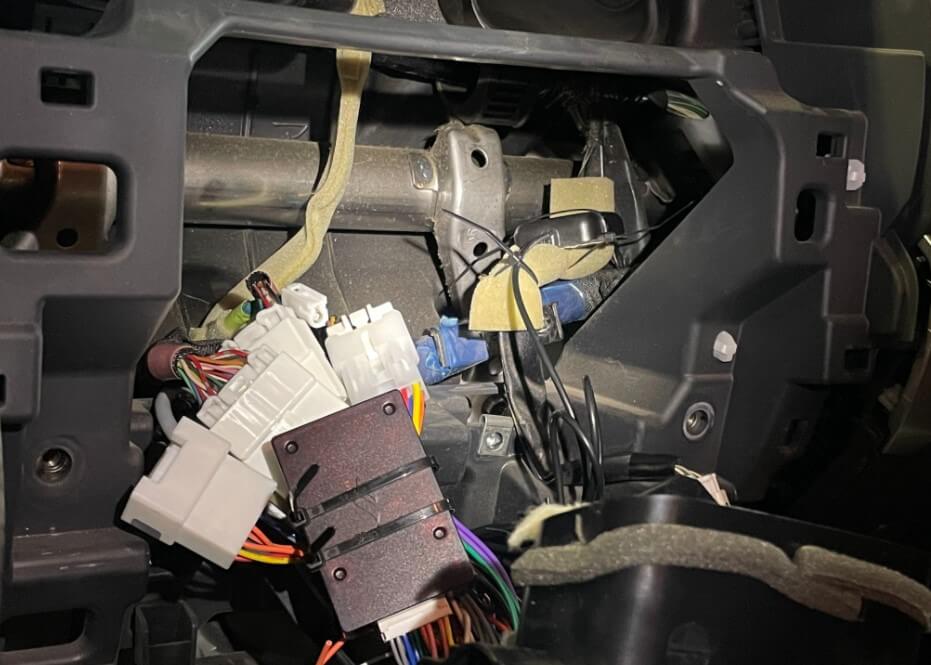
47. You can now turn off the car, and pull the unit back out. Since we do a lot of rough off-road trails, I zip-tied all the bundles together to keep them from rattling around too much. Specifically, I made sure that the CAN BUS module is securely tied down since that is a critical component. You can also see that I just zip-tied the GPS antenna to the top of the flasher switch harness. Not sure if this will cause GPS inaccuracy, but we will mainly be using the iPhone GPS so this antenna will just provide the unit with accurate GPS time. You are welcome to run the antenna wherever you wish, best performance will probably be on top of the dash so there is no metal structure above it. (so far ours has been working just fine in the Android Google Maps app on the unit without the phone plugged in as well)
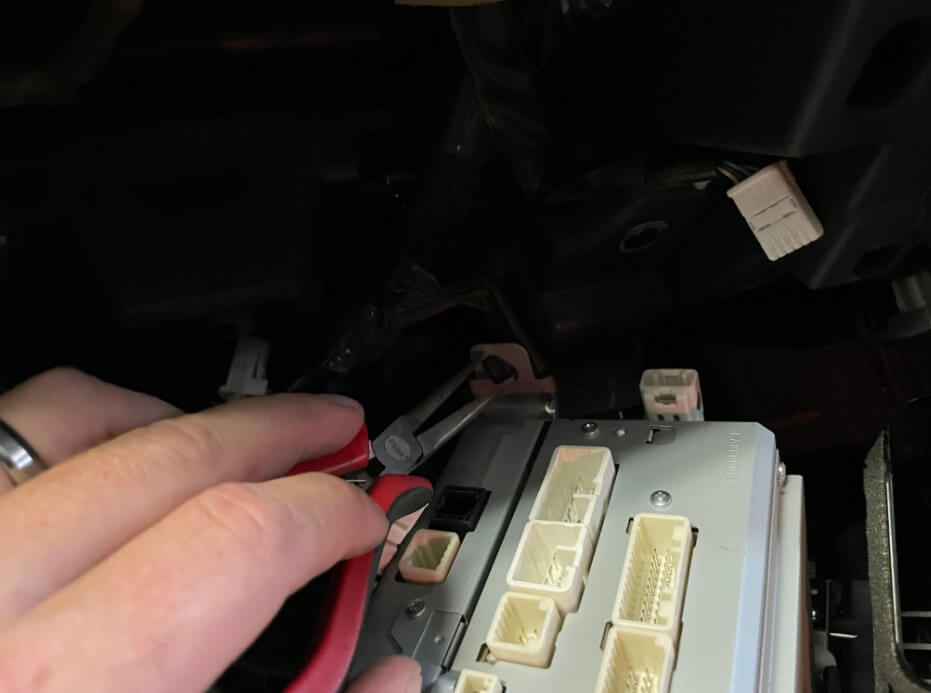
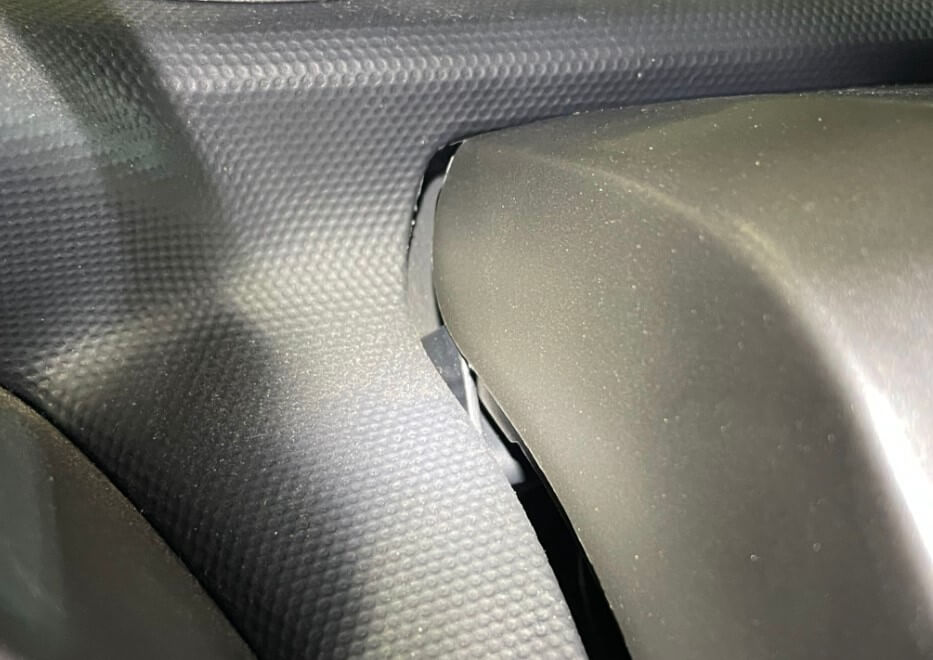
48. Now carefully tuck the wire back and fully clip in the unit with the 6 yellow/white clips you transferred earlier. The T10 unit is much lighter and smaller, so it does not need the 4X 10mm bolts. This was another spot where the Chinese quality showed itself slightly, the plastic bezel was slightly narrower than the guides on the OEM dash, so I go the right side clipped in, and then had to push the unit left while pushing on that plastic clip with a screw driver to get the plastic to fully seat and allow all 6 clips to engage. Use a flashlight to verify it is fully seated, so that the thing doesn’t fall out on a speedbump.
49. Install the climate control knob module by just clipping it in, do the same for the left and right trim panels. And you are done!
NOTE: the plastic film protecting the screen is rather strong, and does not tear easily. I was worried that pulling too hard could break off the two knobs, so I just peeled it back slightly and snipped the edge with scissors to tear the film around the knobs.
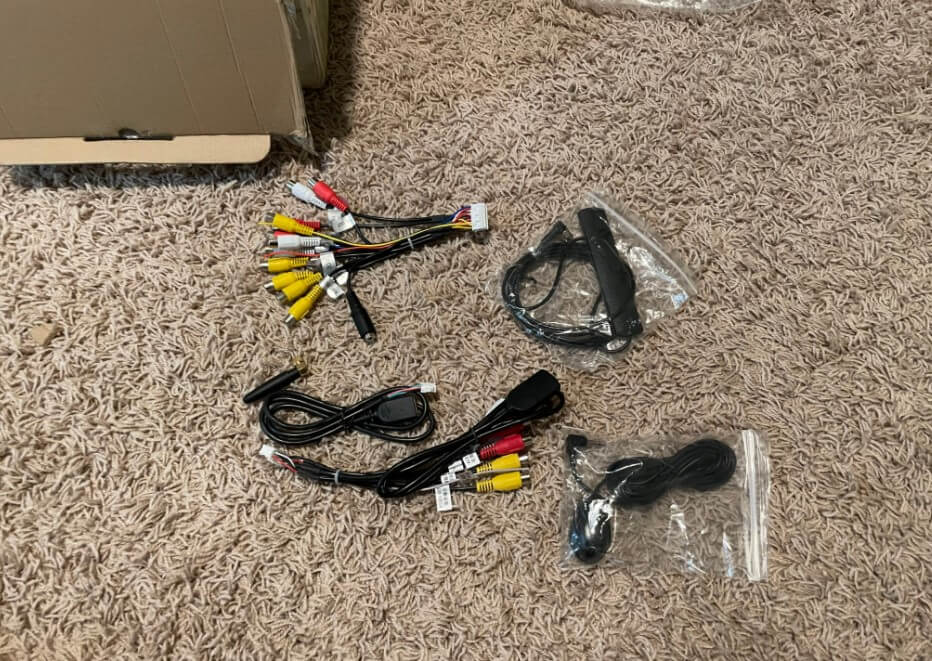
50. These are the harnesses that we had leftover. Depending on what you decided to plug in, your pile may look different.
Hope this install guide helps if you are looking to make the same upgrade!
June 1, 2021 at 10:13 am
Looks like an amazing upgrade and install guide! Did you buy any add-ons or does everything you need come with the T10 unit?
June 13, 2021 at 9:41 pm
We just selected the “free apple car play” option, which seems to allow the wireless carplay via bluetooth… however, I have not figured out how to get it to work through USB… maybe that is a different option?
January 8, 2022 at 12:10 pm
How long did it take to come in via Rhino Radios? Trying to see about their customer service and not sure if I trust how long it’ll take to come in.
Thanks.
January 10, 2022 at 11:31 am
it was a pretty typical roughly 5-day shipping scenario… thought it was reasonable.
February 16, 2022 at 9:34 am
How’s it holding up
March 4, 2022 at 8:32 am
So far so good. Every now and then the reverse camera won’t trigger, so just pop it in neutral and then back in reverse and it turns on on the second try.
June 19, 2021 at 1:40 am
How does it sound playing music?
July 2, 2021 at 10:25 am
The sound is great when playing from the Apple CarPlay app, full richness and depth as I would expect. I do feel that the sound from just the FM radio is a bit more flat, but not too bad.
June 29, 2021 at 8:21 am
Great article! Your pics and detailed steps helped a lot with my 2016 4Runner installation. I am very happy with the T10 head unit. It is far better than the factory navigation head unit. I configured the T10 T-link app to connect my iPhone. I ran into a few problems. The first was the microphone because it was too low. Rhino Radios provided an external microphone so I installed it. Next, I plugged the external mic into the T10 cable labeled “Aux In” which is found with in bundle of RCA cables. Afterward, I had to use the T10 Bluetooth app, Settings, to change the input to “Max”. I had to play around with it because the Setting kept reverting back to “Low”. I’m not sure what I did exactly but I finally was able to make the Setting stay on “Max”. This resolved my mic problem. The next problem is a warning popup. The popup appears every time I start the vehicle and whenever I put it in reserve gear and back to drive. The popup says the sensor on my driver’s side bumper indicates an obstruction. I contacted Rhino Radios who directed me to use a paperclip on the RST hole on the bottom right corner of the T10 head unit. I did this but the problem still occurs. If you ran into this problem and found a solution, please pass it along. Much appreciated. Worse case, I just live with dismissing the popup every time I start my car. No biggie. Thanks
July 2, 2021 at 10:23 am
Hi Jeff,
Thanks for sharing your solution to the microphone, ours is a bit quiet bit bearable. I may try doing what you did in the settings without buying a mic first. Our 4runner does not have sensors in the bumper, just the camera, so we have not run into any of the problems you seem to have with the proximity sensors, but if you do come up with a solution, please comment back on here, as it may help others out too. Thanks for taking the time to share your experience!
November 14, 2021 at 8:31 am
I went to the Rhino page to order a deck and there’s options to add a bunch of accessories. Do I have to add everything like the back up cam, CarPlay etc, go get a functioning deck? I have a 2014 sr5 .
December 9, 2021 at 12:33 pm
We didn’t, we just got the apple Carplay option, but i’m not sure if is even being used since we connect to it through bluetooth.
August 21, 2021 at 10:47 pm
It’s a setting in the headunit 🙂 once you get it right . The proximity sensor will go away. IF rhino has not sent you the wrong canbus and or a refurb
July 6, 2021 at 12:03 pm
Does SR5 come with the harness to be connected to the can bus module.
Does vehicle info such doors, tpms, steering angle … Visible on the unit if being installed on SR5
I appreciate if you please share focused pictures of the harness connected to the can bus from both sides
Thanks
July 6, 2021 at 12:24 pm
Hi Abdullah, our 4Runner is the SR5 trim, so you would have our exact setup. Yes, it connects into the Canbus connector/module just fine. The head unit shows when doors are opened, and when you adjust the climate control knobs. I don’t have any more specific photos of the connectors, and the dash is all closed up, so not sure i’ll have a chance to take photos of them anytime soon, but ours plugged in just fine. Hope this helps.
July 9, 2021 at 7:27 pm
Thanks for the install tips. When I power my 4Runner on, a seat heaters screen pops up and will not go away. It prevents me from using most of the functions on the screen. Any suggestions?
July 19, 2021 at 7:50 am
Robert, the seat heater inputs etc are displayed through the CANBUS module, try unplugging it and powering on the system, see if that goes away. If so, then i’d say you may want to reach out and ask for a replacement module. if it is still showing the seat heater controls, then it is something else in software or other wiring.
July 22, 2021 at 2:29 pm
Any idea what the factory reset code is?
July 22, 2021 at 3:22 pm
I do not, but if you find one that works would be good to know just in case, please post up. maybe try some of these: https://android-headunits.com/pin-codes-for-android-headunit/
August 21, 2021 at 10:49 pm
7890
August 3, 2021 at 7:53 pm
Love the Tutorial! I got the T10 and your tutorial made it so easy!
I am having a problem though and was curious if you(or anyone reading this) has had the same issue.
When I use the CarPlay, audio only plays from the front speakers (no rear passenger or tailgate). Have you experienced this? If so, do you have a fix?
I switched to FM radio and all speakers worked as well as the DSP sound manager app.
Thanks!
August 23, 2021 at 7:37 am
Timothy, that’s strange. since it works from the Radio, I would assume that all the connections are good in the back of the unit. Are you using the T-link bluetooth connection to Carplay? Maybe there’s a carplay specific setting that controls speaker output? I have noticed that the audio quality through Carplay is a lot better than the radio, so there’s clearly some difference in how they work, ours comes out fine on all speakers in both scenarios though.
August 30, 2021 at 4:35 pm
Hi. I just installed the T10 unit in my 2012 4runner. I am experiencing the same problem with the speakers. Have you figured it out yet?
October 6, 2021 at 12:22 pm
Would you happen to know if these will work for the 2010-2013 models? I have a 2013 SR5 model.
October 6, 2021 at 9:59 pm
Eric, my guess is that some of the connectors may be different on that, and possibly the plastic bezel… I’m really not sure on it, maybe reach out to the head unit manufacture, I’ve heard they have great customer service?
October 11, 2021 at 10:23 pm
https://rrcs.zendesk.com/hc/en-us/articles/360057935111-4Runner-2010-2019-Installation-Instruction
Follow the info that rhino radios sent and it tells you to how configure you’re unit to match triune vehicle so the obstruction front sensor and seat warmer settings go away .
May 13, 2022 at 1:11 pm
How do you do software updates? How would you know if it is up to date?
Does the OEM USB plug, grey one, adapt to this unit so the USB/AUX works?
January 5, 2023 at 9:20 am
We used wifi in the garage to do the initial updates, and haven’t done any since (if it works, don’s mess with it is my thought). the USB plug is supposed to work, but not sure it does on ours… it powers and charges, but the carplay works through bluetooth connection.
May 14, 2022 at 10:21 am
How do you get adnroid auto to play on this system? Do you have to have the android auto dongle plugged into USB? Or, is this unit designed to where easy connect app is supposed to connect your phone to the head unit via usb?
January 5, 2023 at 9:17 am
I’m not sure on android auto, we only use apple car play and haven’t tested with an android
September 4, 2022 at 11:50 pm
How is your microphone holding up? I’ve tried internal and external and people say there is either a long delay or underwater sound.
January 5, 2023 at 8:57 am
the mic was never too good, but it works same as when we got it.
December 6, 2022 at 6:07 pm
With this unit, do the controls on the steering wheel work?
January 5, 2023 at 8:32 am
Yes they do, all like factory.
January 8, 2023 at 8:06 pm
Can I purchase the Wiring harness separately? I have the head unit but I can’t find the wires 🙁
January 9, 2023 at 9:54 am
I have not looked, but I would start on e-bay? or email the company and ask about harnesses for the kit.