
SCROLL DOWN FOR CALCULATOR
With all the rough terrain that we’ve been driving though lately, the $99 alignments were starting to add up. In our past life, we used to do string alignments on our race cars. (Keep in mind that this only adjusts the toe settings, camber can be done with a simple digital level, and caster r measurements are easiest with a caster tool)
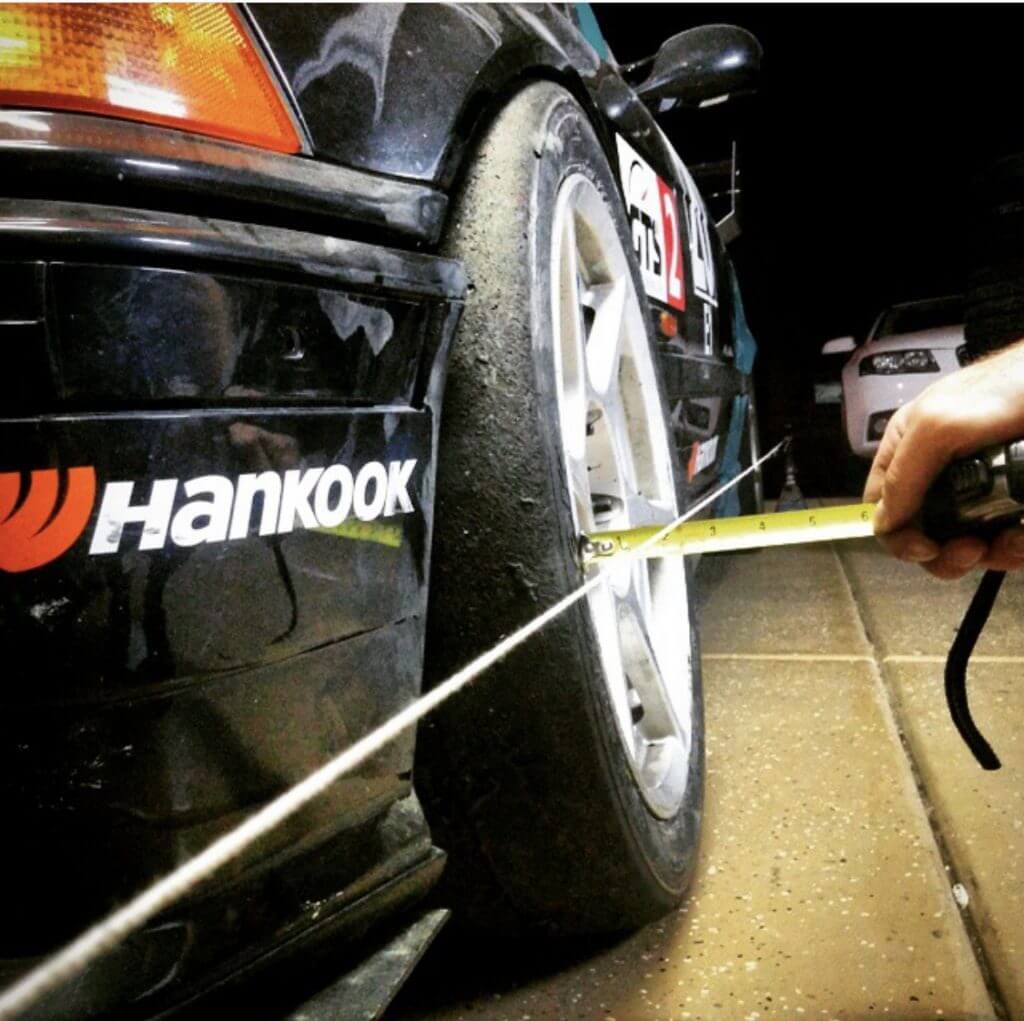
This method is very effective, and is quite economical, however it always took a good bit of time to get the strings perfectly parallel and lined up with the car. Toe plates were a common solution with race cars, but in the offroad world we felt that the nubby tires could negatively affect the readings. There are some options where a pre-built string jig can be mounted to the front and back of the car, but in my opinion those are big and cumbersome to store. So we set out to put together an alternate way to accomplish the same thing.
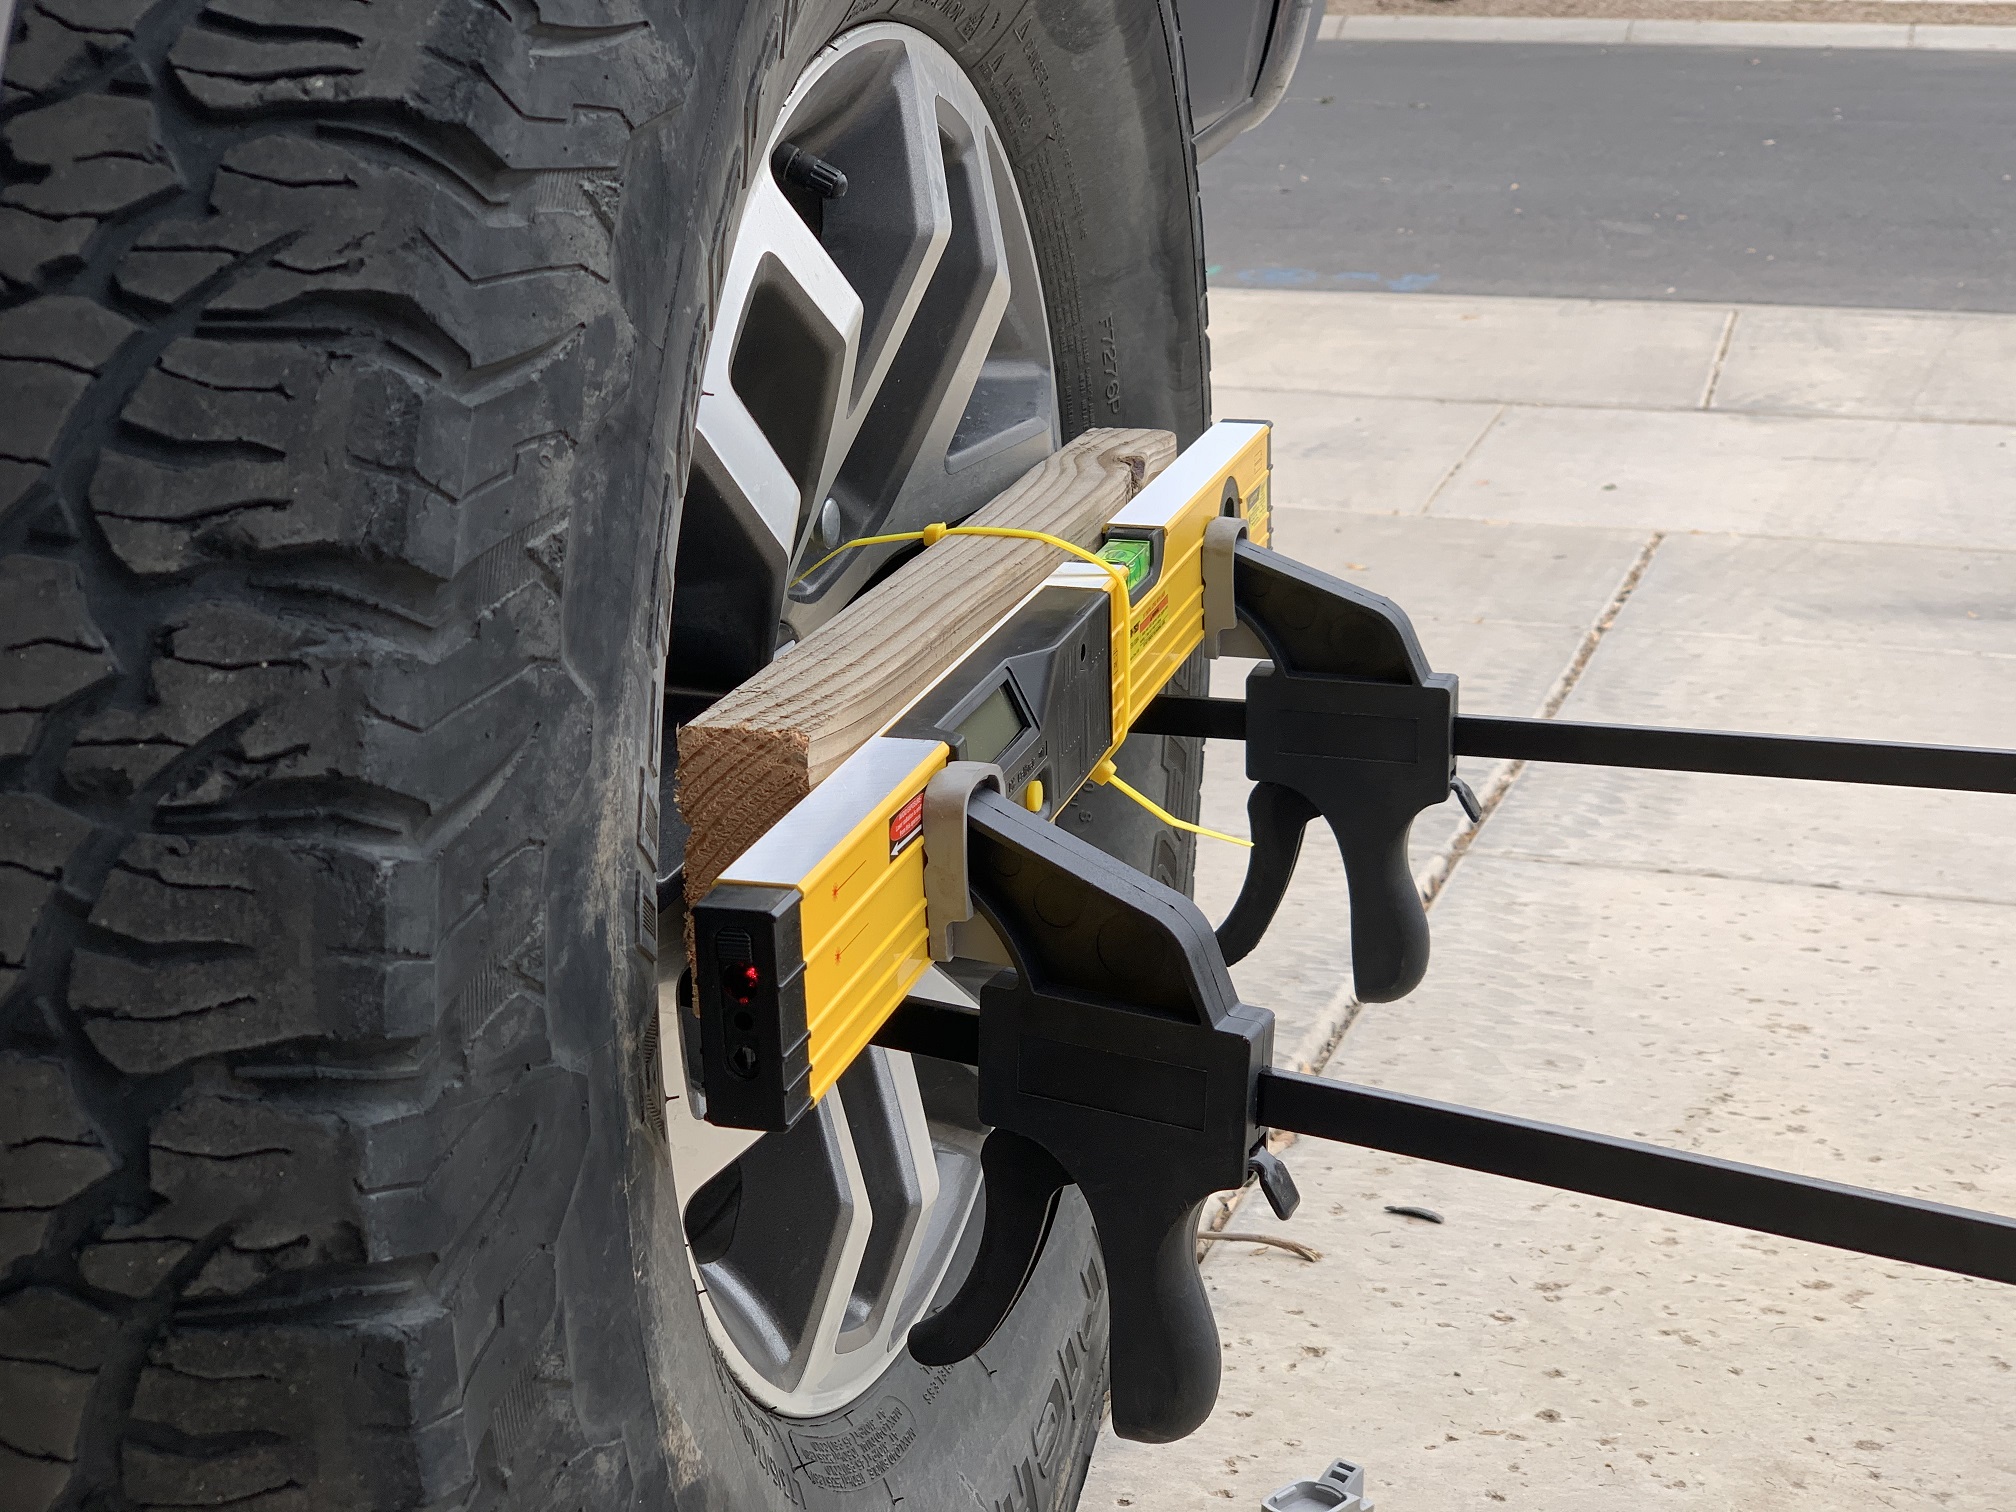
Tools used:
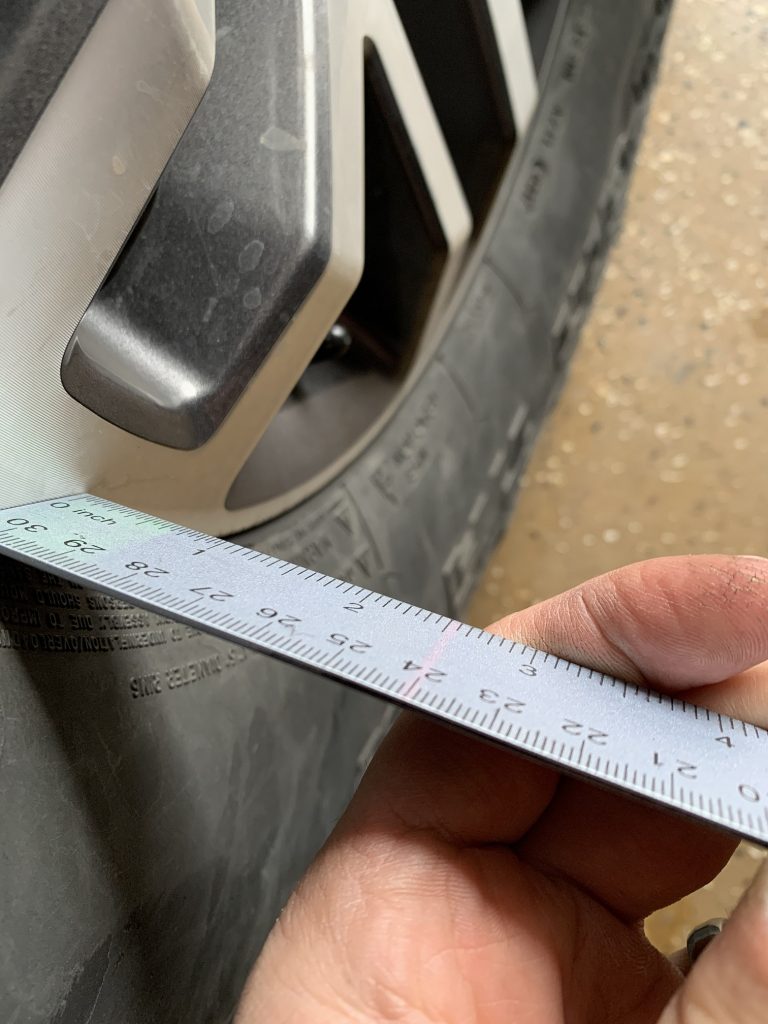
- Standard ruler (lighter colors make it easier)
- 24in laser level from Harbor Freight
- Woodworking clamps
- 2×4
As surprising as it is, the thickness tolerance on a 2×4 is very good, this specific plank measured to within 0.003 inches. The main purpose of the 2×4 is to just offset the level far enough to go around the tire bulge, so anything else you have laying around that is flat and not warped could work too. NOTE: avoid putting the level on the tires, they are “squishy” and will result in completely inaccurate readings if you try to clamp down on them.
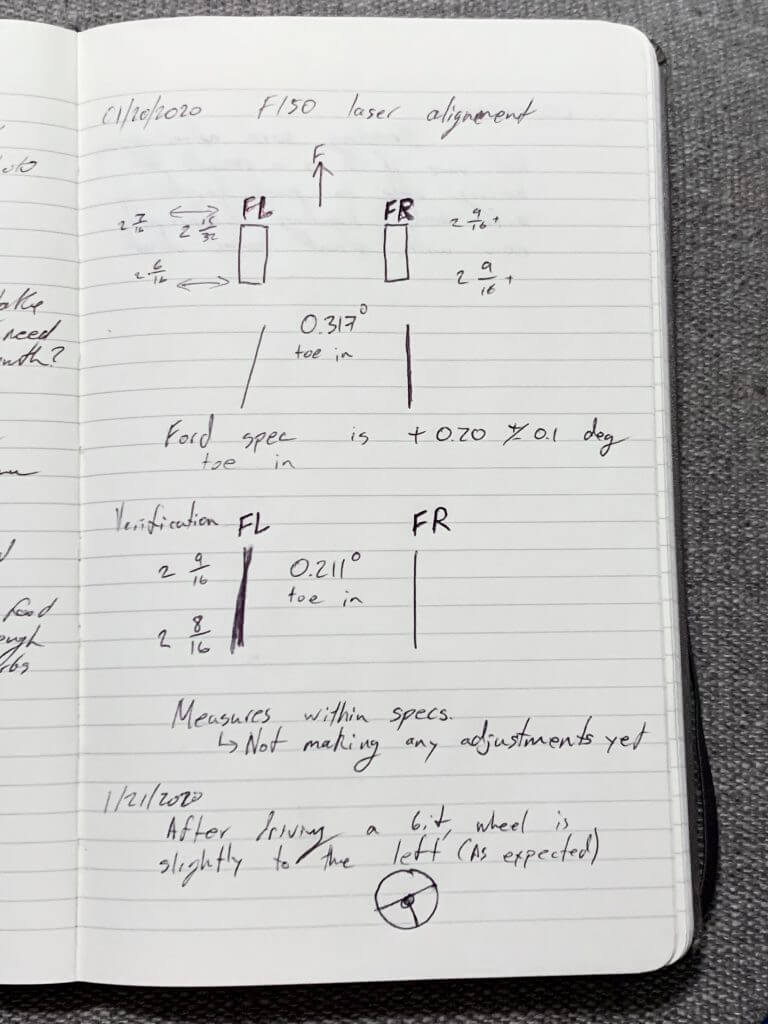
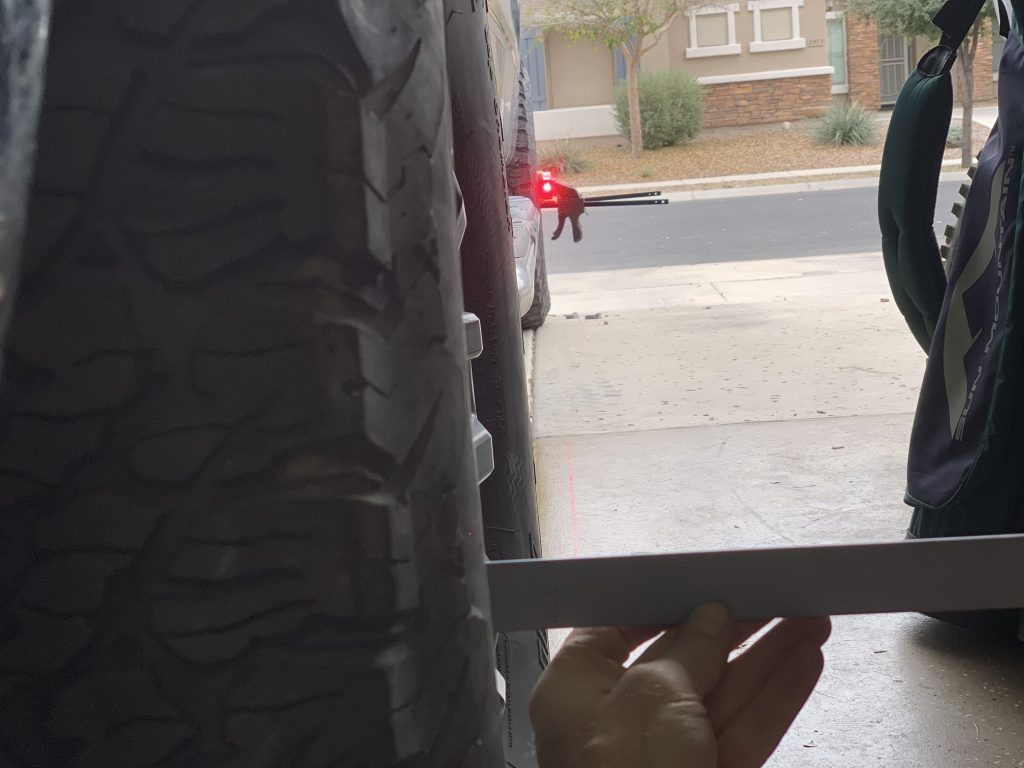
Be sure to make several measurements on each side. If you are willing to spend an extra $60, just get a second laser level so you can measure both sides without having to swap back and forth. You can see in this instance we initially measured a larger toe-in angle than in the following readings. Keep in mind, that with such big tires and OEM rubber control arm bushings, a little bit of toe in is a good thing; as the truck is driving down the road, the castor angle and friction will put some force on the bushings and cause the wheels to want to push out a bit, which will then give you close to zero degrees of toe on the highway and will extend tire life significantly.
NOTE: this is not at all like the race alignment settings that we ran on the track for a car meant to grip through corners. As with everything, it really depends on what you are trying to achieve.
Alignment Calculator
To make things easier for everyone, we’ve put together a quick calculator so that all you have to do is input the measurements as described in the article. You can use inches or mm, just be sure to use the same units in all the input fields. (Positive toe = Toe in, Negative toe = Toe out)
August 21, 2022 at 12:45 am
Hi
I Think that this page calculator is some problem with negative and positive values..
If i put same values in driver and passenger side. one is positive and another is negative values in toe angles
January 5, 2023 at 9:15 am
looks like you are right, have you use negative values for passenger side for it to align