When we started looking for some portable power, there seemed to be plenty of products on the market, but they were all quite costly… The Yeti Goal Zero 1400 power station is $1900! Our thought was that there can’t be much to it (though the Goal Zero does pack in some fancy features like mobile app connectivity and monitoring etc.) In the grand scheme of things, the design very simple, just a battery with a way to connect to it. The important thing is knowing the right type of battery for this application. So, what we have done is put together a complete guide for a DIY power station battery pack system that has the similar power performance as the expensive units, but at a fraction of the cost.
SEE SHOPPING LIST AT THE END
DIY Battery Pack Build
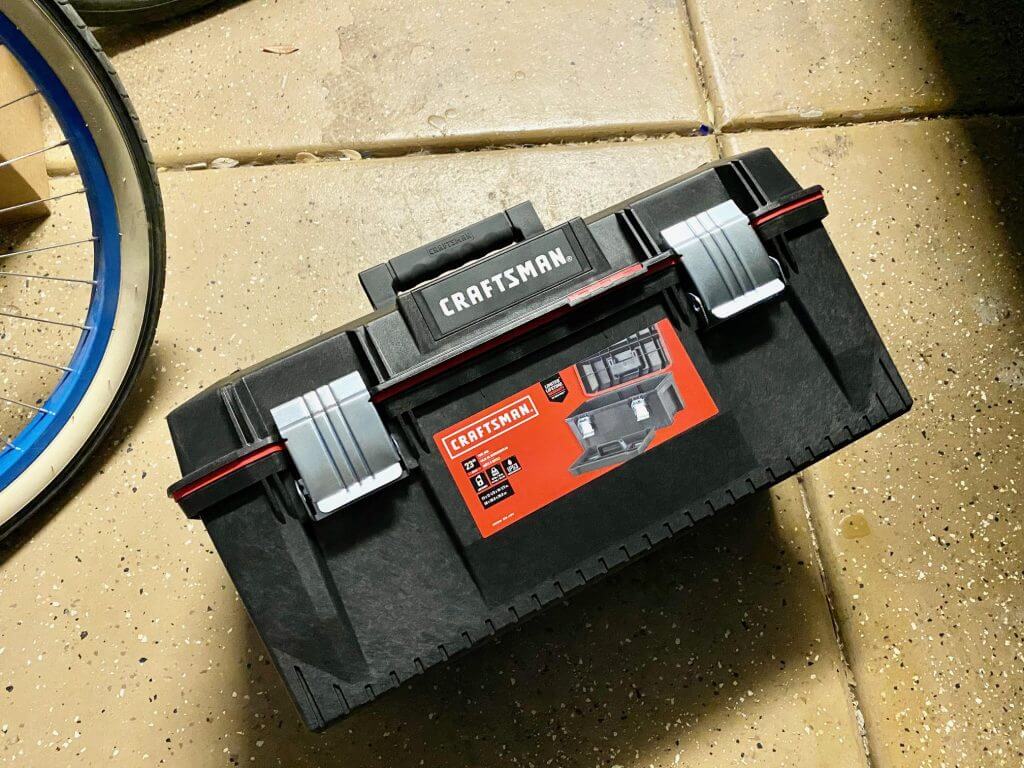
First things first, we started off with the proper sized toolbox. We felt this Craftsman one was big enough, and also structurally sound enough to handle the weight. (Full disclosure, the cheaper battery is HEAVY)
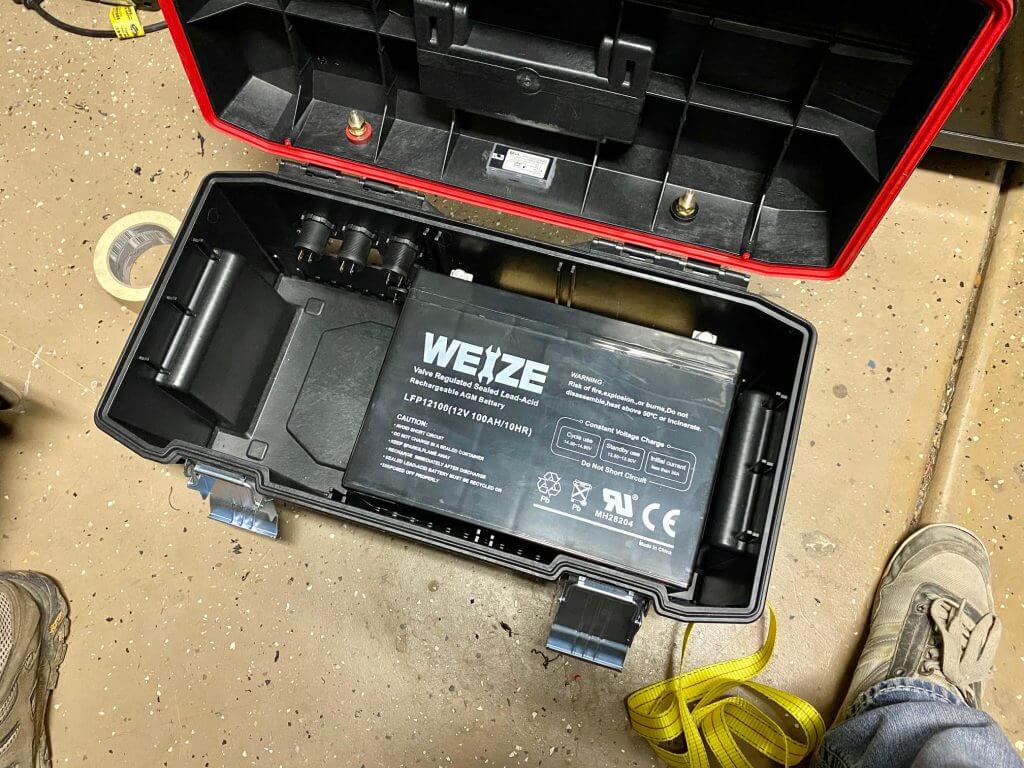
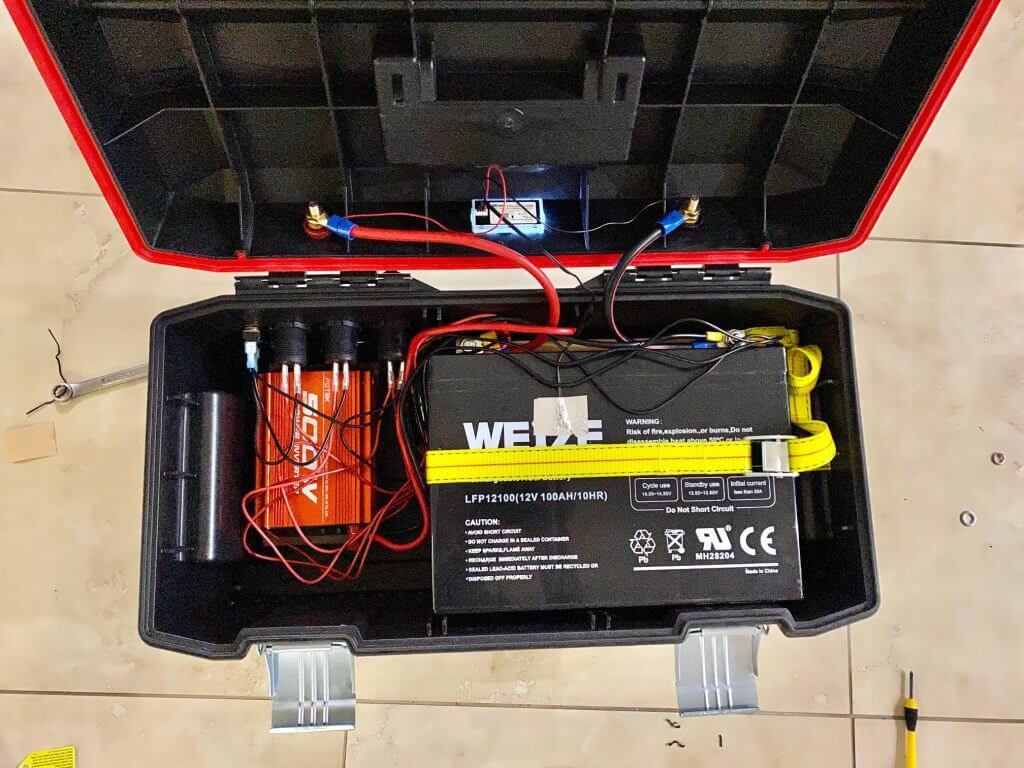
The layout is pretty simple… and the battery will be on one side, so all of the plugs naturally end up on the other.
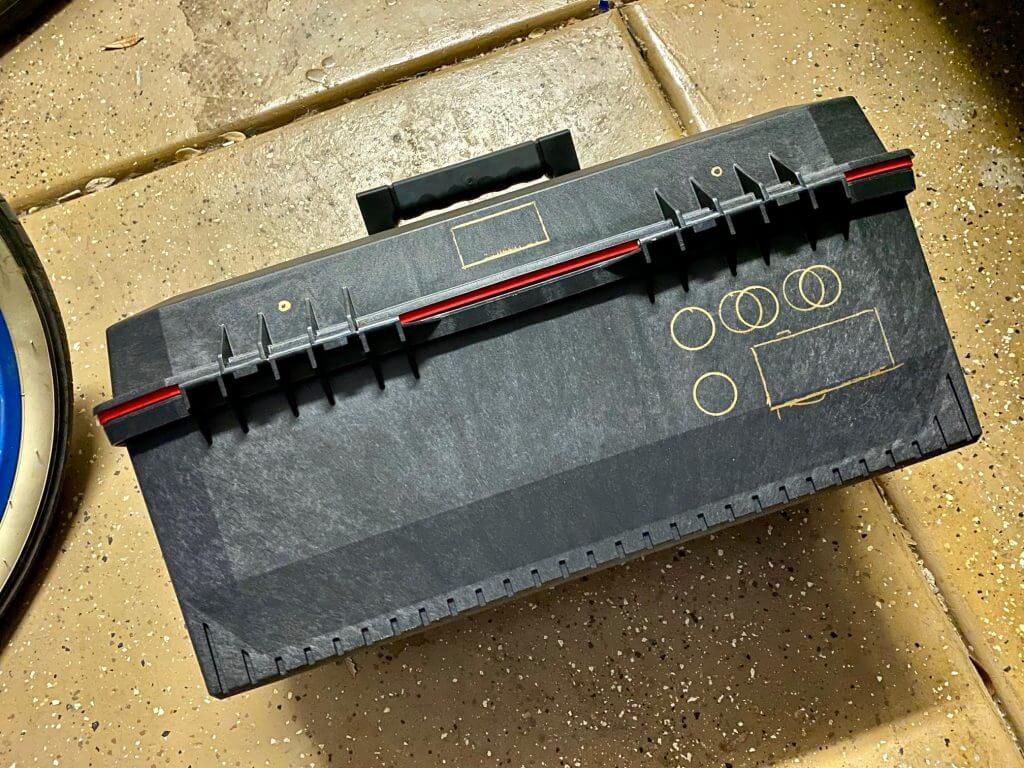
Measure out your plug locations as you wish; we decided to go with this arrangement as it made sense for the plugs and inverter we used.
Next, we picked an inverter that has a conveniently removable face plate, so we were able to unscrew it, and get about 2 extra inches of internal wiring to reach the wall, while having the body of the unit mounted to the floor. In this case, the inverter mounting is nothing fancy, we just took some 2×4’s laying around and bolted the inverter to it, and then screwed the 2×4 to the toolbox through the bottom.
When you look inside, you’ll see that wiring isn’t anything fancy, just bundle it with some zip ties when you are done. As simple as it sounds, to secure the battery we just Dremelled a slot in the bottom and side of the tool box to run the strap though. It works really well, just be mindful of sliding the toolbox around too much as it may wear through the strap eventually.
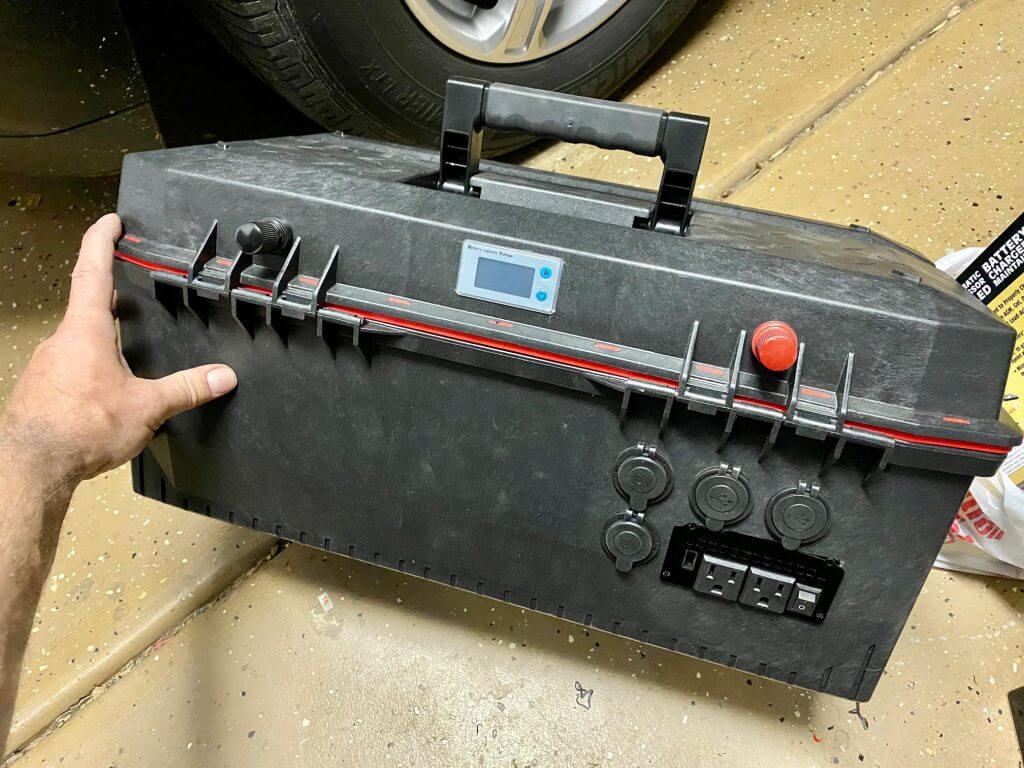
Note that the toggle switch is now installed as well. We used one that is rated for 20A at 120V, which is more than enough to just run the 4x 2 Amp USB plugs though. The Cigarette lighter plugs don’t have LED’s so those don’t need to go through a switch.
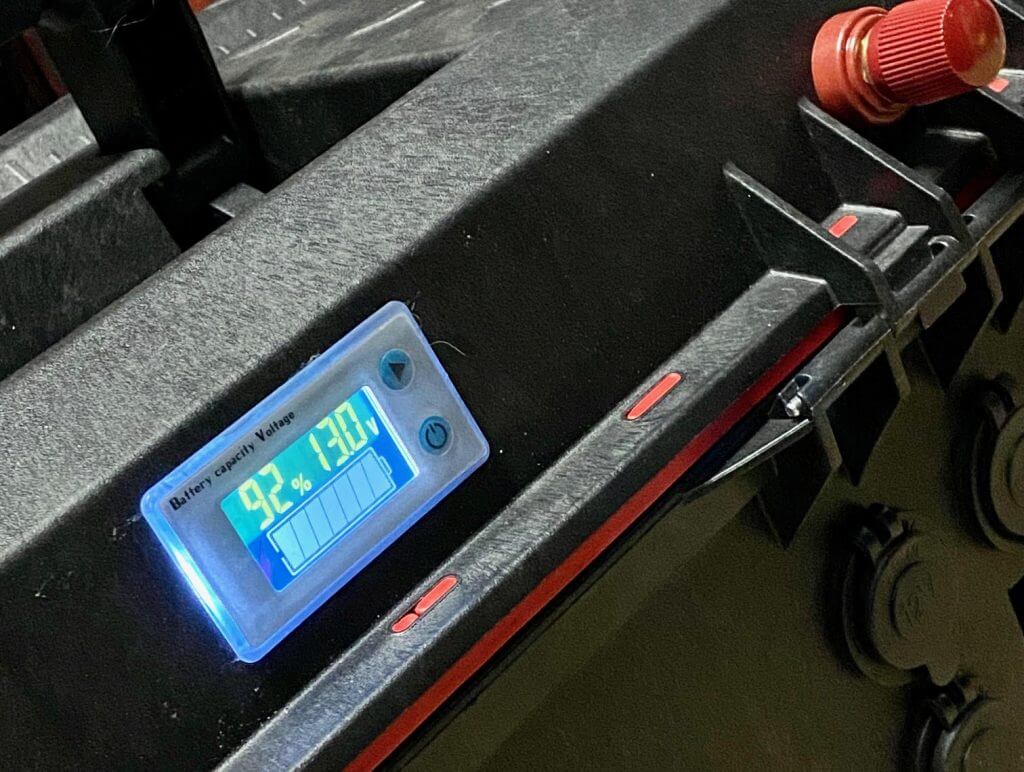
The state of charge meter works pretty well, it has some menu options that let you program it to the type of battery that you have so that the readings are a bit more accurate. It also comes with a thermocouple to display temperature, so make sure to tape it to the battery somewhere, we recommend using aluminum tape.
To charge the battery, just use the AGM battery charger linked in the shopping list (make sure it is set on 12V AGM mode). Because the charging does take a while, so start at least a day before you intend to use it. For charging, we just use the red and black terminal posts, just don’t mix them up!
Below is the State of Charge voltage chart we used to program ours (This is an AGM battery):
| State of Charge | Sealed or Flooded Lead Acid battery voltage | Gel battery voltage | AGM battery voltage |
| 100% | 12.70+ | 12.85+ | 12.80+ |
| 75% | 12.4 | 12.65 | 12.6 |
| 50% | 12.2 | 12.35 | 12.3 |
| 25% | 12 | 12 | 12 |
| 0% | 11.8 | 11.8 | 11.8 |
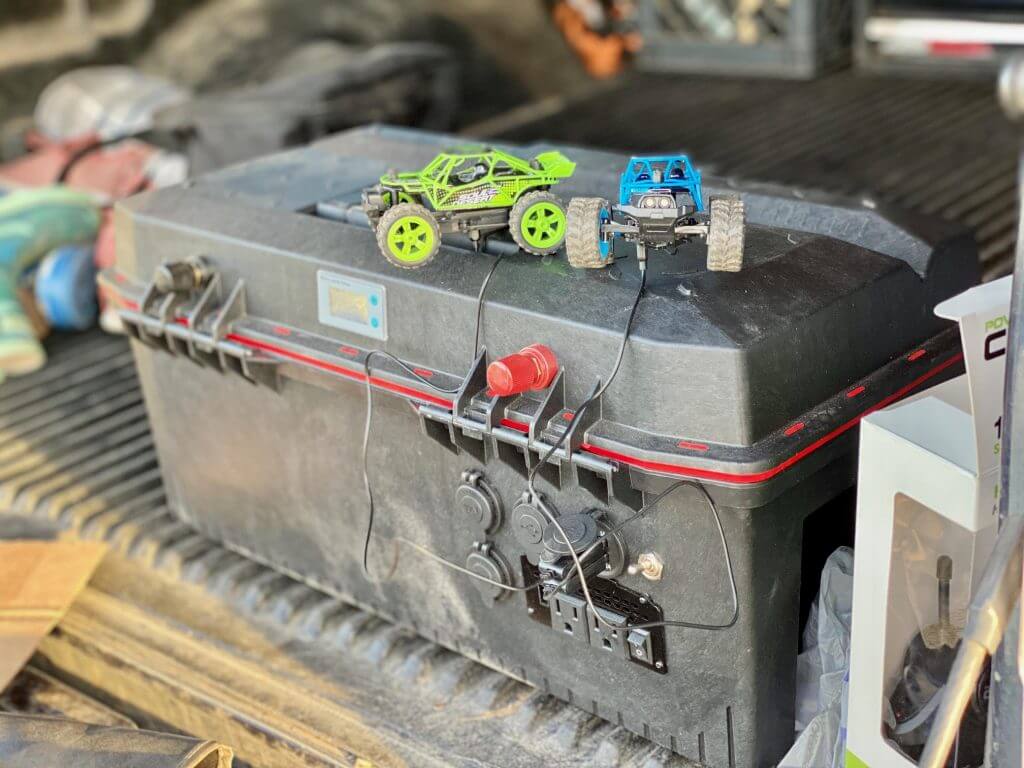
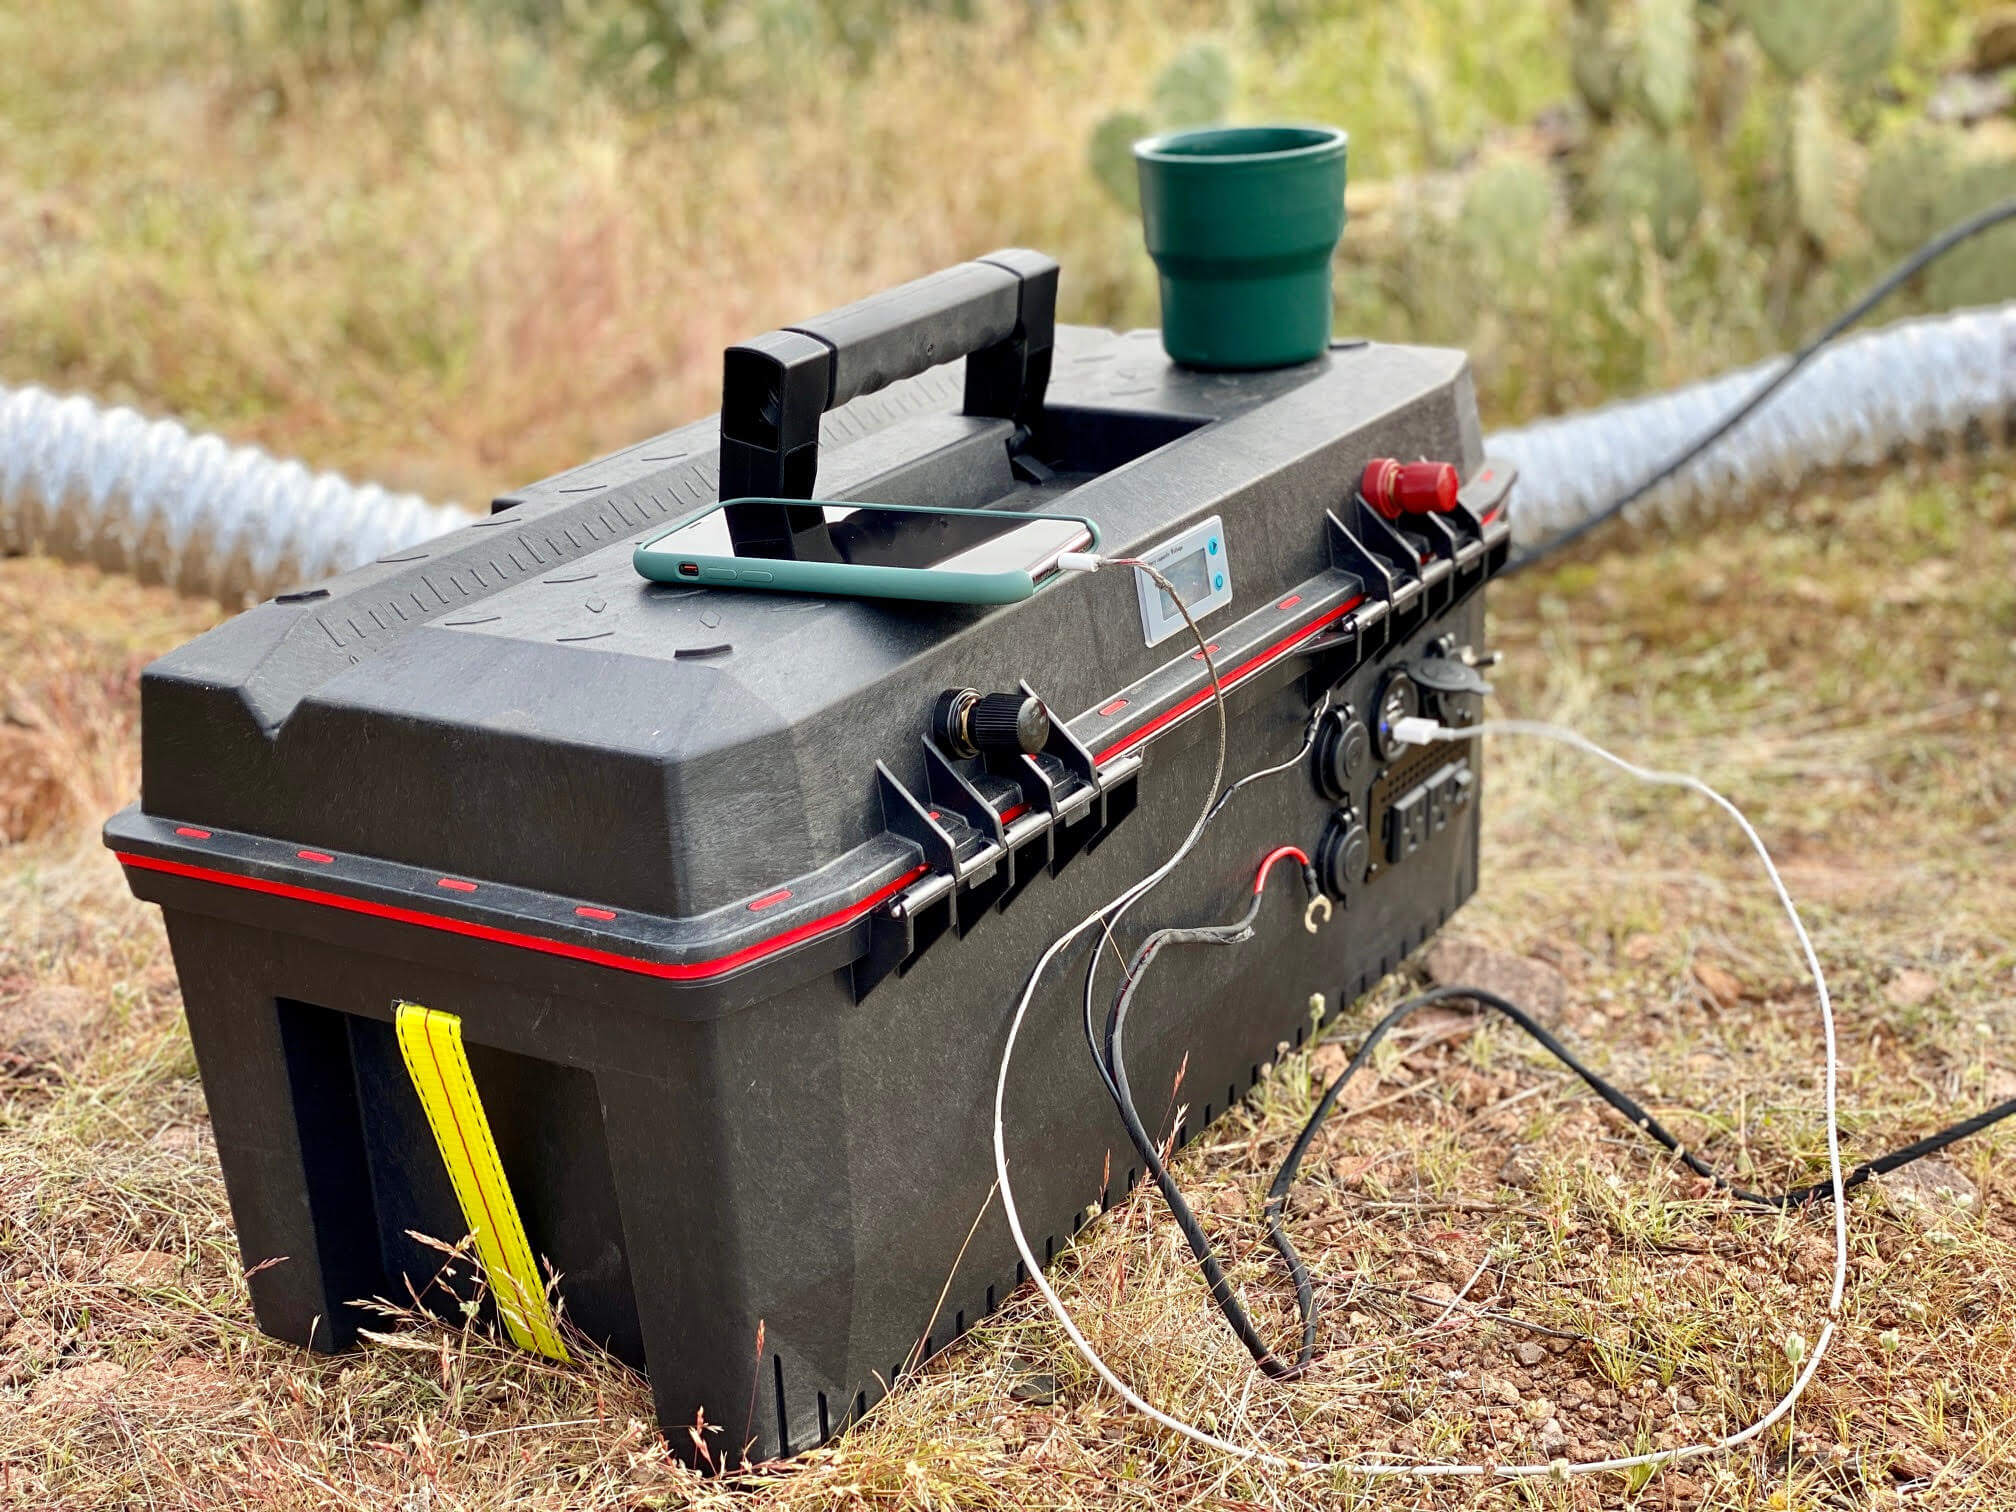
We have taken the battery pack with us on several camping trips already and it works great. You can use it for charging phones, laptops, drones, running a heater or heated blanket etc. And this battery pack is all for a reasonable price (just be ready for it to be a bit heavier than the commercial units).
Shopping List
| 100Ah Deep Cycle Battery | $ 179.99 |
| Battery Terminals | $ 15.97 |
| Battery Meter | $ 16.69 |
| AC Inverter | $ 34.99 |
| USB Plugs (2x @$13.99) | $ 27.98 |
| Tool Box | $ 29.98 |
| Toggle Switch | $ 4.21 |
| AGM Battery Charger | $ 36.99 |
| 1 In. X 12 Ft. Lashing Straps 2 Pk | $ 3.99 |
| TOTAL | $ 350.79 |
We’ll definitely be adding this to our list of camping essentials!

June 10, 2020 at 2:26 pm
Hello, great build! I found this and your site by searching for “100ah inverter diy box”, as I’m hoping to build something similar for camping trips. Your writeup, pictures and links are really helpful to others wanting to try this. Just yesterday I was in Lowe’s trying to compare sturdiness of the Crafstman boxes — do the handle & latches appear to be handling the weight of the battery well? How about heat buildup (e.g., when the inverter is running a full load, or when charging,) — any need to open the lid or perhaps add a fan? Out of the many who’ve built these boxes, you’re probably one of the few who could also run CFD on it!
June 25, 2020 at 3:43 am
Hi! Thanks for the kind words! The top handle works but has detached several times so the side handles are what we use to move it around, since they don’t detach. Heat has not been an issue because the inverter has its own fan that we cut an opening for in the box. Good luck on your build!
July 20, 2020 at 2:13 am
This is great. Can you tell me if it’s okay for batteries to lay on their side? Also how long does the battery last generally? I realize it may depend on how much juice is being used based on what is plugged in but for your use what do you normally get? Thanks for sharing!
July 24, 2020 at 3:37 am
Thanks Norm, glad you found it helpful. The battery that we have in our list is an AGM battery, which the specifications say can be mounted on its side (a standard Lead Acid car battery can NOT be mounted on its side as it will start to leak). We primarily use it for powering our diesel heater for colder nights out camping, as well as charging phones in the morning etc. So far, I would say we get 3 days of use out of it easy, and would probably be able to stretch it to a 4th. when fully discharged, it does take a while to charge back up though so start charging it at least a day before your trip.
August 6, 2020 at 3:36 am
Wonderful. Thanks a million!
September 8, 2020 at 2:46 am
Thanks for posting this, looks super helpful! Wondering if it might be advisable to add a 20A in-line fuse, and also wondering how much you can depelte the battery without damaging it (I’ve read elsewhere that you should try to keep it at >50% charge). My application will be to recharge a few 36 volt 14Ah batteries and I’m guessing the battery could get below 50%. Any insight you can share would be great…and this is a great site!
September 15, 2020 at 9:11 pm
Hi Court, Thanks for your comment! Yeah, you can certainly ad the 20A in-line. It would definitely be a safety feature. On the AGM batteries, it is advised to keep it above 20% charge, but if they go below they are much more resilient than the lithium batteries. You can likely charge one at a time safely, a second 36v 14Ah would likely deplete this 12v 100 Ah battery pack. Let us know if you have any other questions!
September 23, 2020 at 11:12 pm
Thanks so much for the response! I’ve built my box, following your instructions to the letter, and it works great. I really appreciate you taking the time to post, and to answer questions. Thank you!
September 24, 2020 at 5:53 pm
Awesome, yay! Thanks so much for sharing and glad you found it all helpful!
January 1, 2021 at 9:31 pm
Hi. I am a little confused at the specs on this. I am not an electrician nor an engineer so bear with me. The article cites building a power station comparable to the yeti 1400 but the build uses a 100 ah battery? Please clarify. Thanks
January 4, 2021 at 5:14 pm
Joe, no worries, hopefully this clears things up. The Yeti 1400, is a 1400Wh system. This is a 1300Wh system, meaning that we are running a 100Ah battery at 13V (13V is 100% on this battery and then it goes down to 12 at 25%, and you don’t want discharge it below that), so then using the P=V*I, 13V * 100A*h = 1300W *h. there are just different ways of expressing the performance of these, saying that it has a 12V 100Ah battery is perfectly fair as well, but everyone seems to try to go for the “bigger” looking numbers so we used that to make comparisons easy for folks.
February 20, 2021 at 8:47 am
This is great, I am looking for power stations for my camper van, and those commercial ones are so expensive. I have 0 experience with electronics though so I will keep this guide as a baseline and look at other tutorials for the specific wiring etc. Just a few questions of the cuff:
1. Does this work with LiFePo batteries? Drawbacks?
2. Will the battery not overheat? Does it make sense to add a small 12v fan in the side?
3. How do you actually charge it? can you charge it normally in the house with a plug? What is needed to add solar charging capabilities?
Thanks in advance so much for any answer!
March 4, 2021 at 8:34 am
Hi Robin, hopefully I can provide some responses that help:
1. Does this work with LiFePo batteries? Drawbacks?
-This would work with the lithium batteries as well, the LiFePo4 batteries are a lot lighter, and as a result more expensive. You will also want to have a lithium specific charger to get the most out of them (charging response in #3 as well)
2. Will the battery not overheat? Does it make sense to add a small 12v fan in the side?
-These are high capacity low current batteries, for the low current stuff we use them for it has been fine, in general they shouldn’t heat up that much, most of the heating will probably be during charging. I would put vent openings in over a fan, as a fan will drain the batteries unnecessarily, the monitor we have has a temp gauge for the battery, so just keep an eye on it if you are concerned.
3. How do you actually charge it? can you charge it normally in the house with a plug? What is needed to add solar charging capabilities?
-Right now, we just use the harbor freight AGM battery tender to charge it by plugging it into the outlet at home. You can also charge them through a solar panel (the panel needs to have a 12v charge controller with it), or you could charge from the car battery, but that is not ideal unless you have the proper separation switches etc, as it could lead to a dead car battery and you stranded.
May 10, 2021 at 12:32 pm
This is amazing. I’ve been trying to figure out a way to build a portable power source for my travel trailer and this lays it all out so clearly. I just need to confirm that everything I’m running (which amounts to a string of lights and maybe an electric blanket) are under 12V correct?
May 10, 2021 at 8:51 pm
Sort of. In this build, the battery is a deep cycle, with a 30 Amp max current if I recall correctly. you need to make sure that the current draw is less than 30A total. Electronics usually have a max current rating somewhere near the plug or on the inverter to tell you the voltage and the current draw. A quick Amazon search for 12V electric blankets shows that they run roughly 3.5A, but check what yours is. this is a 1300Wh unit, so at 12-13V it is a 100AmpHour battery so you could run close to 28hrs of electric blanket use on one charge which should be plenty for 4ish nights. Feel free to email us if you have any other questions during the build. (PS the inverter works great, but when possible I recommend buying things that can run off of the 12V plug or the 5V USB outlets just so that there is less energy loss, the inverters are just not as efficient, but it will get you by if you need)
October 21, 2021 at 8:52 am
This is great. I have been looking for examples of DIY power banks for my astrophotography rig. One would think that should be easy to find but not so much in reality. I just need a 12V cigarette-style plug, a couple of standard-issue male 5.1mm jacks for things like cameras and whatnot, and a bunch of USB 2.0 slots. Hopefully, I can sort of copy your design for mine…. but one question I have is how do you determine the polarity of your output power. I’d hate to run the risk of damaging my equipment because of the wrong polarity input.
December 9, 2021 at 12:30 pm
well, the battery is clearly marked, so just pay attention to that.
October 31, 2021 at 10:12 pm
What gauge wires did you use for connecting the battery to the drilled battery terminals?
December 9, 2021 at 12:32 pm
For this build, I honestly just used an old set of jumper cables that I had laying around. But if you are buying fresh wire, id probably go with something like 4AWG.
November 30, 2021 at 8:01 pm
Hello ,
Very clever design love it .
We just purchased rooftop type of tent and looking for power station just like it.
I have question , regarding using solar panel and be able to charge the battery during the daylight hrs.
You can get now days many flexible stick on type solar panels to mount it on the roof tent top and having second option generating electricity from panel and store in the battery would be awesome.
If there is way to do , what additional electronic beside solar panel one would need ?
Les
December 9, 2021 at 12:08 pm
Depending on the specific panel, some of them have charge controllers built into the electronics, others are just a direct output and need to have a standalone charge controller for the battery. Awesome to hear on the new tent! good luck and keep us posted!
December 21, 2021 at 12:56 am
Hi.
I thought we cannot store the battery in that position? I was advised by the seller last time always to keep the battery up right. the terminal should always be in the top position. any issue with your setup? can you clarify?
Am planning to do this also. Gathering as much info I possible before doing the project.
Thank you in advance.
January 3, 2022 at 12:49 pm
Hi Moses, regular lead acid car batteries need to be stored upright because they have vent ports that the fluid will leak out of if turned on the side. We used a sealed AGM battery which uses a gel rather than a liquid and can be oriented however necessary. Have had our setup for over a year and has been working out great. hope this helps.
January 17, 2022 at 9:26 pm
Dear Valentin
Thanks mate. This setup can save the battery quantity.
February 11, 2022 at 5:58 am
Hi, You stated the cheaper battery was heaver. You did not state which battery was the cheaper one, GEL or AGM. Also you did not advise if it was a significant weight saving.
March 4, 2022 at 8:36 am
AGM and gel are one and the same. they weigh the same as a standard car battery (heavy). The lightweight ones are the Lithium batteries, and they can be 1/4 of the weight, but 4X as expensive.
February 11, 2022 at 10:43 pm
Awesome build and write up!! It was the perfect guide to make my own.
Just out of curiosity have you powered any other devices with this like a fridge?
March 4, 2022 at 8:34 am
Haven’t done a fridge, but have used it for laptops, camera charging, drone charging etc. Glad you found it helpful!
June 12, 2022 at 7:18 pm
Hi Valentin, Thanks for providing all of this information, and they are totally awesome. I was about to purchase a commercial battery pack, but I found this posting. So, I am going to build my own following your ways. As I am not good at all the wiring, could you please provide me the wiring details to follow? It would be really helpful if I could have it before ordering the parts. Thank you! 🙂
July 15, 2022 at 1:14 pm
I have a deep cycle marine/rv battery 12v, would this be okay to use on this project? Looking to power accessory lighting, fan and charge phones for my camper shell.
August 3, 2022 at 2:05 pm
This is fantastic guide. Thanks for all the time and effort. What do you think of connecting two batteries in series (effectively making it 2600 Wh). Would the voltage chart report back correctly? (Anything worth doing, is worth overdoing, right?)
September 5, 2022 at 5:07 am
Very nice write-up !!
I would definitely like to build one of these for use in an aircraft, but I first have a couple of questions…
– The Amazon description for this battery states that it’s a “Deep Cycle Battery 12V 100 Amp Hour Sealed Lead Acid Rechargeable” I’m confused, for it seems to counter dict your notes. So… it appears as though it is a lead acid battery… should it really be put on it’s side? Thoughts ?
– Also, I don’t quite understand how does it provide 5 volts ( versus 12v) for USB plugs ?
January 5, 2023 at 8:56 am
An AGM (absorbed glass mat) battery contains a special glass mat separator that wicks the electrolyte solution between the battery plates. This material’s design enables the fiberglass to be saturated with electrolyte – and to store the electrolyte in a “dry” or suspended state rather than in free liquid form. so it is similar chemistry to a Lead Acid battery, (which is why the description states that) but since it isnt’ flooded it can be sealed and placed on any side. Standard lead acid batteries have vent holes on top, this does not.
The 12V is converted to5V inside the USB charger plugs.
October 10, 2022 at 12:14 am
Thanks. If I just needed the usb and was very lazy so as not to want to figure all this out (haha), could I just buy the battery and an inverter with usb outlets? Of course I would not have the extra outputs. I think that’s right.
But another questions is I’d like to run a fish finder off mine. Could I just leave the fish finder permanently connected to the battery while of course the inverter is connected as well?
January 5, 2023 at 8:46 am
those are all things you could do… just make sure to keep the battery charged up. the point of the build is to show that all the expensive boxes are just batteries with various ports, some have fancy displays, but at the end of the day, its a battery.